General
How do I start Stellar?
Download your device.
Run your device. Windows or MacOS
Log in into Stellar using you account details…
How do I find my files?
The File Locations section in the Files Tutorial will explain all you need to know.
How do I make Stellar fit my screen?
In the top right corner of the Stellar UI there is a ![]() which will open the UI Resizing menu.
which will open the UI Resizing menu.
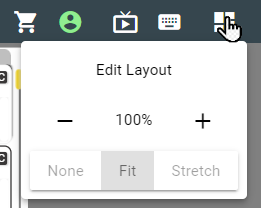
For a more detailed explanation of the Stellar Layouts, please visit this section.
Glossary
Nebula Glossary - For Nebula related terms.
Stellar Glossary - For Stellar related terms.
Projects and Files
Create Project from Media.
Please see the Create Project from Video section in the Creating a Project thread.
Open an Existing Stellar Project
Please see the Importing a Project section.
Add a existing text file (AD,Dubb, Sub file) to project.
You already have an AD or Subtitle file and you want to add it to the current Project
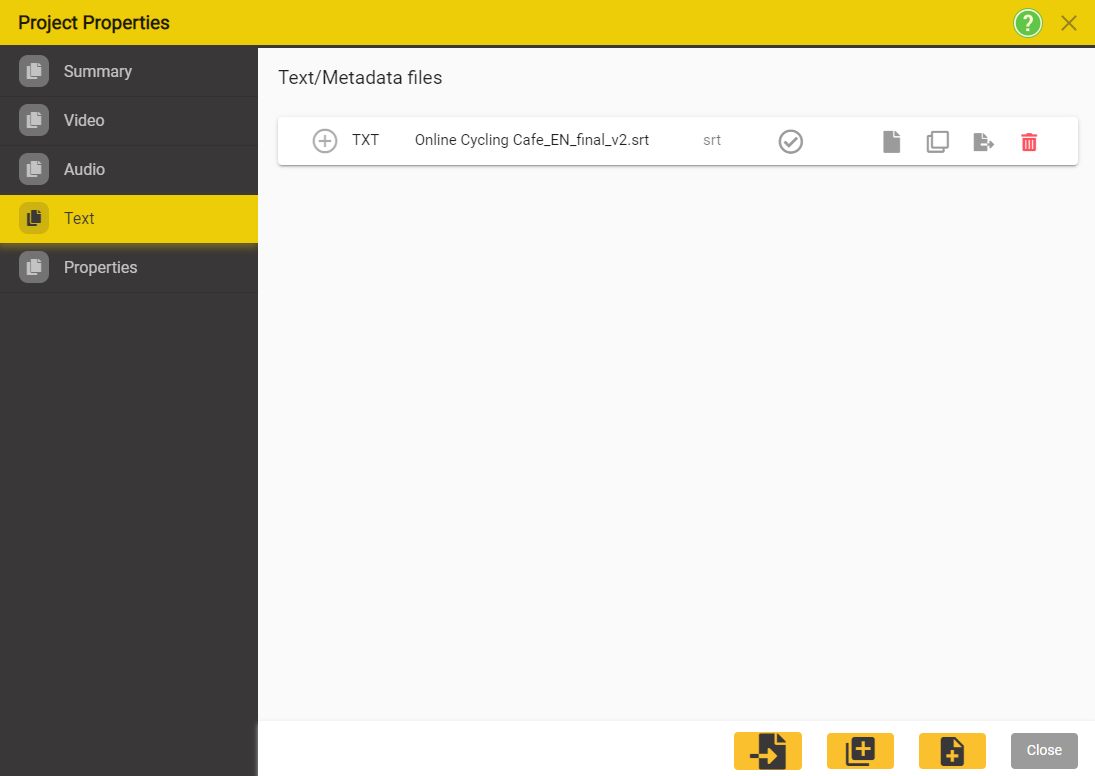
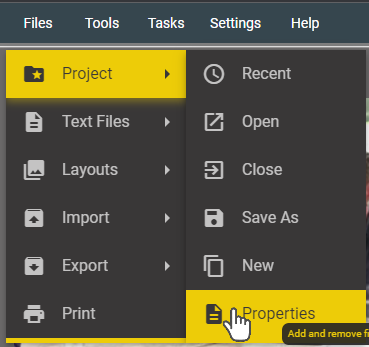
Files → Project → Properties
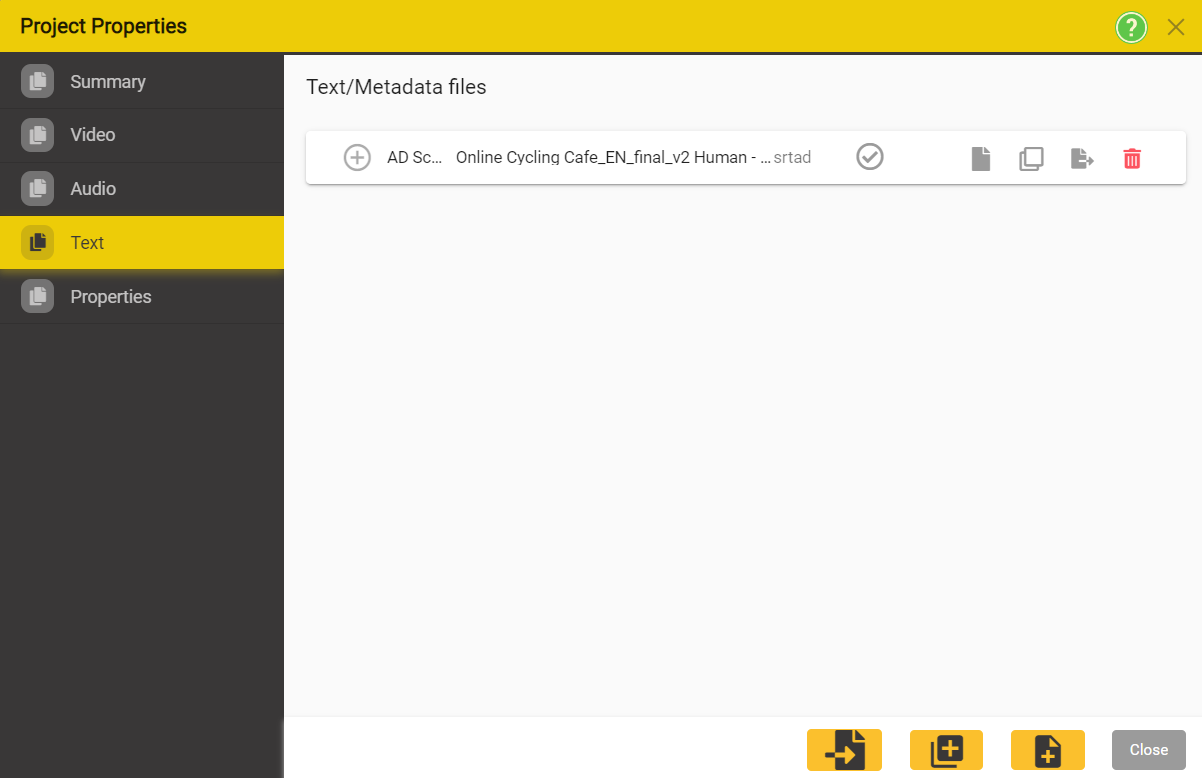
Click on the Add Existing File ![]() button at the bottom of the screen.
button at the bottom of the screen.
This will open up a browser screen to show you the files and folders contained in the ~/Documents/Stellar/Files folder. This is the default location for all your subtitle and AD Files. You MUST put all your work in this folder or in a subfolder of it.
For AD Script Files

-
You can filter the files shown to only show AD Script file types ESF and SRTAD by using the Filter Displayed by control:
-
Make sure you select either an ESF or SRT AD file type as these are the only ones that support AD audio clips.
- It’s important to know what you need to deliver.
- ESF files are the industry standard and if you are delivering either a script only or a script plus wav files for use in other systems then you will probably be asked for ESF.
- IMPORTANT: ESF files do not support multiple Takes and have restrictions on the fade times and the lengths of audio Takes.
- Stellar allows you to use multiple Takes when working with an ESF file but active audios will be saved as a single mixed audio in the ESF file each time you make a change.
- Once you close Stellar all muted Takes and multiple active Takes will be lost when working with an ESF file.
- IMPORTANT: ESF files do not support multiple Takes and have restrictions on the fade times and the lengths of audio Takes.
- SRTAD files are more comprehensive and easy to use file format, they can support multiple takes for each text element and also settings for synthetic voices.
- If you are delivering a finished audio track or mix or are doing all your work within the Stellar and Nebula tools, then SRTAD is a better choice.
- ESF files are the industry standard and if you are delivering either a script only or a script plus wav files for use in other systems then you will probably be asked for ESF.
- It’s important to know what you need to deliver.
-
Once you have selected the file to add, click OK
-
Then click Save to add the new file to the Project and close the Project Properties screen
For Subtitle Files

- You can filter the files shown to only show only subtitle file types by using the Filter Displayed by control
- Once you have selected the file to add, click OK
- Then click Save to add the new file to the Project and close the Project Properties screen
For Dubbing Scripts
![]()
- You can filter the files shown to only show only dubbing file types by using the Filter Displayed by control
- Once you have selected the file to add, click OK
- Then click Save to add the new file to the Project and close the Project Properties screen
More information about importing files into Stellar.
Create a new text file (AD,Dubb, Sub file) and add it to the project.
See Adding New Files in the Adding Existing Files thread.
How to work with just an AD, Dubbing or Subtitle file, without a media (video) file
Sometimes you will need to work on an AD, Dubbing or Subtitle file when you don’t have the video media. Because Stellar always works on Projects you need to create a blank Project and add the AD or subtitle file to it.
Did you know, you can record and review AD audio without the video media? Just use a blank Project as described here.
File → Project → New
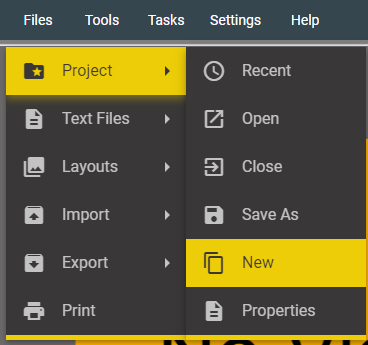
This will allow you to create a New Project.
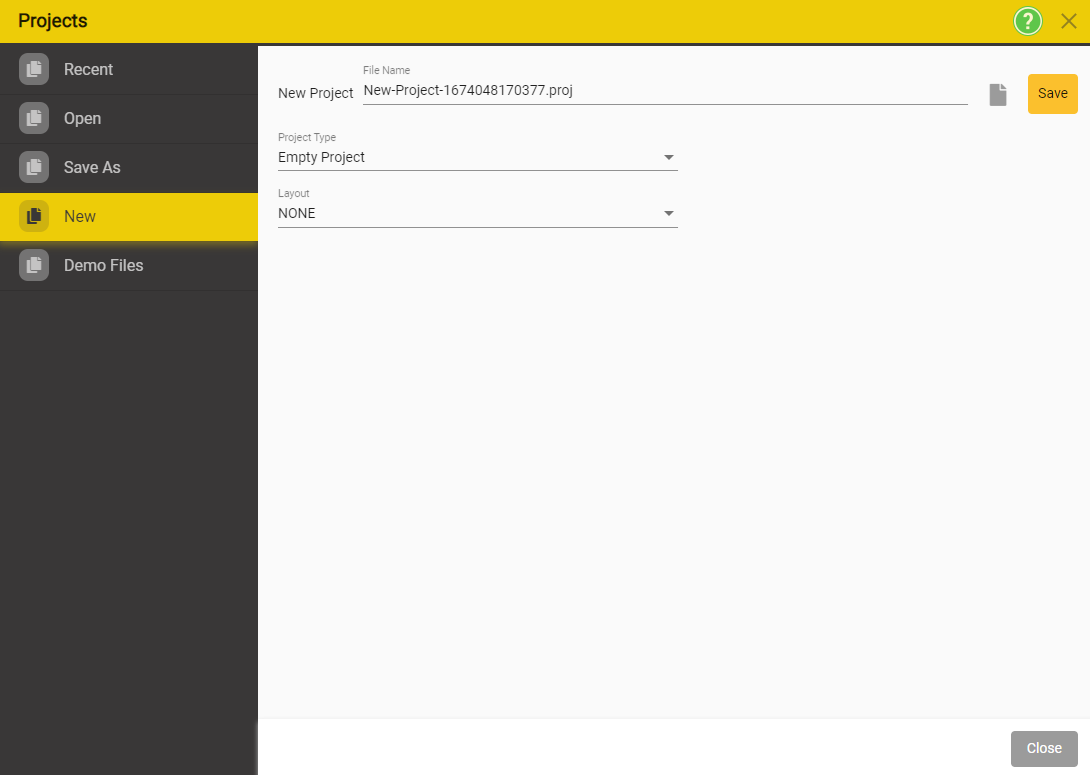
Enter a Project name and Press Save
Leave Project Type as Empty Project
Optionally select a Layout for this Project.
You can use the Browse button to set a new subfolder location if you want to set different subfolders for different groups of Projects.
Click Save
You now have a blank Project. Follow the instructions in How to add an existing file to the current Project.
Note: To change the offsets for the file Files → Project → Properties
How do I convert a subtitle file format (STR, STL etc.) into an AD script file format?
You may have been sent an AD script in a subtitle file format (SRT, STL etc.) but need to make an AD recording.
These subtitle formats do not support the association of audio WAV files so can’t be used directly to record AD.
In Stellar you can convert most subtitle file formats to one of the AD formats (SRTAD or ESF).
You can do this in one of two ways:
- Import and convert the subtitle file into the Project
- This will give you a Project with just the new AD file
- Add the subtitle file to the Project then Duplicate and convert it
- This will give you a Project with both the original subtitle file and the new AD file in the Project
Option 1 – Import
- Open or create a New Project
Files → Import → Text File
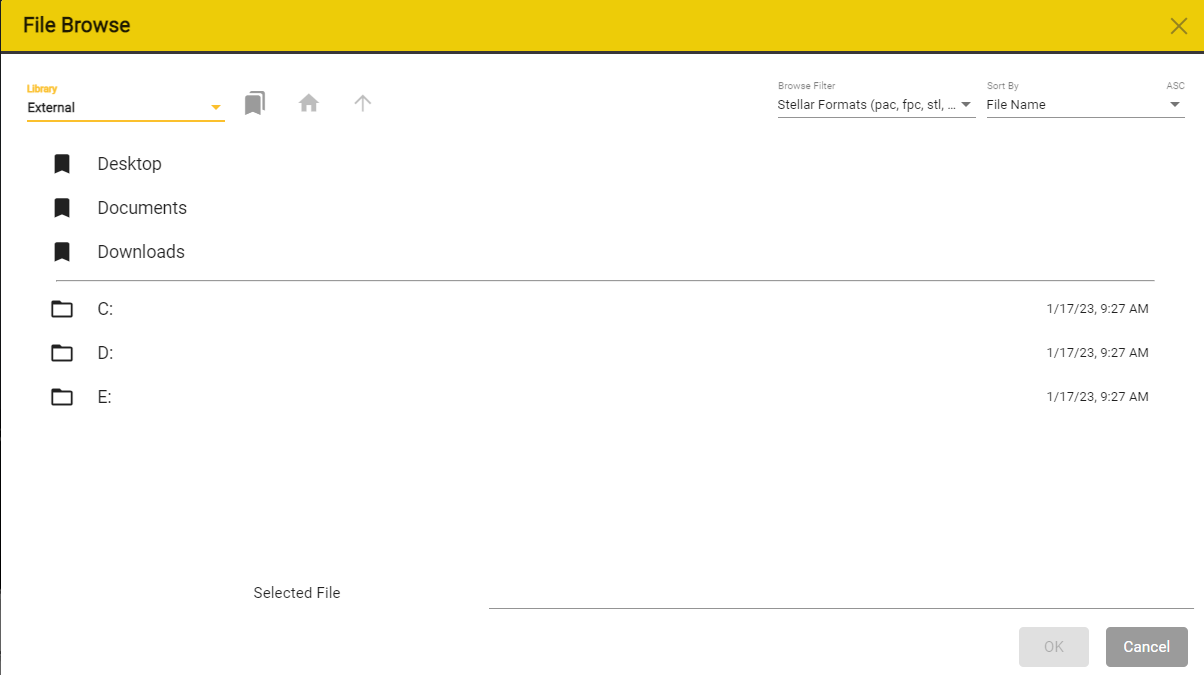
The Subtitle file must be located on you PC or Mac in a folder accessible to the External Files setting in Stellar – See Here
Navigate to your file, select it then press ok.
Press details button corresponding to your text file.

This will open the Details section and will allow you to edit offsets.
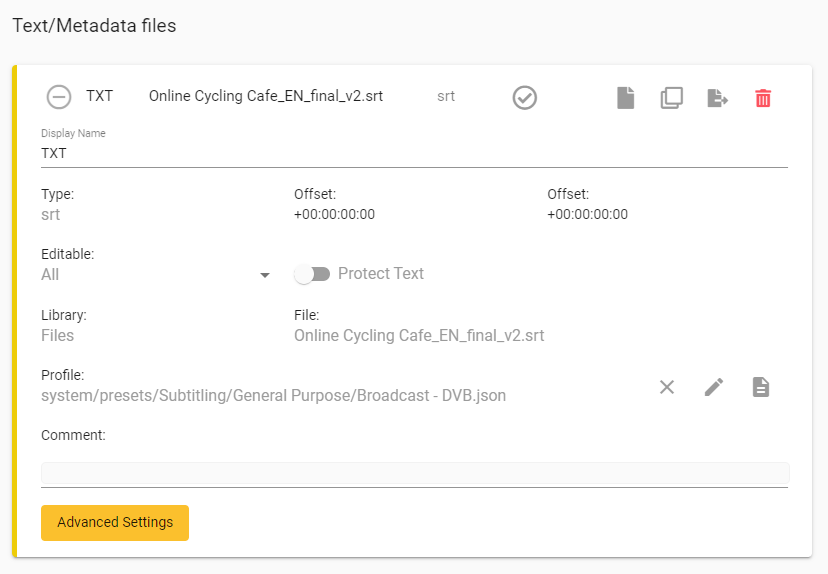
Edit the offsets according to your needs, then press Save.
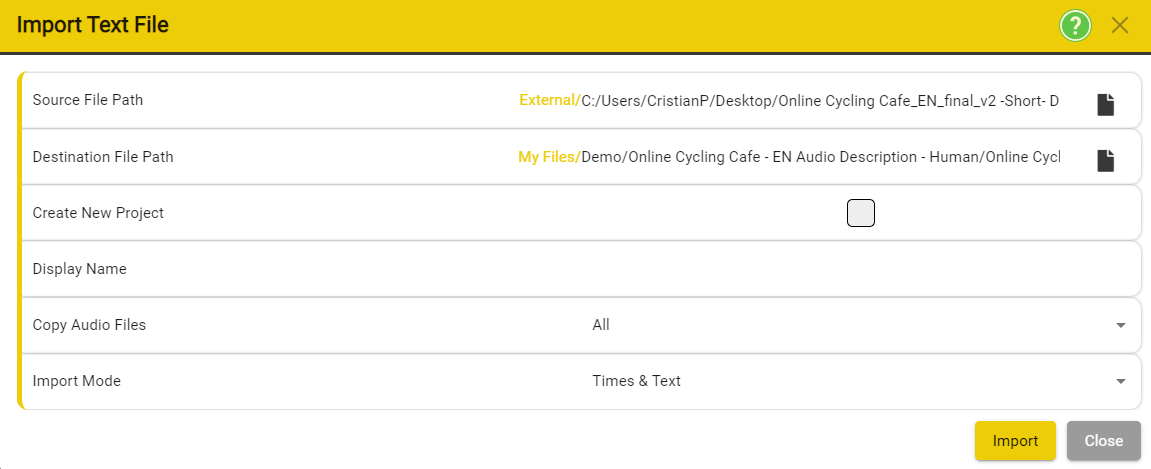
Click on the Browse button on the right side of the Destination File Path row ![]()
This will open another File Browse window which will allow you to change the file format.
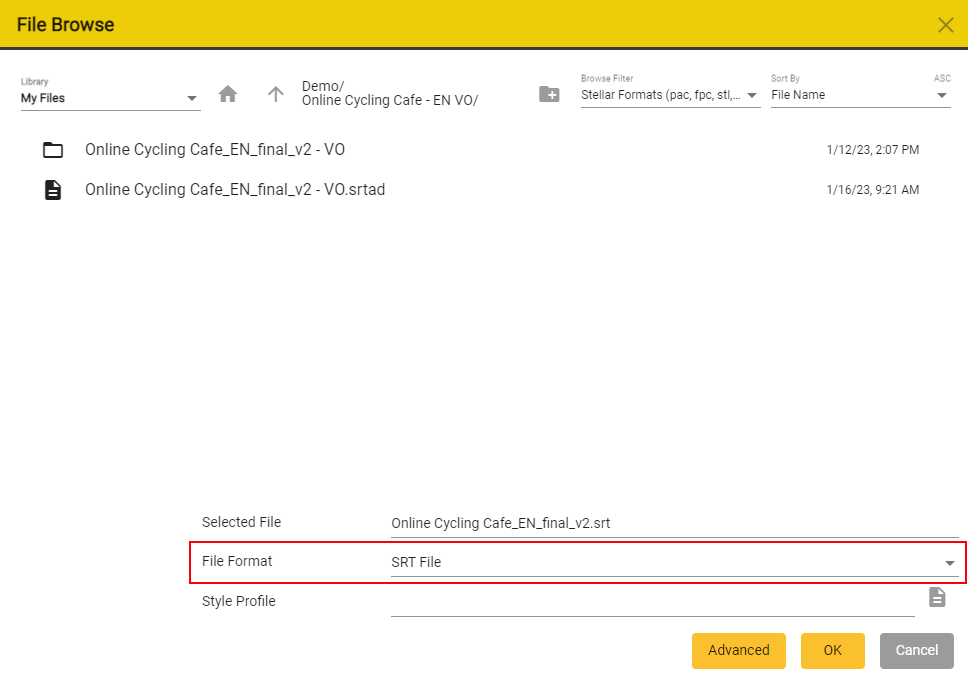
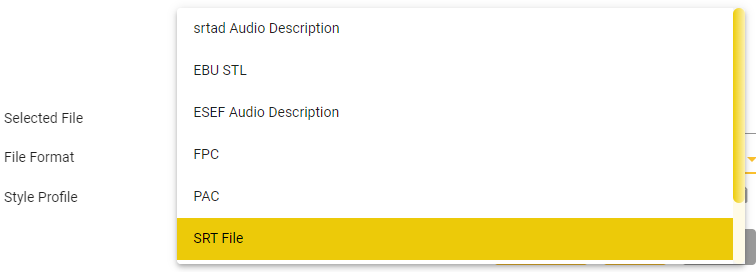
Set the file format to srtad or ESEF
You can Create a New Project, or just import the file. More about importing assets here.
If needed you can also pick a Style Profile for this converted file. Read more about Style Profiles.
After choosing the appropriate settings, you can press OK to go back to the Import Text File Window.
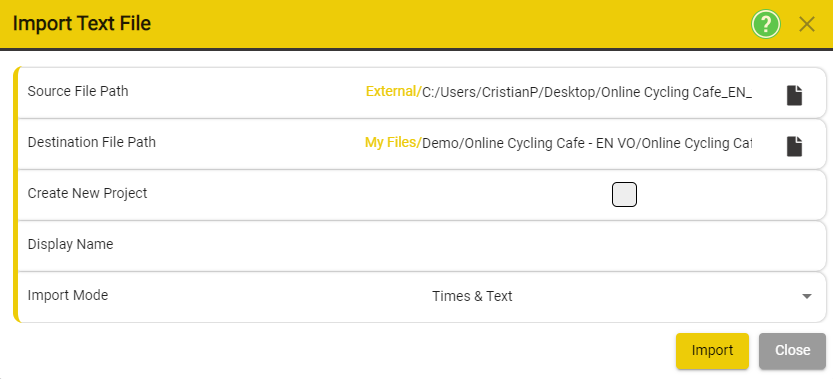
You can add a Display Name for the newly created file.
You can now press import to convert your file.
Option 2 – Duplicate
- Add the Subtitle file to the Project
- In the Files, Project, Properties screen select the Text Tab (you will already be on this tab if you’ve just added the subtitle file).

Click on the Duplicate button ![]() corresponding to the file that you want to convert. This will open the Duplicate Text File.
corresponding to the file that you want to convert. This will open the Duplicate Text File.

Click on the Browse File Icon ![]()
This will open a File Browse Window - with the file to be converted already selected.
Set the file format to srtad or ESEF
Press OK to go back to the Duplicate Text File Window.
Change the Display Name - if needed.
Press Duplicate to Convert the File.
Once the conversion process has ended, you will see a prompt that will tell you that the file converstion was successful.
Press OK → The Converted file will be added to the project. You will see it in the Timed Text Editor.
How do I protect my files from accidental edits?
- There are many instances where you may want to protect a subtitle or script file from accidental changes:
- You have an original language Template from which to translate
- You Want to translate into a new language file without changing any timecodes by accident
- You are recording an AD script and want to protect the text and times from accidental changes
- You want to pass a file to a client to add comments, but want to prevent them making changes to the text and times.
- You may also want to make text changes occasionally, but protect against accidental changes the rest of the time
Stellar supports a system of configurable Editability and an addition Protect Text mode.
Files → Project → Properties → Text Tab → Select the Text File you want to protect
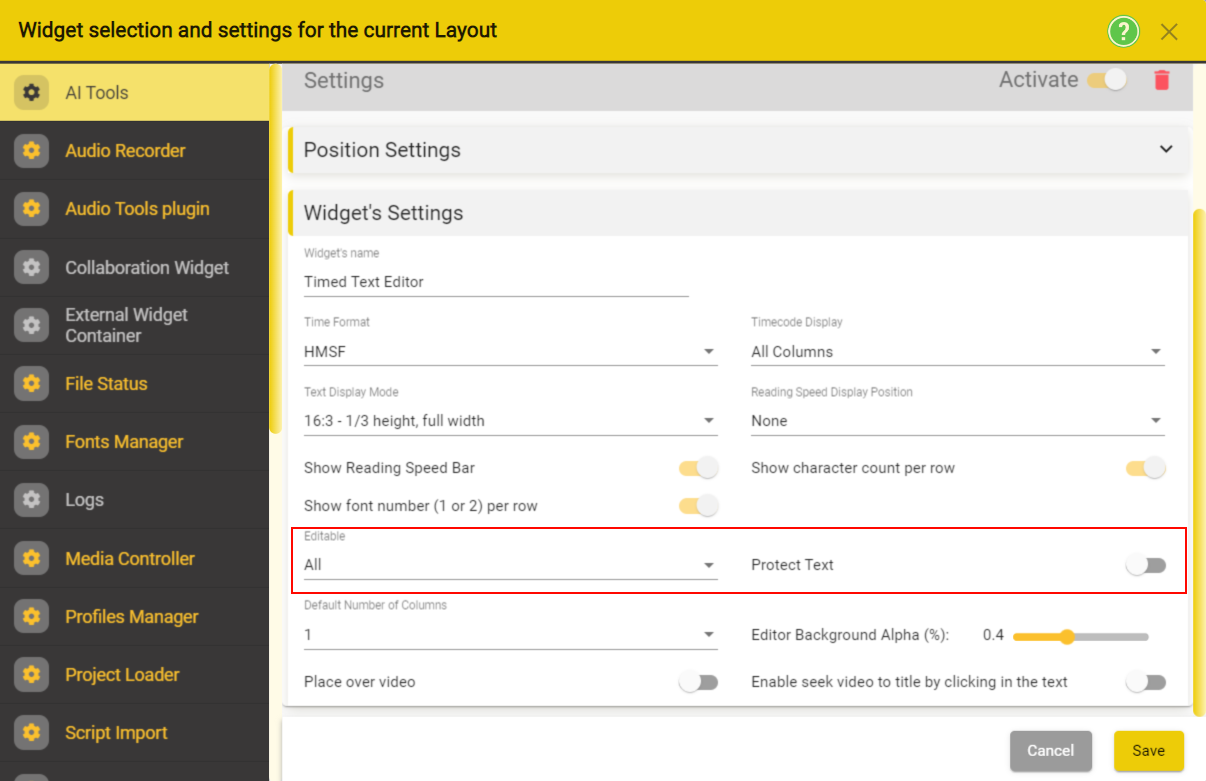
Select one of the Editable modes to give the level of protection you need:

Alternatively, you can protect only the text from accidental edits by enabling the Protect Text mode.
Timecodes
How to get the timecode in Stellar to match the video timecode.
-
Making sure the timecodes are correct can be complex and confusing.
-
The first step is to make sure you know what output type and timecode you need.
-
Stellar will try and make sure that the video timecode and frame rate (FPS) is recognised and the selected automatically.
-
Stellar will also try and find any Slate or pre-roll section in the file if it can.
-
Stellar will then set the Video Offsets accordingly.
-
By default the video start timecode will be either:
-
Zero 00:00:00:00
OR
-
The timecode found in the video file, with the possibility of a Slate or pre-roll section being recognised and taken into account.
-
Unless you’ve been told otherwise you should work with the timecode of the video file.
-
If you know Stellar is not showing the timecode you need you can set the start timecode yourself.
-
What timecode should I set?
-
You can either:
-
Assume the first frame of video should be a specific time, normally 00:00:00:00 or 10:00:00:00
OR
-
Use any burnt in timecode in the video picture to set the first frame.
-
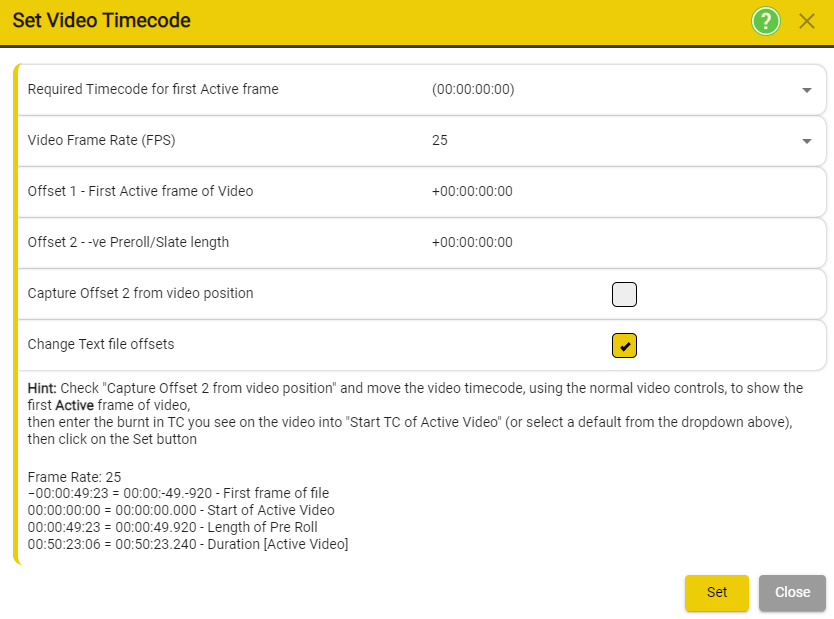
The main help section on setting the Video Timecode is here
Quick Method
-
Move the video show it displays the first active frame. This would normally be either the very first frame, or the first frame after any pre-roll, colour bars etc.
- If there is a burnt in timecode it will probably show 00:00:00:0 or 10:00:00:00 or possibly 01:00:00:00
- If there is a burnt in timecode it will probably show 00:00:00:0 or 10:00:00:00 or possibly 01:00:00:00
-
Right click in the video area and select Video Timecode
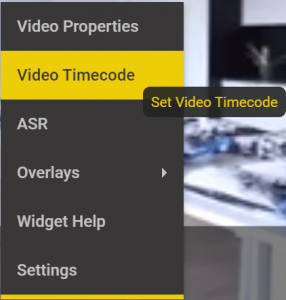
- Select the correct timecode for this frame
- Click Set
- Now the burnt in timecode should match the Stellar timecode

You can check the current settings for the video file by:
- Right click in the video window → Properties
or - Files → Project → Properties
- Select the Video Tab
- Click on the video file to see its properties
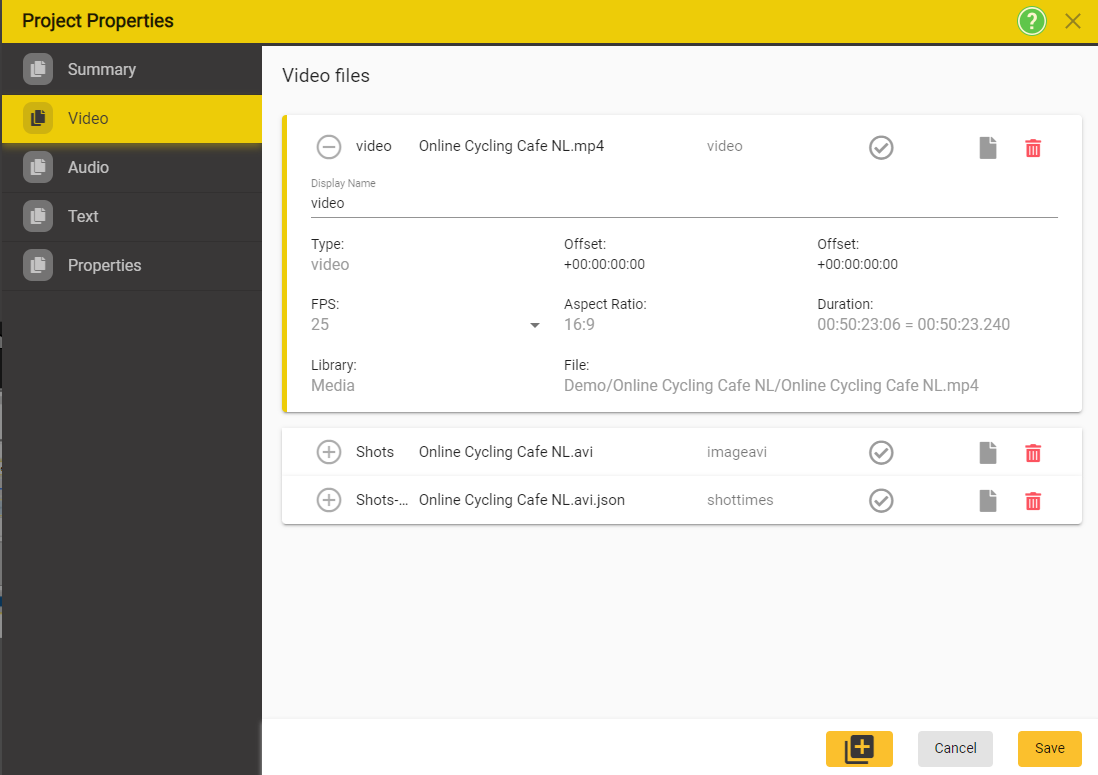
- The two important entries are FPS and Offset
- FPS
- This is the frame rate or Frames Per Second that Stellar has detected for this video file.
- You can change it, but don’t if you’re not sure!
- Offset
- This is the control you should change to get the displayed timecode to match the burnt-in timecode
- This sets a simple offset between the file start time and the displayed Timecode in Stellar
- Here it has been set to minus one to correct a one frame offset between the start of the file and the burnt-in timecode of the video.
- Offset 2 works in addition to the main offset and is used by Stellar when a Slate or Pre Roll is detected.
- FPS
- Click out of the offset value, if you’ve changed it,
- Click Save.
Other Common Timecode Problems
- The timecode is right at the begin of the video but drifts out as the media plays.
- This will be because the FPS (frame rate) set is wrong.
- Find out what the frame rate of the video is.
- Set the FPS value as shown above to the correct setting.
- Check again.
- The video starts at 00:00:00:00 but I’ve been told the subtitles need to start at 10:00:00:00
- This is the same problem as making sure the video time has the correct start time but you need to set the Video timecode offset to +10:00:00:00.
- Now any timecodes captured will have the correct timecode.
How to - Get timecodes in my Subtitle File to match the video timecode - Recutting
Making sure the timecodes are correct can be complex and confusing.
The first step is to make sure you know what output type and timecode you need.
Stellar will try and make sure that the video timecode and frame rate (FPS) is recognised and the selected automatically.
However the subtitle (or other text file) you are working with may not match the timecode of the video. There are many reasons why this can happen, a common one is the slates or bumpers have been added or removed from the video since the subtitle file was created.
This type of problem creates a fixed offset between the video timecode and the times in the subtitle file.
Stellar allows you to change all the times in the subtitle file by a fixed amount, this is referred to as Recutting.
- Recutting is different from Offsetting
- Offset:
- A time offset is applied inside Stellar to make the timecodes displayed match up.
- No timecodes in the subtitle or AD files are changed
- Recut:
- Some or all timecodes in the subtitle or AD file is modified
- Offset:
How to recut your subtitle file:
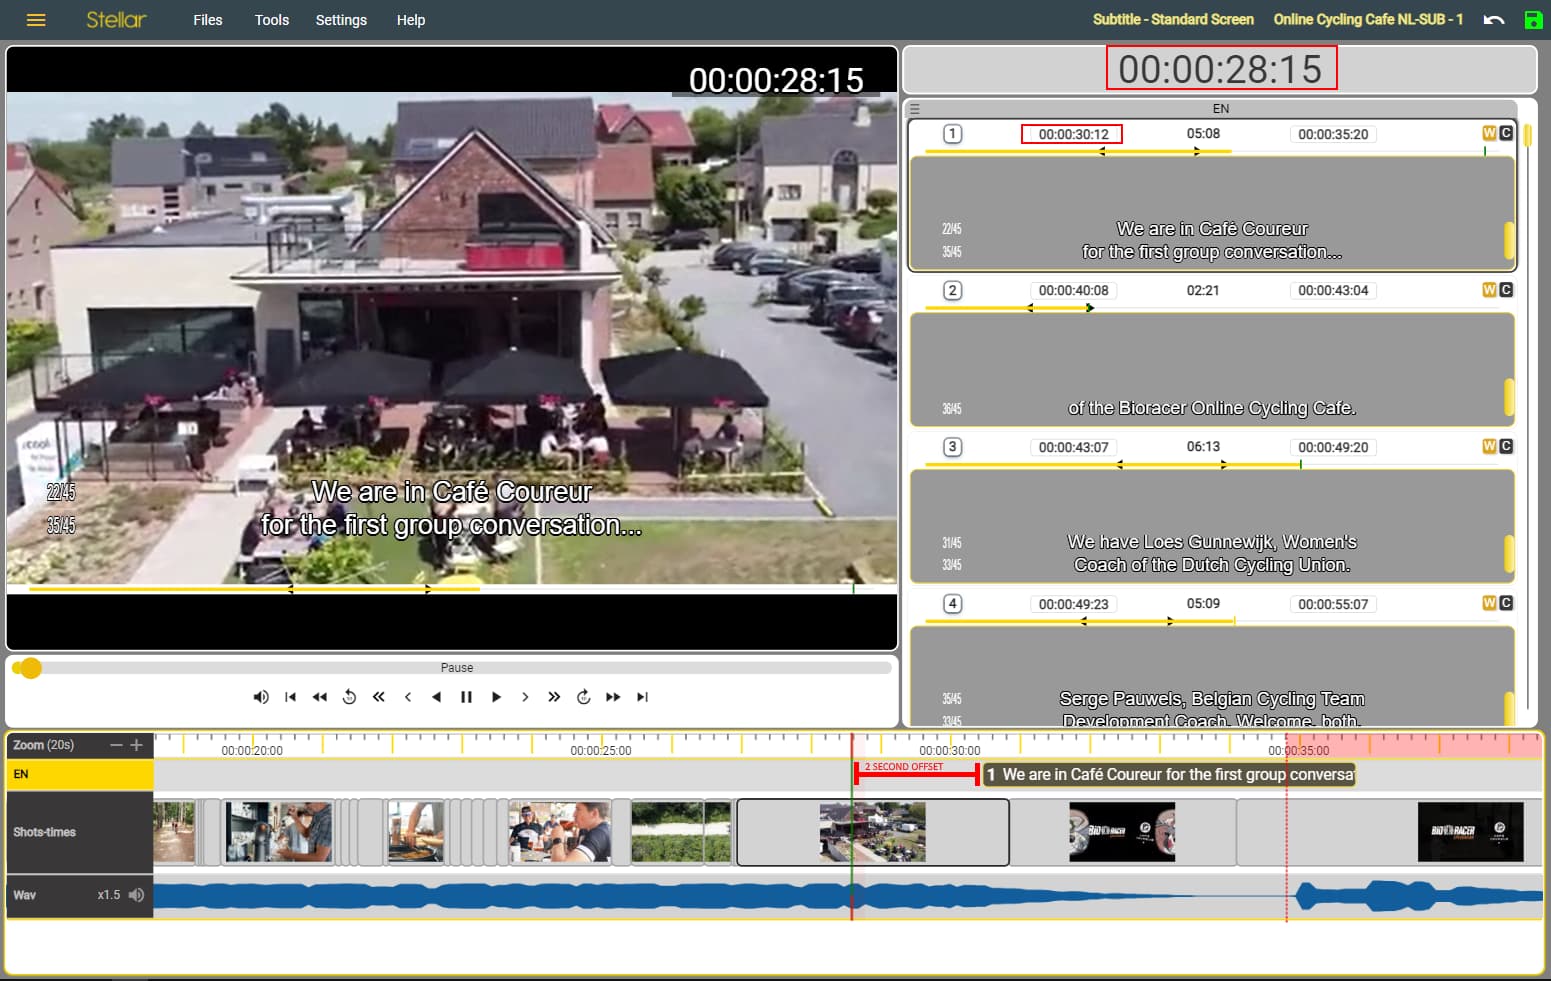
- Open or create a Project with the correct video and the subtitle file.
- Work out what the offset is, if you don’t already know.
- The simplest way to do this is find the first subtitle that contains dialog, ignore subtitle zero and any title translations for example.
- Jump the video to the start time of this subtitle (Double click on the subtitle number or do Ctrl+ Shift+J.
- Now shuttle the video to find the timecode where this dialog starts.
- The difference between the subtitle in cue and the current timecode is the offset you need. Remember this could be negative or positive.
- Now you can Recut the file
Tools → Timing Tools → Recut
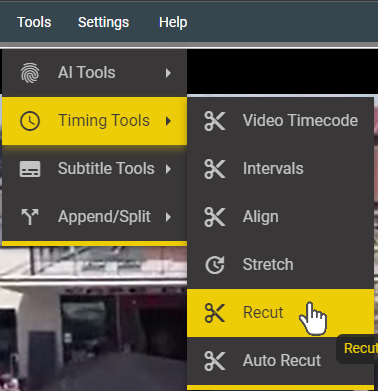
- OR Right Click anywhere in the Timeline display and select Recut
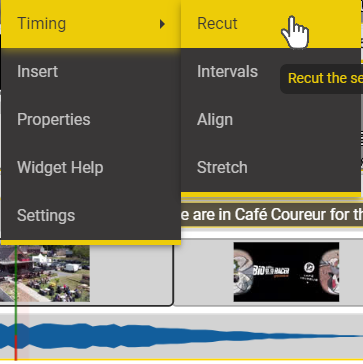
Any of the above actions will open the Recut In and Out Cues

- This will open the Recut dialog.
- Change the timecode either by entering a value, by using the arrow keys or with the mouse wheel.
- You can either recut the whole file or just subtitles after a specific time.
- To do this click on the ‘Recut only from current Title’ flag
- This will default to the current subtitle but you can change this here.
- Click Recut
You have now recut you subtitle file.
Navigating Through a Project
How to scroll through the subtitles (or script) file.
The subtitles (or script titles) are shown in a vertical column.
The second title from the top is the Current Title (unless you are at the beginning and then it’s the top title. You can only edit the Current title.
There are lots of ways to scroll through the list of titles:
- Page up and page down keys.
- Click in a title – any line except line 2 and this will become the current title.
- Move the mouse pointer over the text column and use the scroll wheel.
- Use the vertical slider on the right of the text column.
- Press Ctrl+ G and enter a subtitle number to jump directly to that title.
If you want the video to track the new title then try one of these:
- Hold down the Alt key (Opt on a Mac) and Page up or down.
- Hold down the Alt key (Opt on a Mac) and use the scroll wheel over the text column.
- Hold down the Alt key (Opt on a Mac) and click and left/right anywhere in the timeline area.
- Double click on the title number in the corner of the text box.
- Double click on a title block in the timeline.
- Scroll to a title and then press Alt+ J to jump the video to the in time of that title.
How to move though the video
There are lots of options for moving through the video, either by playing of jumping:
- Playing or stepping the video

-
Use the media control buttons to play or step
- You can play forwards or reverse
- Step backwards or forwards in three step sizes
- Play forwards or backwards at speeds between x0.25 to x1000
- Jump to the beginning or end
- Hover the mouse pointer over a control for a tip on what it does
![]()
-
Drag the video slider in the media controls
-
Use the hotkeys – See Here for a full list of Hotkeys
- Alt+ Arrow Keys – Left and right to play, up and down to step
- Alt+ Page up and down to step through titles with video
- Alt+ Home and End to jump to the start or end of Video
-
If there is no text cursor then the spacebar is a play pause control
- Shift spacebar is play in reverse
-
Click in the video window
- Shift + click in the video window for reverse play
-
Use the mouse scroll wheel – the mouse pointer can be anywhere except over the text column
- Shift + scroll for medium size steps
- Ctrl+ scroll for large steps
-
Click and drag left/right anywhere in the timeline area

-
Click in the master timecode display and use up and down arrows, the scroll wheel or type in a new timecode
- Hint: Alt+ S will take the focus to the seconds section of the master timecode display
-
Jump to a new point in the video
- Press Ctrl+ J and enter a timecode to jump directly to that time.

- Double click in the timecode track at the top of the timeline

- Click at a new point on the video slider
- Press Ctrl+ J and enter a timecode to jump directly to that time.
Text Editing - Scripts & Subtitles
How to add a new Title in a text file
Subtitle, AD description or dubbing Lines
Once you have added a new subtitle or script file to your Project you can start adding subtitles, descriptions or script text or Titles.
Each Title has an in and an out time referenced to the video media, so the first step is to move the video to where you want to insert the new Title. See How to move through the video.
- The video time set will be the In time of the new Title.
Once you have the correct point in the video use one of the Insert options:
Mouse actions:
-
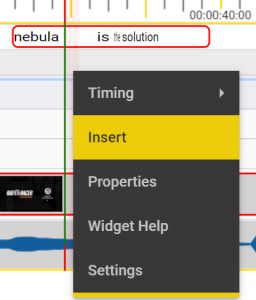
Right Click on the Text track on the timeline and select Insert
-
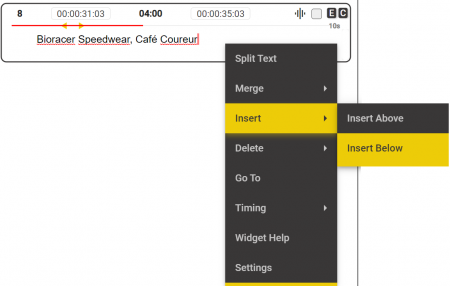
Right click in an existing text box and select Insert Below to insert After this box.
-
If the video time is before the title you clicked in then you can’t insert after it.
-
If the video time is over the title you clicked in the new title will be inserted immediately after it, if there is space.
- If there is no space after the title you clicked in you will see a warning message.
-
Hot Keys
- PC
- Alt+ Enter
- Ctrl+ Enter
- Ctrl+ Insert
- Numeric pad Enter
- Mac
- Opt+ Enter
- Ctrl+ Enter
- Ctrl+ Insert
- Numeric pad Enter
- PC
All of these methods will add a new blank Title of the default length (duration) on the timeline:

- To add text
- If the new box was created while the focus was on the text window (yellow outline) then there will already be a cursor in the box, just start typing.
- If the new box was created while the focus was on the timeline do either:
- Press Tab
- Click in the new box
How to change the times of a Title
(subtitle or description)
Once you have added a Title and added text in to it you may want to edit the times.
You can:
-
Adjust the in and out (start and end) times by
*** In the Text Editor using the mouse or Hot Keys.**
-
In the text box either click on the times for that Title or press Tab to cycle between the text, the in time and the out time…
- Hint: Use the TAB key to move between the text and the in and out times.
-
Once in the time window you can use the arrow keys to increase or decrease the time or to move left and right between the sections.
- You can’t enter an invalid time – EG overlapping a neighbouring title or breaking the minimum gap setting.
-
Or use the mouse wheel to change the times

On the Timeline using the mouse.
- Use Shift Drag on the ends of the text box to change the in and out times

- Hint: Hold down the Shift key and move the mouse – the pointer will change when you can start Drag so Click and drag at this point.
Using Hot Keys
- Adjust the video so to the point where you want to change the In or out time to.
- This can be inside, before or after the title but not overlapping another title.
- To set the in time press Alt+ the +/= button OR press the + (plus) button on the numeric keypad.
- To set the out time press Alt+ the – (minus) OR press the – (minus) button on the numeric keypad.
Move the whole Title on the timeline
- Move the mouse pointer to the middle of the text box on the timeline and use Shift Drag to move it left and right.

- Hint: Hold down the Shift key and move the mouse – the pointer will change when you can start Drag so Click and drag at this point.
- You can’t overlap or swap title order on the timeline.
Stellar set up - Subtitling
When you first start Stellar you will get a default Layout loaded. The layout sets how the screen looks and what controls and tools you have available. Because Stellar can be used for a wide rant of work it’s important that you load a suitable layout and a number of default Layouts have been provided.
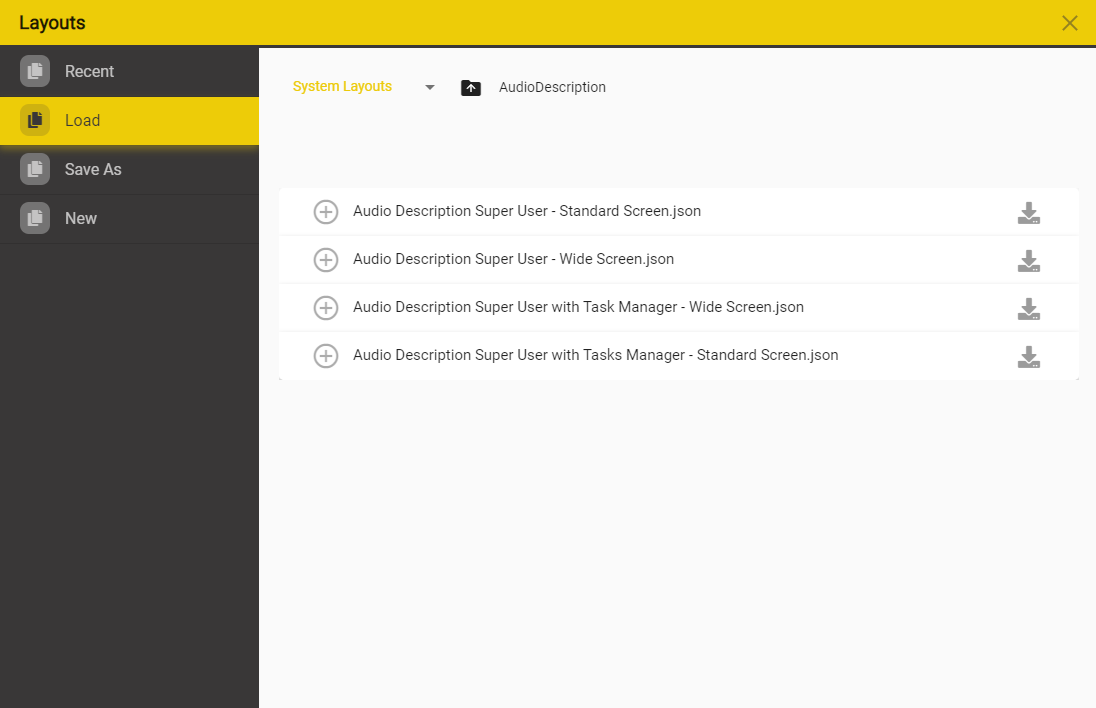
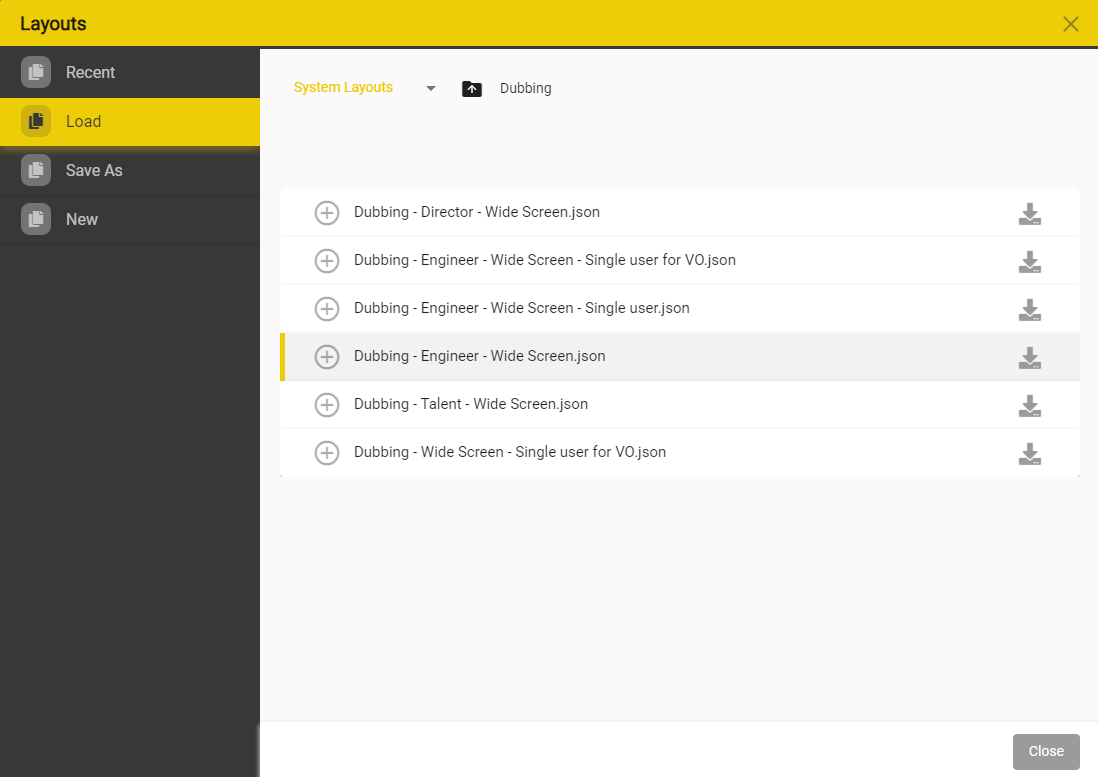
Files → Layouts → Load
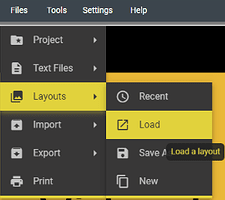
This will open the Layouts Window.
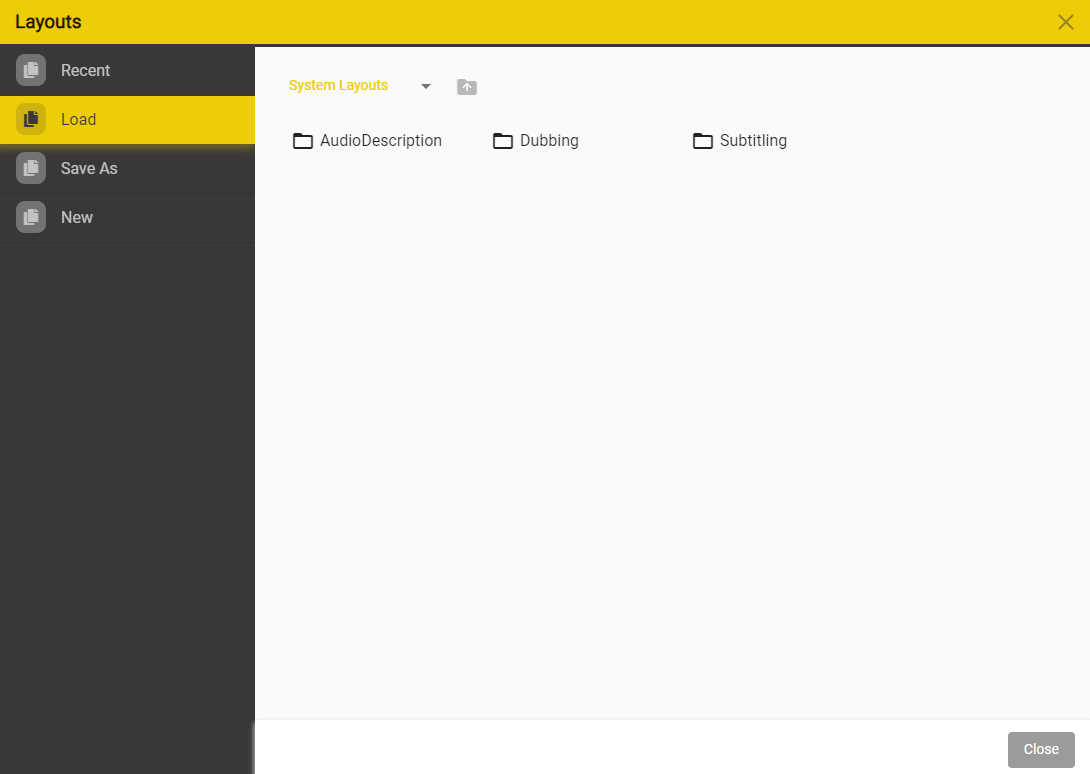
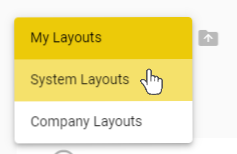
Click on the Layouts Library Dropdown list.
![]()
Select System Layouts
Select Subtitling - this will open the Subtitling Layout list

Decide on a Layout depending on your needs.
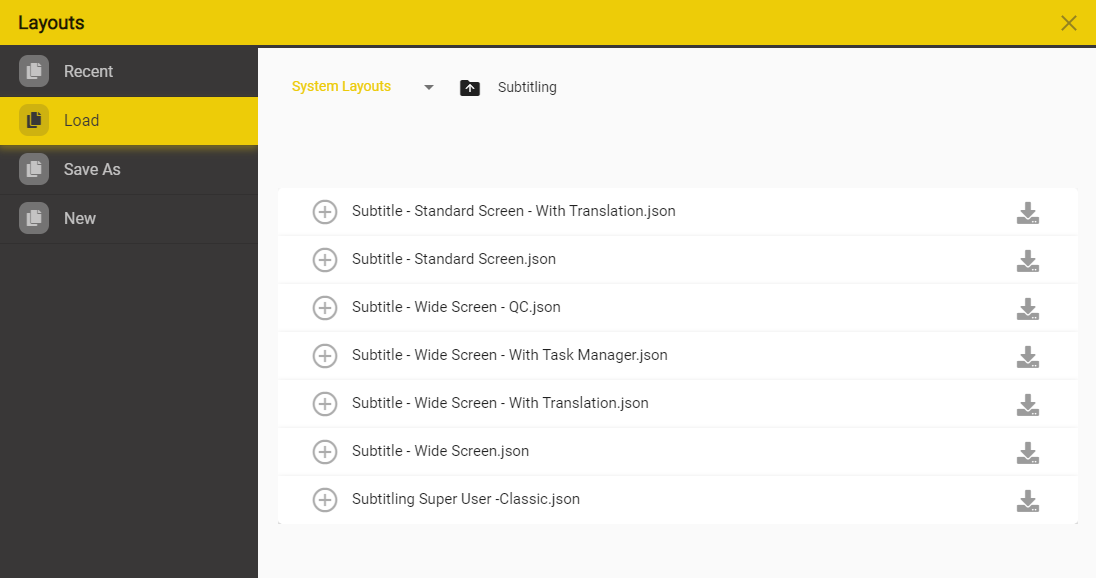
Press the Load Button  corresponding to the the layout you want to try.
You can swap between layouts at any time and you can create your own Layouts and save them for future use.
Audio Description
How do I set up Stellar for AD
When you first start Stellar you will get a default Layout loaded. The layout sets how the screen looks and what controls and tools you have available. Because Stellar can be used for a wide rant of work it’s important that you load a suitable layout and a number of default Layouts have been provided.
Files → Layouts → Load
This will open the Layouts Window.
Click on the Layouts Library Dropdown list.
![]()
Select System Layouts
Select AudioDescription - this will open the Subtitling Layout list
Decide on a Layout depending on your needs.
Press the Load Button corresponding to the the layout you want to try.
You can swap between layouts at any time and you can create your own Layouts and save them for future use.
How to - Microphone & AD Recording
Once you have a Project loaded and have added an AD script file in ESF, SRTAD or TTAL format you’re ready to start recording.
First you’ll need to make sure the microphone and audio inputs are correctly configured. Follow the instructions here.
How to select a Microphone.
How to calibrate your Microphone
How to Record using the Audio Recorder Widget
How to Deliver a finished AD Project
Once you have recorded and checked your AD Project you will want to deliver the results in some format.
There are three main options:
- Export a Stellar Project with some or all all the elements of the Project.
- This option will create a Zip with the AD script file, all the Wav files, any other text files and optionally the media files from the Project
- Another user will then be able to Import this Project into their copy of Stellar and start working straight away.
- Export an Audio Job – Create a ZIP file containing the AD file and associated WAV files.
- This option will create a Zip file with just the AD script and WAV files in it. No other parts of the project will be included.
- Another user can use this in Stellar or other AD systems (if you used the industry standard ESF file format)
- Mix the audio output yourself.
- Stellar provides tools that allow the mixing of AD output in a wide range of formats.
- These files will be in standard WAV or MP4 formats and can be used in all media editing tools (Pro Tools etc.)
How to Mix an AD Output Audio
-
There are several output formats available:
- A single audio file containing just the AD Audio
- A single audio file containing the program audio mixed with the AD audio
- An MP4 video file with the program audio and AD audio mixed together.
- A single audio file containing just the AD audio and a control track suitable for use on the UK Digital Terrestrial TV services (DTT)
-
Load the Project containing your recorded AD audio
-
Make sure you have the right audio Takes selected (only applies to srtad file type)
Tools → Audio Tools → Audio Mixer
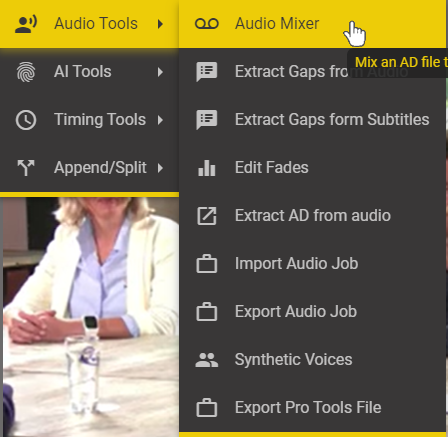
This will open the Audio Mixer Window
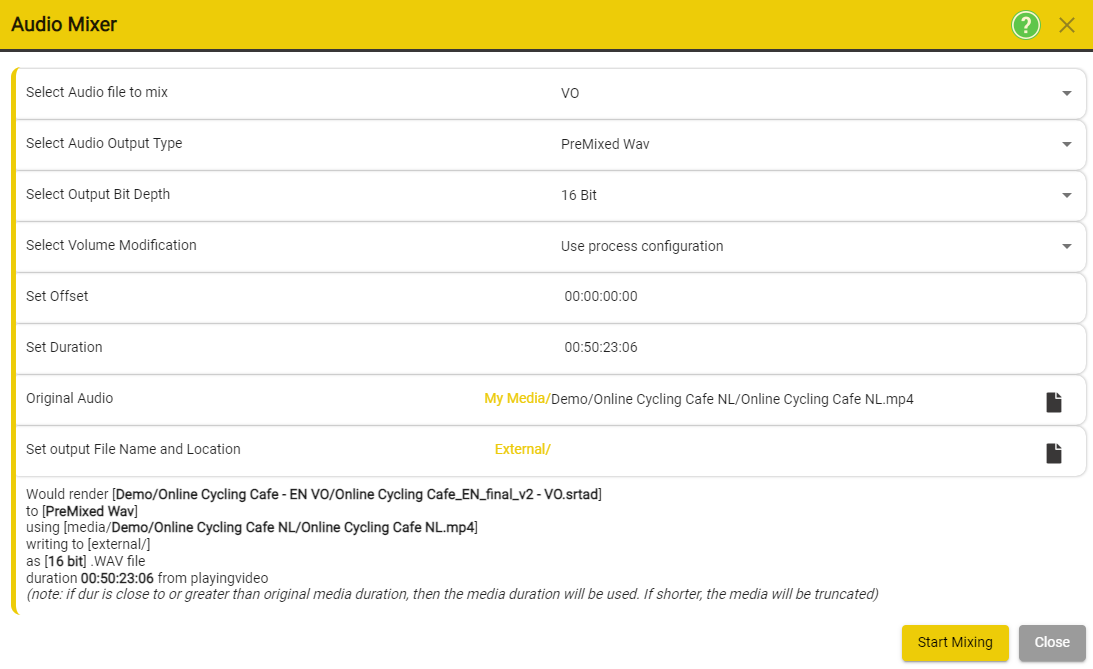
- For full details on all the options see here: AD Mixer
- Once you have set the options and file locations click on Start Mixing.
- Depending on the length of the program this will take from a few seconds to a few minutes.
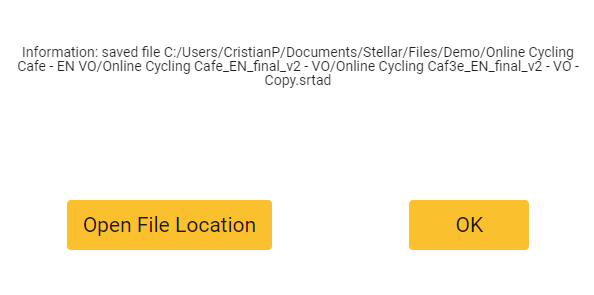
In the State section, you will be able to follow the progress of the Mixing Process.

Once the mixing process has finalized, you will be able to press the Open File Location and check the exported file.
How to set the Fade Levels
How to edit Fades
Fades Handle Tutorial
How to work with ESF files
ESF Files are an existing AD file format that has been in use for many years. You can create, open, edit and export ESF files directly in Stellar. However there are certain technical limitations with the ESF format that you should be aware of. If you don’t HAVE to use the ESF file format we would recommend you always use the srtad format. This is a much more comprehensive and flexible format as it allows you to store multiple Takes, trim audio Takes and has fewer timing restrictions.
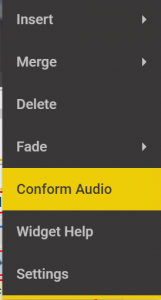
The ESF file format only supports a single audio for each text block and the audio has to be trimmed to the exact end points. To create a single audio file from one or more Takes, each possibly with different Trim points you must Conform the audio for each text block. You can do this by Right clicking on either the audio Take or the Text box.
-
Any audio Take in an ESF file will be shown in Red if it needs to be Conformed or it is positioned in a way that is not supported in the ESF file format.
-
A Text warning message is displayed if you hover over the audio waveform or the Text block showing what the error is.
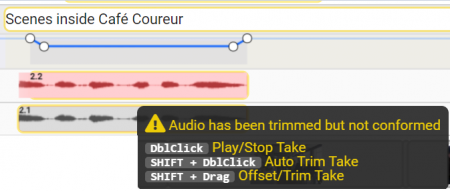
Possible errors are:
- Audio starts before Text box.
- Audio has been trimmed but not conformed.
- Audio gain has been changed but not conformed.
- There is more than one active audio for this Title and it hasn’t been conformed
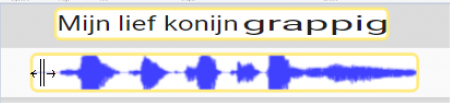
When setting or editing the Fade for an AD title you can drag the four points on the Fade waveform to get the fade slope and depth you need.
- In and ESF file it is not possible to set the start and end points of the Fade outside of the associated Text block.
- On a timeline track for an ESF file, you can’t move the fade outside of the text box. (This is not a limitation for srtad files).
- Extending the size of the text block, or the size of the audio Take will allow the fade point to be moved.
You can always convert between file formats so even if you work in an srtad format you can export as an ESF file for delivery and Stellar will impose the limits for you automatically.
Dubbing
How do I set up Stellar for Dubbing
When you first start Stellar you will get a default Layout loaded. The layout sets how the screen looks and what controls and tools you have available. Because Stellar can be used for a wide rant of work it’s important that you load a suitable layout and a number of default Layouts have been provided.
Files → Layouts → Load
This will open the Layouts Window.
Click on the Layouts Library Dropdown list.
![]()
Select System Layouts
Select AudioDescription - this will open the Subtitling Layout list
Decide on a Layout depending on your needs.
Press the Load Button corresponding to the the layout you want to try.
You can swap between layouts at any time and you can create your own Layouts and save them for future use.
How to Edit a dubbing script
This section describes how to create or edit a Dubbing Script but not how to do the Adaptation.
For how to Adapt the word timings of a Dubbing Script see here.
A dubbing Script contains:
- The Lines or Dialog
- Role or Character name
- The timing of the Lines
- Any special instructions or comments
Dubbing Scripts are SRTDUB files in Stellar and contain all these elements in a single file. Once you start recording the information about the audio clips are stored in the same file.
-
You can either create the Script from scratch or open an existing SRTDUB file and edit the Script.
- To add a blank Script file to a Project follow the instructions for adding a new file and select the SRTDUB file type.
- To add an existing file follow the instructions here.
-
Once you have a Project with a Dubbing Script you can start creating or editing the contents.
-
Similar to subtitles each Line for a Role is split into a separate block of text. There is no limit on how long a Line can be but it’s easier to handle and subsequently to Adapt if you keep the Line shorter then 10 seconds in duration.
-
A full set of tools to insert, split, merge and delete Lines is provided. See the details of the Timed Text Editor for full details.
-
The timing of Lines against the video media can be edited either in the text editor or on the Timeline.
-
You can view or edit any Comments for a Line by clicking on the
 icon in the text editor next to each Line.
 -
To Assign a Line to a Role (Character) use the drop down menu in the corner of the Lines box in the Text Editor:
-
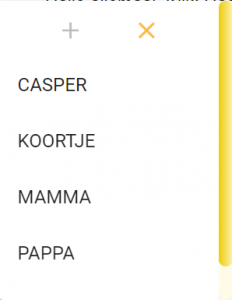
This will open a selection box for the Roles
- Here you can
- Select a Role for this Line
- Use the + button to add a Role
- Use the x button to remove any Role from the Line
- Here you can
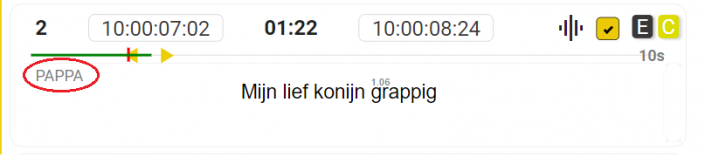
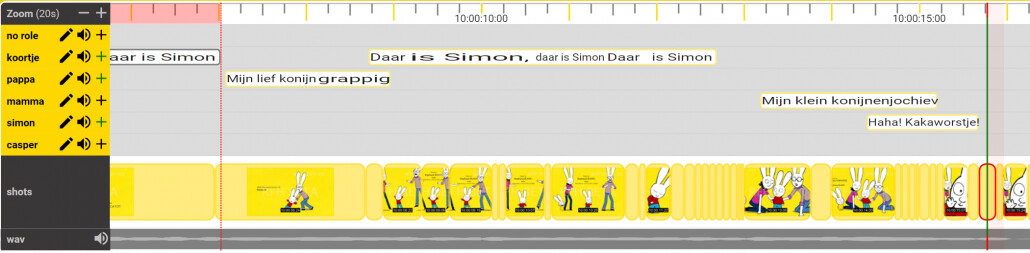
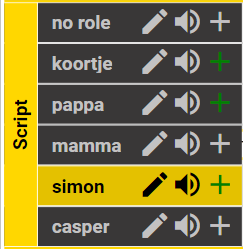
On the Timeline there will be a separate track (row) for each Role so you can easily see how the the Lines for different Roles relate to each other.
How to Adapt a Dubbing Script
Once you have a Dubbing Script with all the Lines, Roles and basic timing you may need to do detailed Adaptation for lip-sync timing.
Adaptation is done on the Timeline using drag handles at the beginning and end of each word.
-
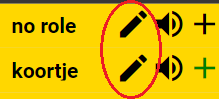
Each separate Role (Character) is represented on a separate track (row) on the timeline.
-
On each track for a Role there is an edit control
-
Clicking on the pencil button for a Role enables Adaptation editing for that Role

-
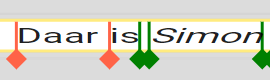
There is a Handle for the start and end of each work
-
The first and last word are fixed to the end of the text box times
-
You can edit the start and end points of the text box either by editing the times in the text editor
-
or by using Shift and Drag over then ends of the text block on the Timeline.
-
-
-
Green Handles are unfixed and will move as you make other adjustments.
-
Red Handles are fixed and won’t move as you make adjustments
-
-
To move a Handle drag it with the mouse.
- The word timing will change as you move the Handle
- If the Handle is Green it will turn Red and the timing of that handle will be fixed.
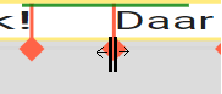
- As you drag the Handle you will see a green limit line above the Handle showing how far you can move it.
-
To unfix a Red Handle Shift click on it and it will turn Green.
-
Any changes you make will be saved automatically.
-
Click on the Edit Pencil icon to turn off Adaptation editing for a Role.
-
How to record dubbing audio
Make sure you have a suitable Single User Dubbing Layout loaded.
- This will give you the controls you need.
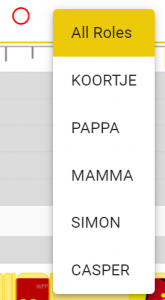
You can select to record All Roles or a specific Role.
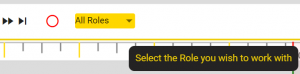
- On the Media control bar use the Dropdown to select either All Roles or a specific Role
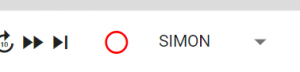
-
Or click on the Role on the Timeline
-
The selected Role is highlighted in Yellow
-
If a specific Role is selected then only this Role will be shown on the top row of the Rythmoband

Select which Line you want to record by moving the video or double clicking on the text block on the timeline
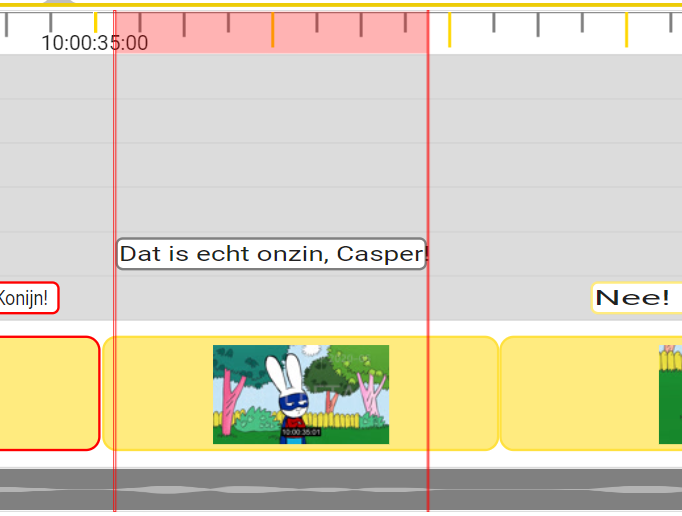
-
This will show red in and out record markers
-
You are now ready to record
-
The Record button will be active (red) provided a Line is selected for the selected Role.
Click on Record to record the single Line.
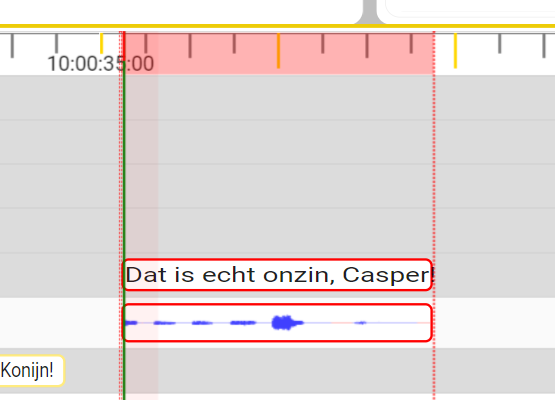
- The video will start playing with a (configurable) pre-roll.
- The Rythmoband will start moving and as the text gets to the vertical green line, start speaking.
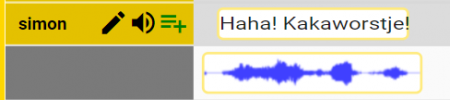
- After a short post-roll the audio will appear on the timeline below the text (Lines).
If you record additional Takes these will be added to the Timeline.
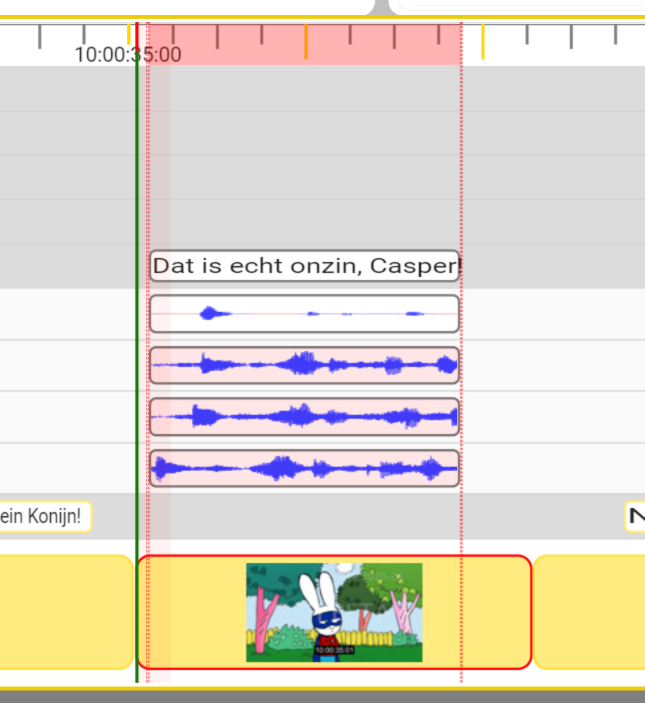
- Hover the mouse over a waveform to pop up play, mute and delete controls.
Once you have recoded one or more Lines you can play then video and hear the recordings along with the program audio.
- If you have more than one Take you can select your preferred version by muting and unmuting the Takes
- The unmuted version(s) will move to the top of the list of Takes (waveforms)
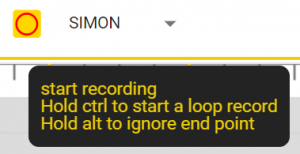
Other Recording modes:
- As well as recording a single Line there are two there recoding modes:
- Loop recording – hold down the Ctrl key before you click on the Record button
- This will record the selected Line up to three times in a loop
- You can push Stop (the Record button) at any point
- Endless Record
- Hold down the Alt key before you click on the record button.
- This will start recording at the beginning of the selected Line (red marker) but keep going until you press Stop
- This allows you to record several Lines in one Take
- By default the audio will be split into separate sections for each Line recorded but this can be disabled in Settings
- Hold down the Alt key before you click on the record button.
- Loop recording – hold down the Ctrl key before you click on the Record button
Hint: Hover the mouse over the Record button to see the record options.
How to record and manage multiple Takes
When you record a Take in Stellar a new audio clip is added to the Project and it is linked to the Script file, the Role and the specific Line(s) recorded.
All Takes are displayed on the Timeline, although they may be hidden depending on the ‘fold’ setting for the Role.
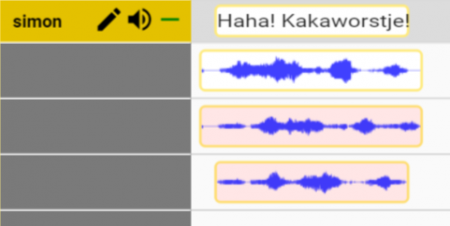
Viewing the Takes
-
Each Role on the timeline has a + control.

- If there a recorded audio takes for this Role in the visible section of the timeline the + button will be green
-
Click on the + button to see any Active Tales for the Role.
- This will show one or more Active Takes
- An Active take is one that is not muted.
- This will show one or more Active Takes
-
Click on the + button again to show all Takes
- Inactive or Muted takes will be shown with a slight red background.
- Note: Takes are show with active Takes at the top and inactive Takes below, each in Take number order.
-
The central section of the Timeline can be scrolled vertically if there are too many rows to show.
- Use the scroll bar at the right hand end of the Timeline.
- Use the mouse scroll wheel over the left hand title section of the timeline.
- Use Shift Scroll wheel anywhere in the timeline.
How to edit audio Takes
- Hover over a Take to show the controls available

- PLAY – Use the Play button on the left to listen to an individual Take
- AUTO TRIM – trim to fit the text box times
- Click on the Scissors button to trim the audio to match the Lines box times
- MUTE – Use the Speaker button to mute or unmute a Take –
- Note: This will change the display order of the Takes putting active Takes at the top.
- There can be more than one active Take.
- DELETE -Click on the Delete button to delete the Take
- You will be asked to confirm this.
- Hint: Holding down the Ctrl key and clicking on Delete will remove the Take without a confirmation.
- Useful if you are cleaning up a lot of old Takes.
Hold down the Shift key and hover the mouse over the Take.
-
SLIPPING – To move or Slip the audio on the timeline Shift+ Drag over the centre portion of the Take waveform

-
You can move the Take on the timeline to adjust the Take audio relative to the video time.
- Hint: Marker lines with In and Out timecodes will be shown as you move the waveform.
-
TRIM – To Trim either the in or out point of the Take audio Shift and drag over one end of the waveform.
-
You can trim to expose more or less of the recoded take, up to the maximum available.
- Hint: Marker lines with In or Out timecodes will be shown as you move the waveform end point.
-
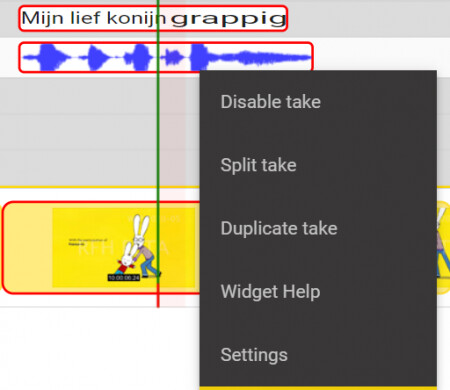
SPLIT – split a waveform at the position of the playhead.
-
Move the video position to the point you want to split the audio
-
Right click over the Take and select Split take.
-
Two copies of the waveform will be created with different trim points set
-
No audio is deleted and you can adjust the trims to reveal more of the original Take
-
DUPLICATE – make an identical copy of an existing Take
-
Right click over the selected Take and click on Duplicate take.
-
An identical copy of the Take with the same trim points will be created.
Loading a Task
Once you have been assigned a task, you can proceed to load it in Stellar.
- Before you can work on a Task you must download it.
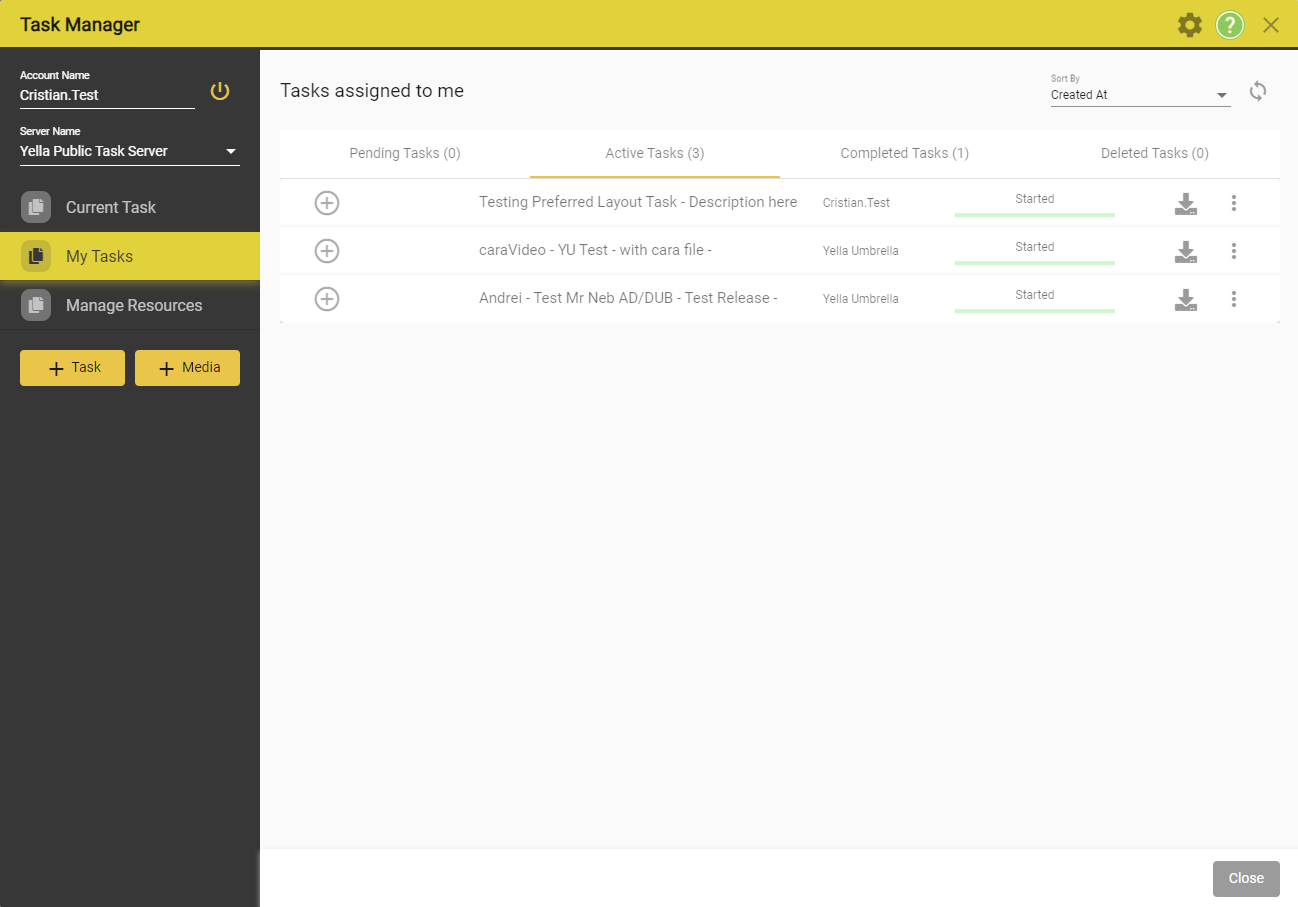
- On the Tasks Started & Ready Tab select the task you want and click on the corresponding Download button.

- You will be asked if you want to download the required files – Click Yes
- You may be asked if you want to download additional media files. Unless you know you already have these on your machine click Yes.
- You will be asked if you want to open the Project for the selected Task.
- Click Yes to start work immediately
- Click No if you’re just downloading the files for later use.
- Note: A Project within Stellar is the collection of media, script and audio files for a single Task.
Working on a Task
- Once a Task is in the state Ready you can start working on it.
- Depending on the Task this can be creating new subtitles, QC, editing the script, translating, adapting, recording, reviewing or mixing.
- First load the Task
- This will load all the files you need to do the task and may include video, additional audios, shot change list, subtitle or script file(s) and other settings.
Create a New Task
-
To create a New Task you must have Manager or Admin level access for the Company you want to create a Task for.
-
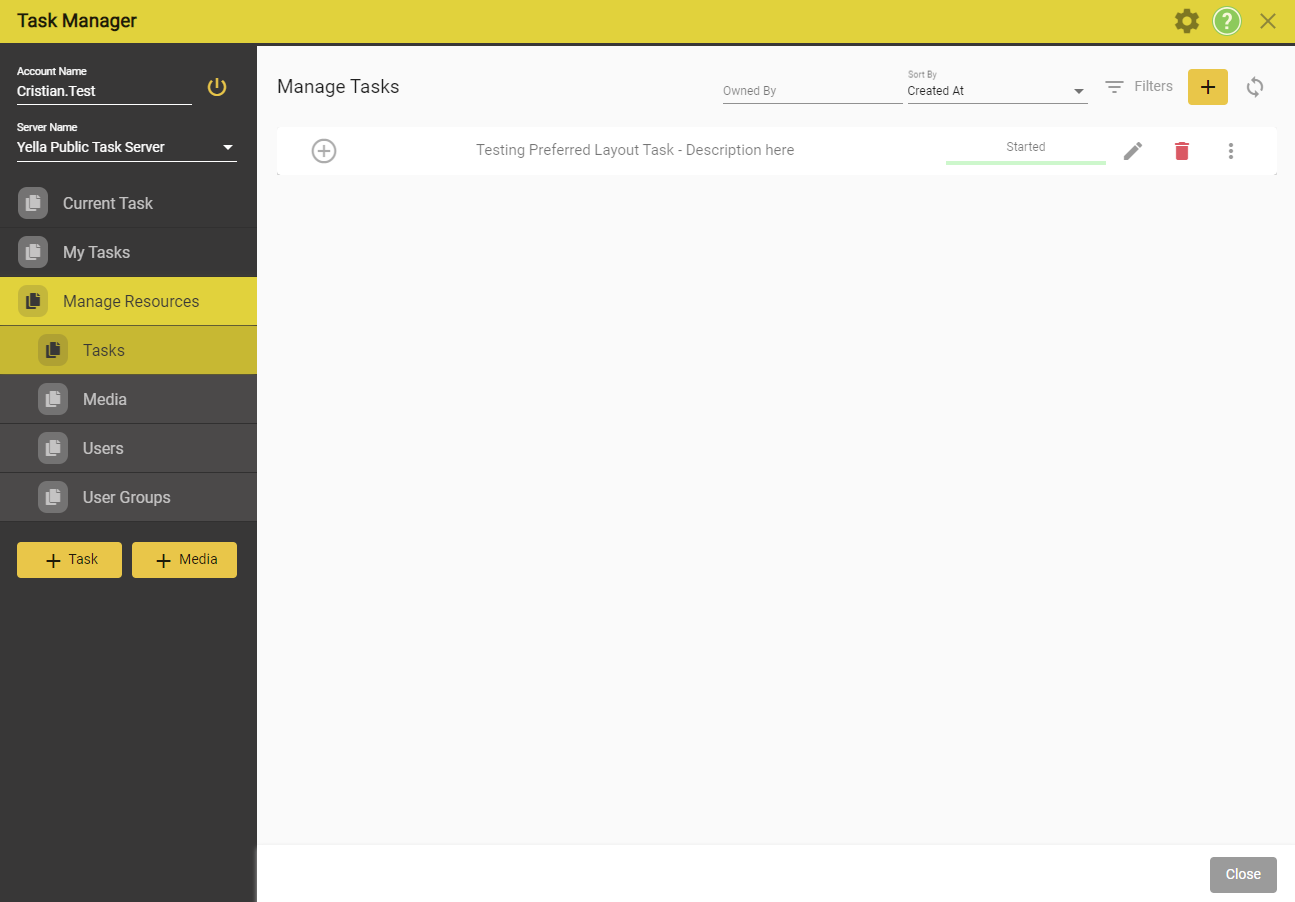
If you have an Admin or Manager level of Access you will see the Manage Recourses option on the Task screen.
-
Click on Tasks
-
Select the Tasks option under Manage Resources
-
Click on the New Task button - From any tab in the Task Manager
-
Click on the plus button
 - While on the Tasks Tab.
-
-
Create a Task from Project This is the simplest option.
- Create a normal Stellar Project with the media and any existing subtitle or script files.
- Upload the whole set to the server as a single Task.
- You can set DRM encoding on the media if required.
- Full details can be found here.
- Create a normal Stellar Project with the media and any existing subtitle or script files.
-
Create a Task based on the current Task – This is useful for creating multiple Tasks based on the same media.
- EG Subtitle into multiple languages so you can create one task per language.
- The media is already assigned to the Task.
- You can’t add DRM encryption, but it might have been applied to the media when the initial Task was created.
- Full details can be found here.
- EG Subtitle into multiple languages so you can create one task per language.
-
Create a Task based on Remote Media (Media already stored on the server) – Useful if you want to re-use the same media in multiple task.
- You can then optionally download the Task and add additional subtitle or script files.
- These will be automatically published to the server.
- Full details can be found here.
- You can then optionally download the Task and add additional subtitle or script files.

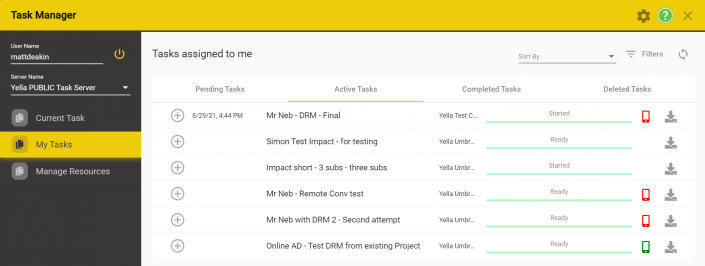
Finding your tasks
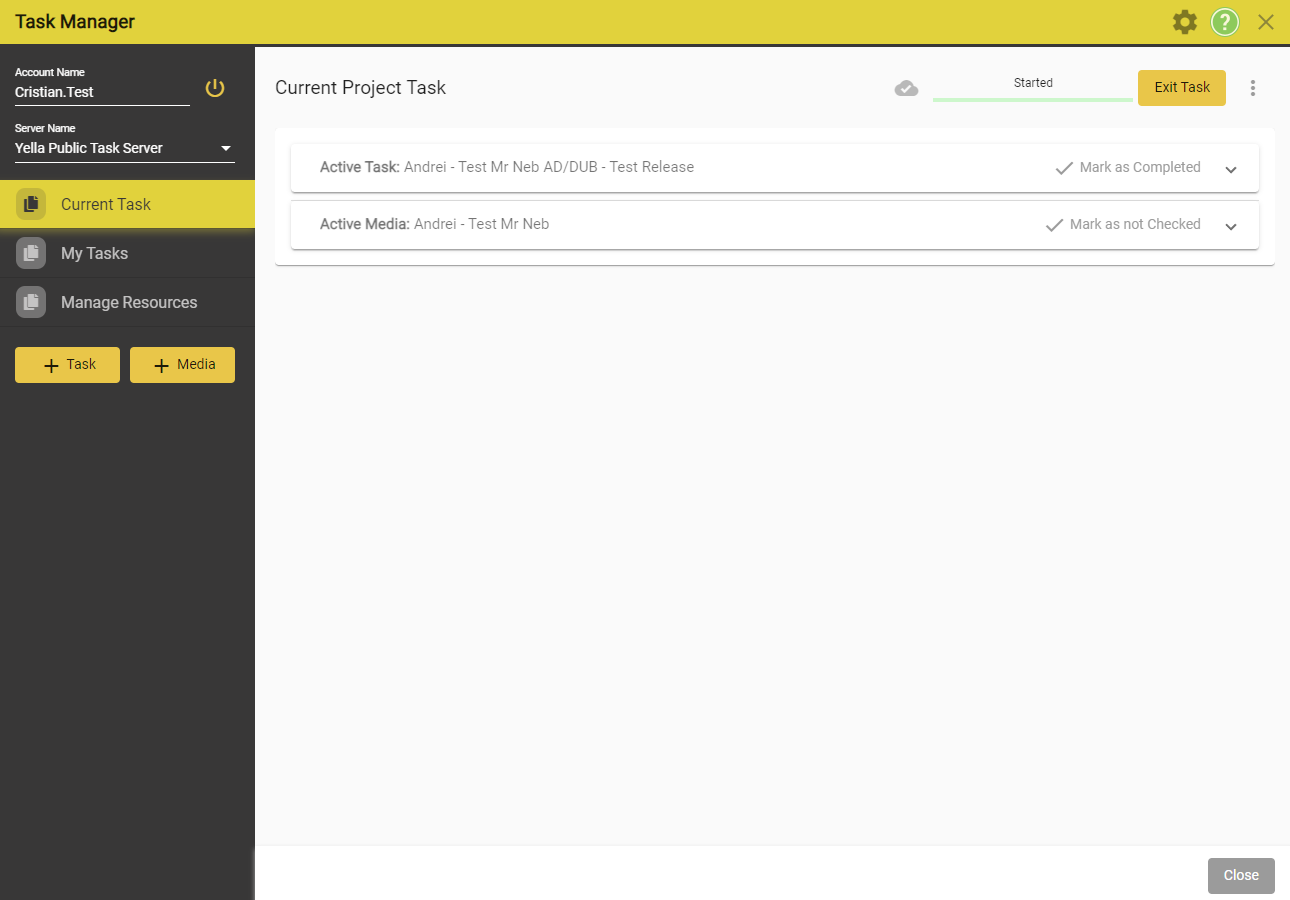
If you have a task loaded, then when you press on Tasks in the top bar, the Task Manager will open and the Current Task tab will be selected. You will be able to see the current Active Task.
If you do not have a task loaded, then when you press on Tasks in the top bar, the Task Manager will open and the My Tasks tab will be selected. By default you will see all the Active Task assigned to you.
Add Tasks to your Layout
Most of the time, you will be able to access the Task Manger through the Tasks button in the Stellar top bar.
![]()
There might be situations where the Tasks button is not available in the Stellar top bar.
![]()
In order to make it appear, we have to enable the Task Manager widget for the current layout we are using.
Go to Settings ![]() → Widget Settings
→ Widget Settings ![]() .
.
This will open the Widget Manager.
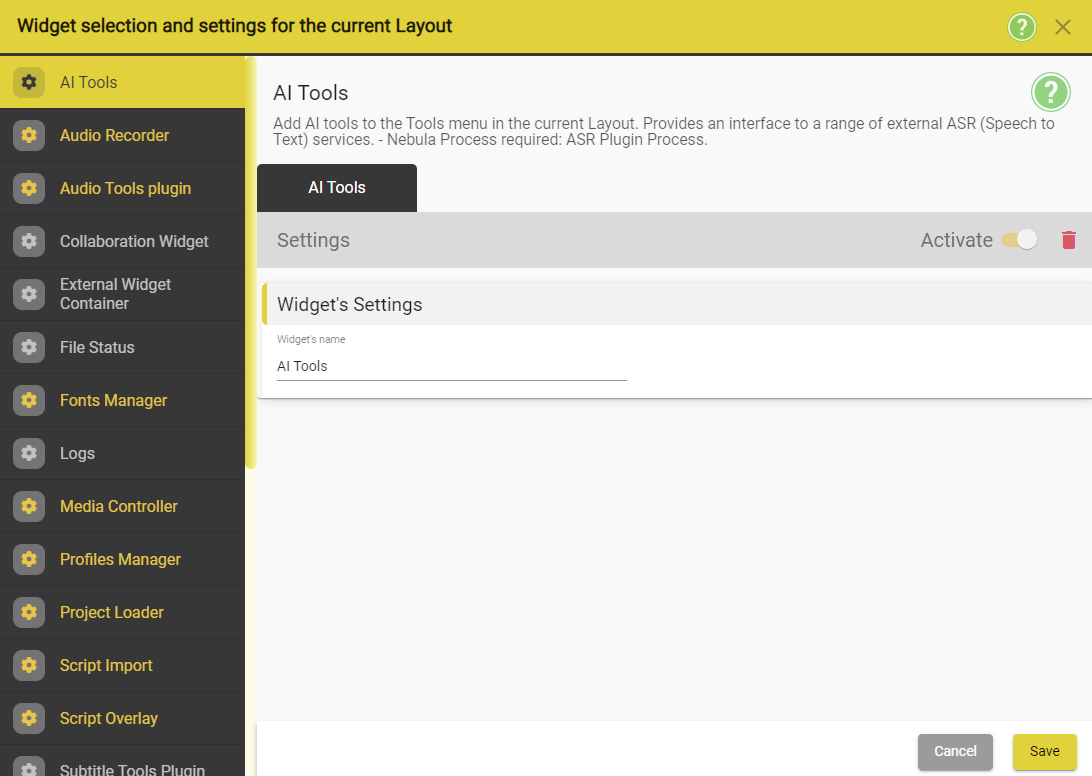
In the left side column, scroll down until you see Task Manager.
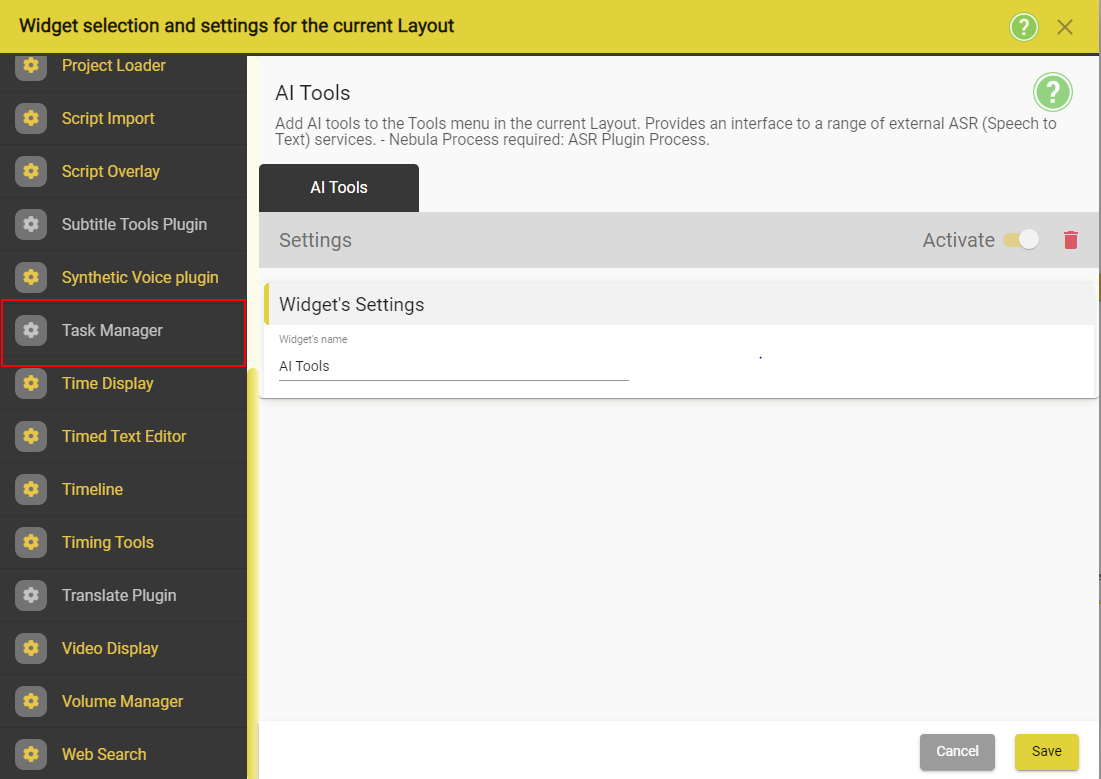
Click on the Task Manager entry in the list.

To Add it to your Layout, please click on the Plus button 
This will add a Task Manager Tab inside the right side of the window.

In the bottom right corner, press on Save ![]()
The tasks buttons should appear in the top bar between Files and Tools.
![]()
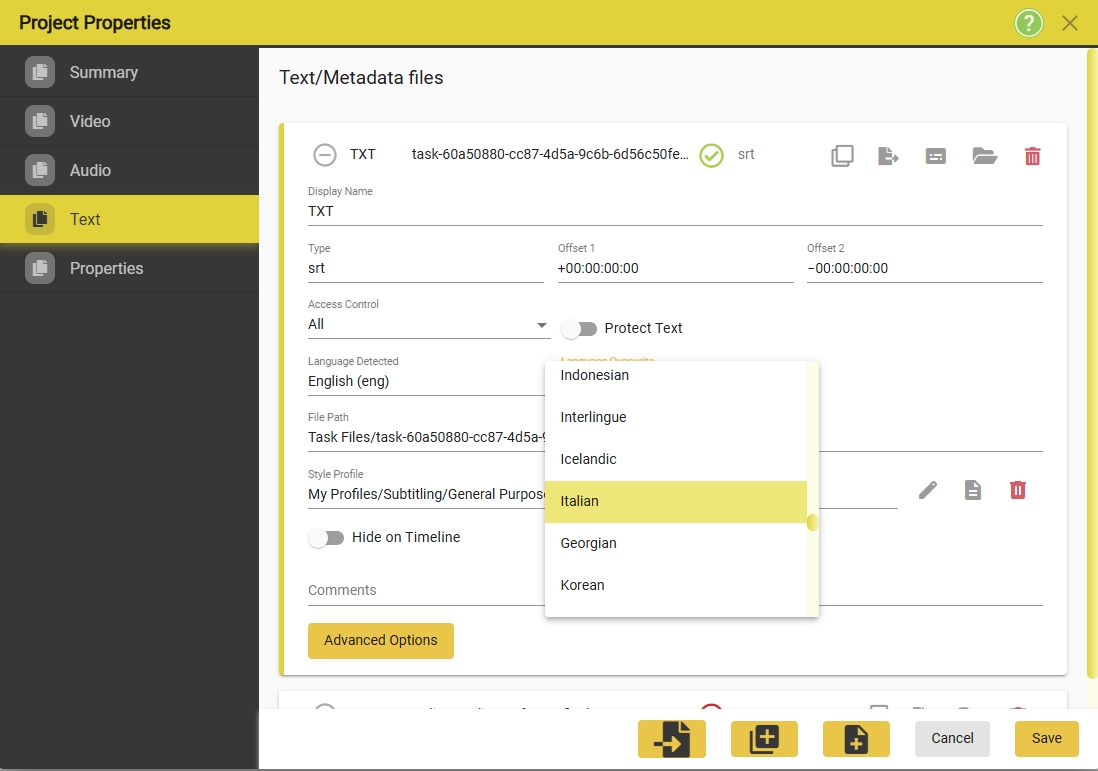
Setting/Changing the language of a text file
In Stellar, there are two ways the language of a text file can be set:
- Automatically - default option
- Manual - allows the override of the Automatically set language
To manually set the language of a file, please go to Files → Project Properties → Text → Select the text file → Use the drop down in the Language Overwrite to set the language of the file. Once you have do that please press the Save button in the bottom right.