Project from Video
When importing a video, you can choose to create a new project.
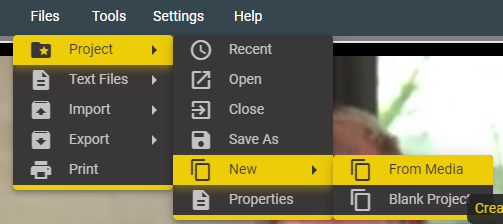
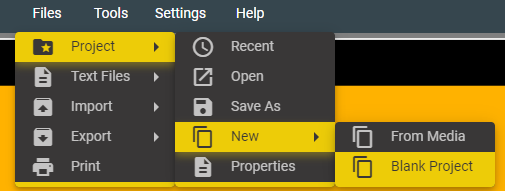
Files → Project → New → From Media
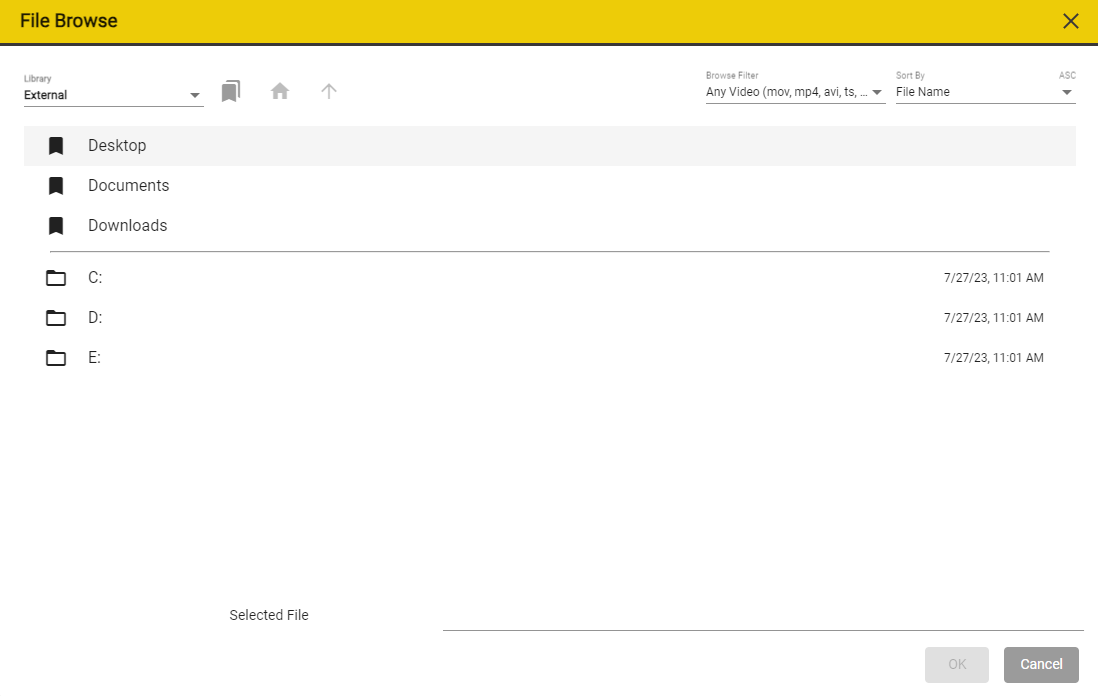
The File Browse window will open. Please browse to and select your media file.
The next window that will open is the Import Media Window
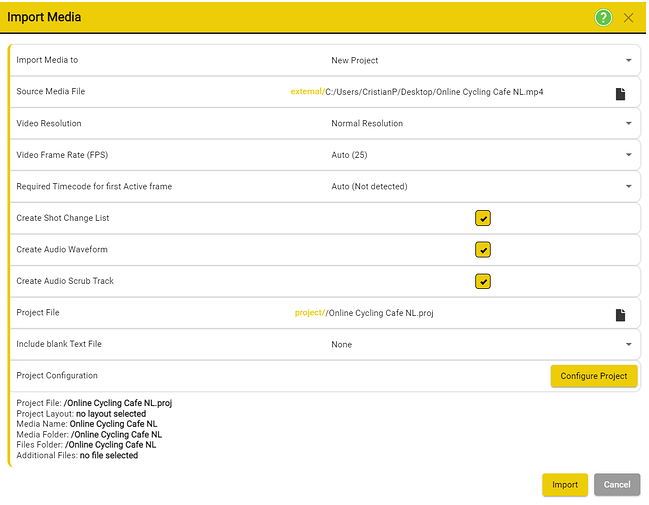
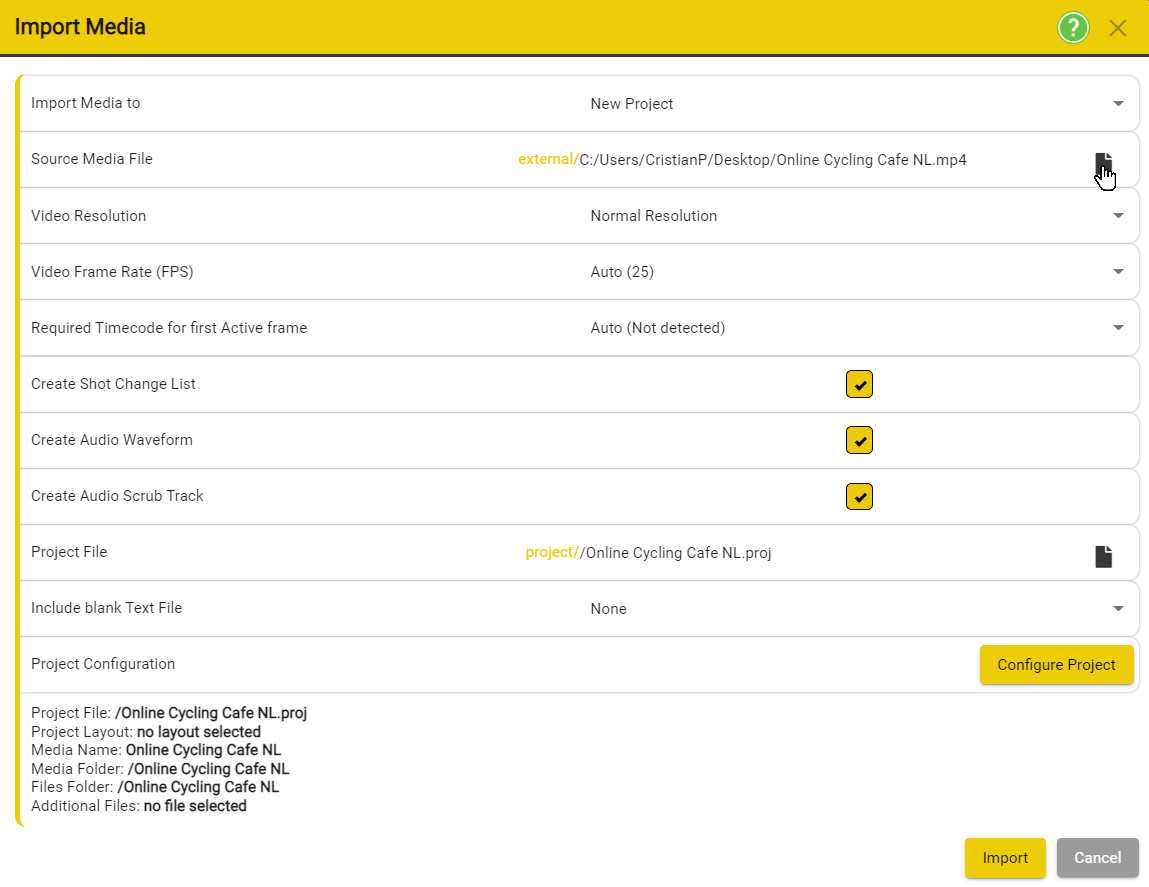
To Select the Source Media File press on the File Icon on the right side of the row.
This will open the File Browse window. Most likely, the library will be set to Media - this will allow you to import video that are present in the Stellar/Media folder. To import from other locations on your device, press on the drop-down list and select external.

Navigate to your file, select it and then press OK.

The path to the Source Media File should now be updated to point to the Media File you have selected.
Set the video resolution by using the drop-down menu.

- Normal Resolution – quarter SD resolution – suitable for most uses
- High Resolution – SD resolution – use this if you need to see the picture content in more detail, for AD where you are describing fine details.
- Original Resolution – uses the resolution of the original file. If this is HD or higher it will have an impact on the speed of response of the video controls in Stellar.
Set the Video Frame Rate - Generally, Stellar will Auto Detect the Framerate of the Media, but it can also be manually overridden by using the drop-down menu.
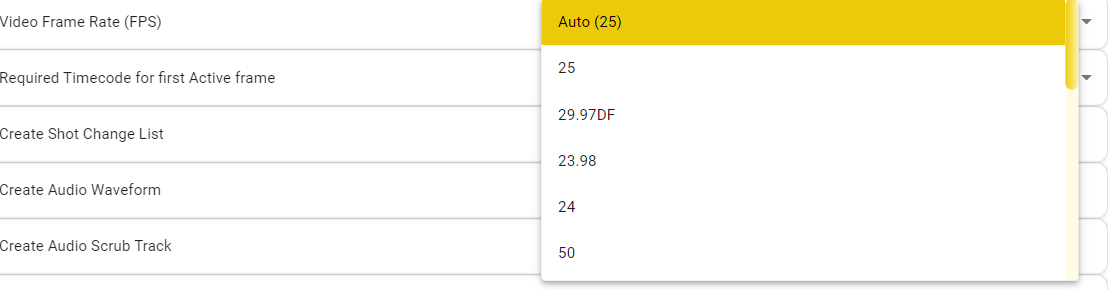
Set the timecode for the first active frame - Stellar will try to detect the timecode from the original file. If this is Not Detected, then you can set it manually using the drop-down menu.

Create Shot Change List – A list of shot changes will be created automatically and added to the new Project
Create Shot Audio Waveform – A graphical image of the audio waveform will be created automatically and added to the new Project
Create Audio Scrub Track – A additional audio track will be created for to provide audio scrubbing during cueing will be created automatically and added to the new Project

Project File – Set the location and name of the new Project – Defaults to the same name as the media file but can be edited.
- If you set a sub folder below Stellar\Projects\ then the new path will be used for the media and any text files that are included in the Project.
- EG. If the Project file is in Stellar\Projects\Netflix\Stranger Things Series 10\
- then the media and text files will be created in:
- Stellar\media\Netflix\Stranger Things Series 10\
- and
- Stellar\files\Netflix\Stranger Things Series 10\
- These will become the default locations for all files added to the Project (EG Import Text file or New Text file)
Include blank text File
- You have the option to create the new Project with a blank file of any of the Internal types
- Select the file type from the dropdown

- The file name and location will default to the Project file path and the project name
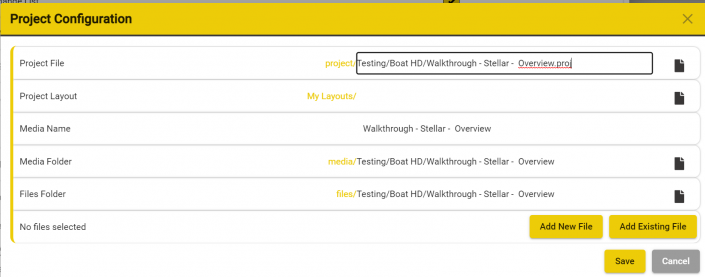
You have the option to add existing Text files and other settings by clicking on the Configure project button.
This will open the Project Configuration dialog.
-
Project File – This is the same control as on the Import Media dialog
- Any changes here will reflect in the whole Project
-
Project Layout – You have the option to select a Layout that will be loaded when the Project is opened
- Useful if you want to force the Layout for a new user or for a special Project with custom requirements
- Media Name – read only
- Media Folder – allows you to change the default location for all media in this Project
- Files Folder – allows you to override the default location for all Text files in this Project
- Add New File – Allows you to add one or more new (blank) files of any Internal type to the Project
-
Add Existing File – Allows you to add one or more existing Text files of any Internal type to the Project
- Note: These files must already be in the Stellar\Files folder or subfolders
New Blank Project
If you have no Project or file loaded, you can click on the “Click here to create a new Project”

If you already had a previous project loaded, you can create a new Project by going to
Files → Project → New → Blank Project
This will open the Project Window on the New Tab and will allow you to change several settings before creating the Stellar Project.
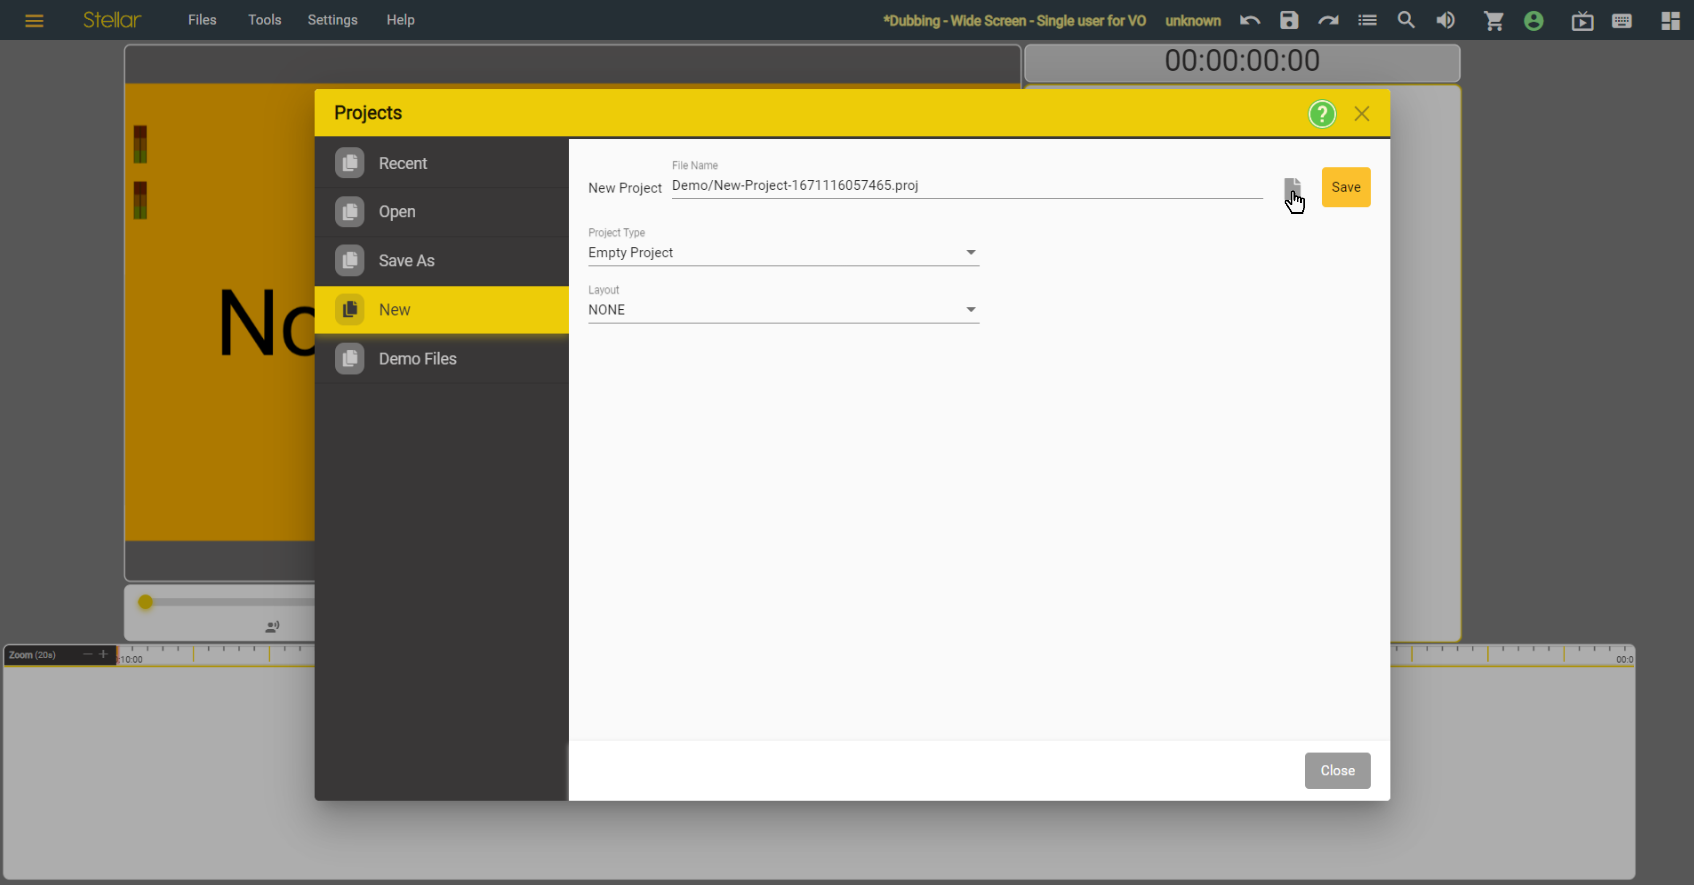
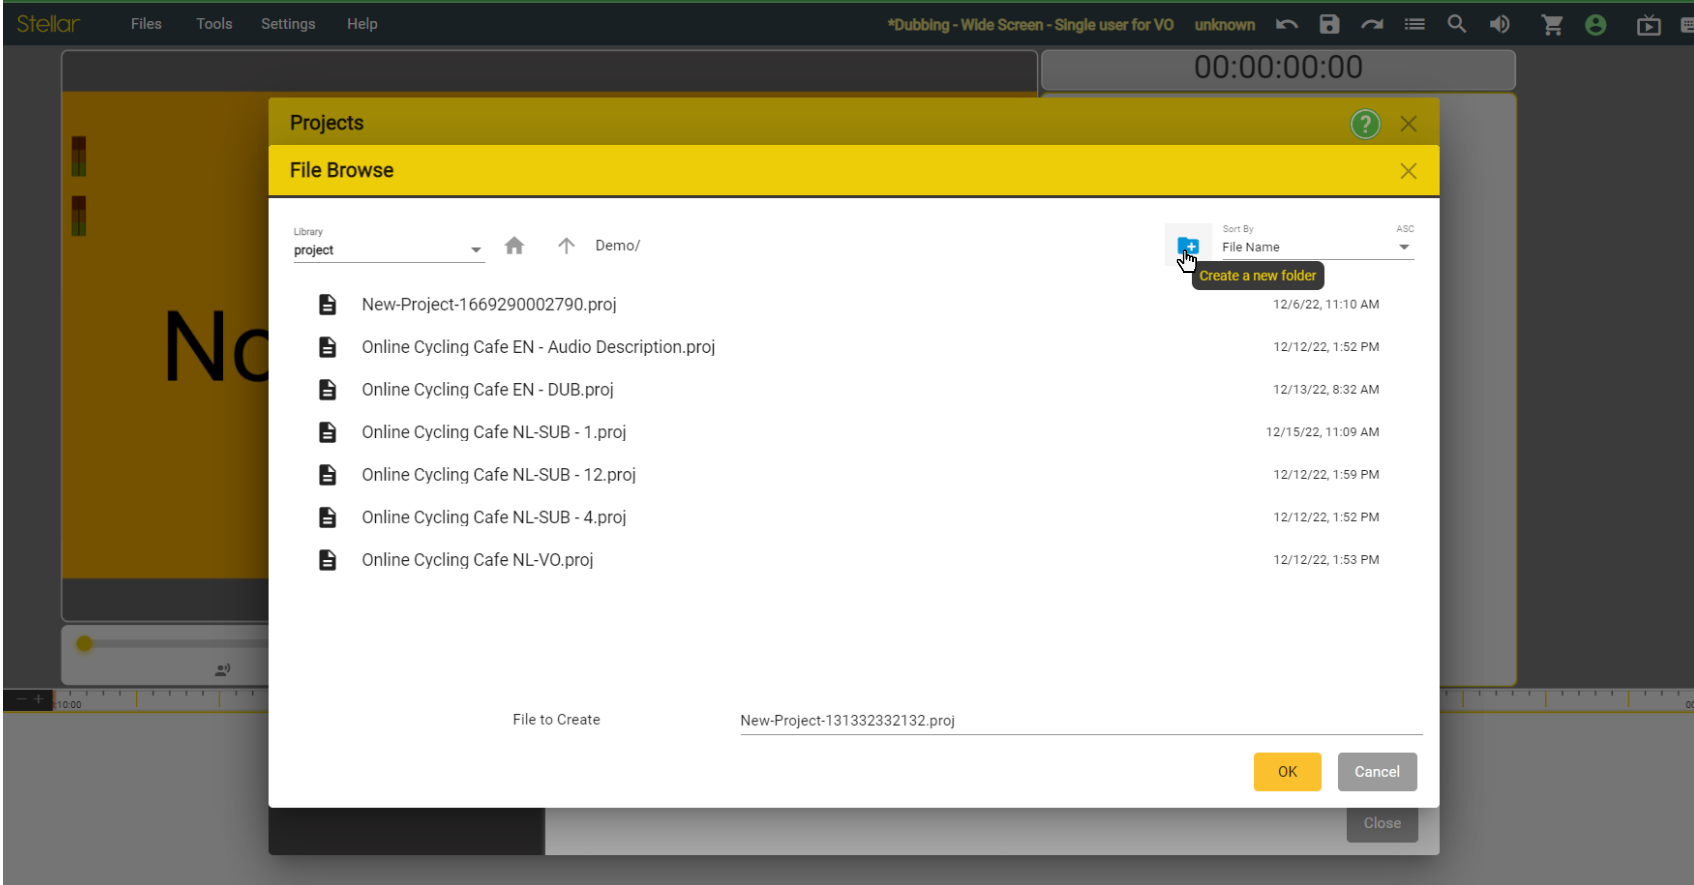
File Name - You can change the name of the Project. If you press on the File icon, you can open the file browser which will allow you to select a new location for your project.
Since we are dealing with a Dubbing project which will contain audio snippets, it is advised to create a new folder for the project. To create a new Folder for you to save your project in, press on the Folder Icon in top right side.
Enter a name for the new folder, and then press OK.
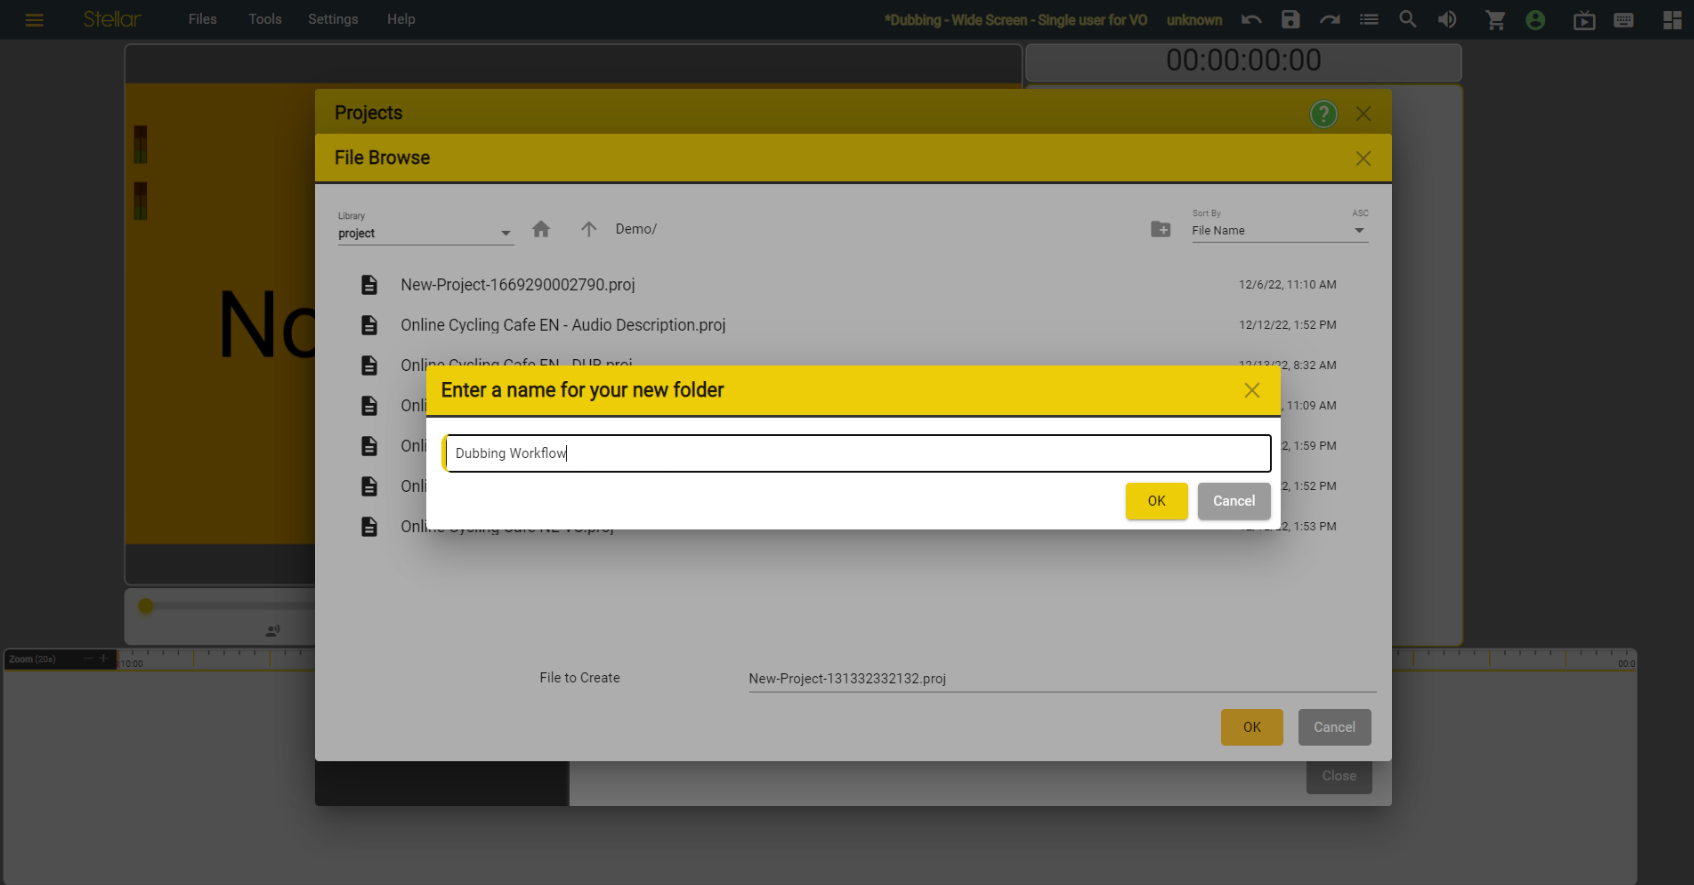
You can also change the name of the project, but do NOT remove the .proj from the name, then press OK.

You can leave the Project Type set as Empty and Layout set to NONE.
Press Save.
If everything went well, you will be prompted with a Load Complete window.
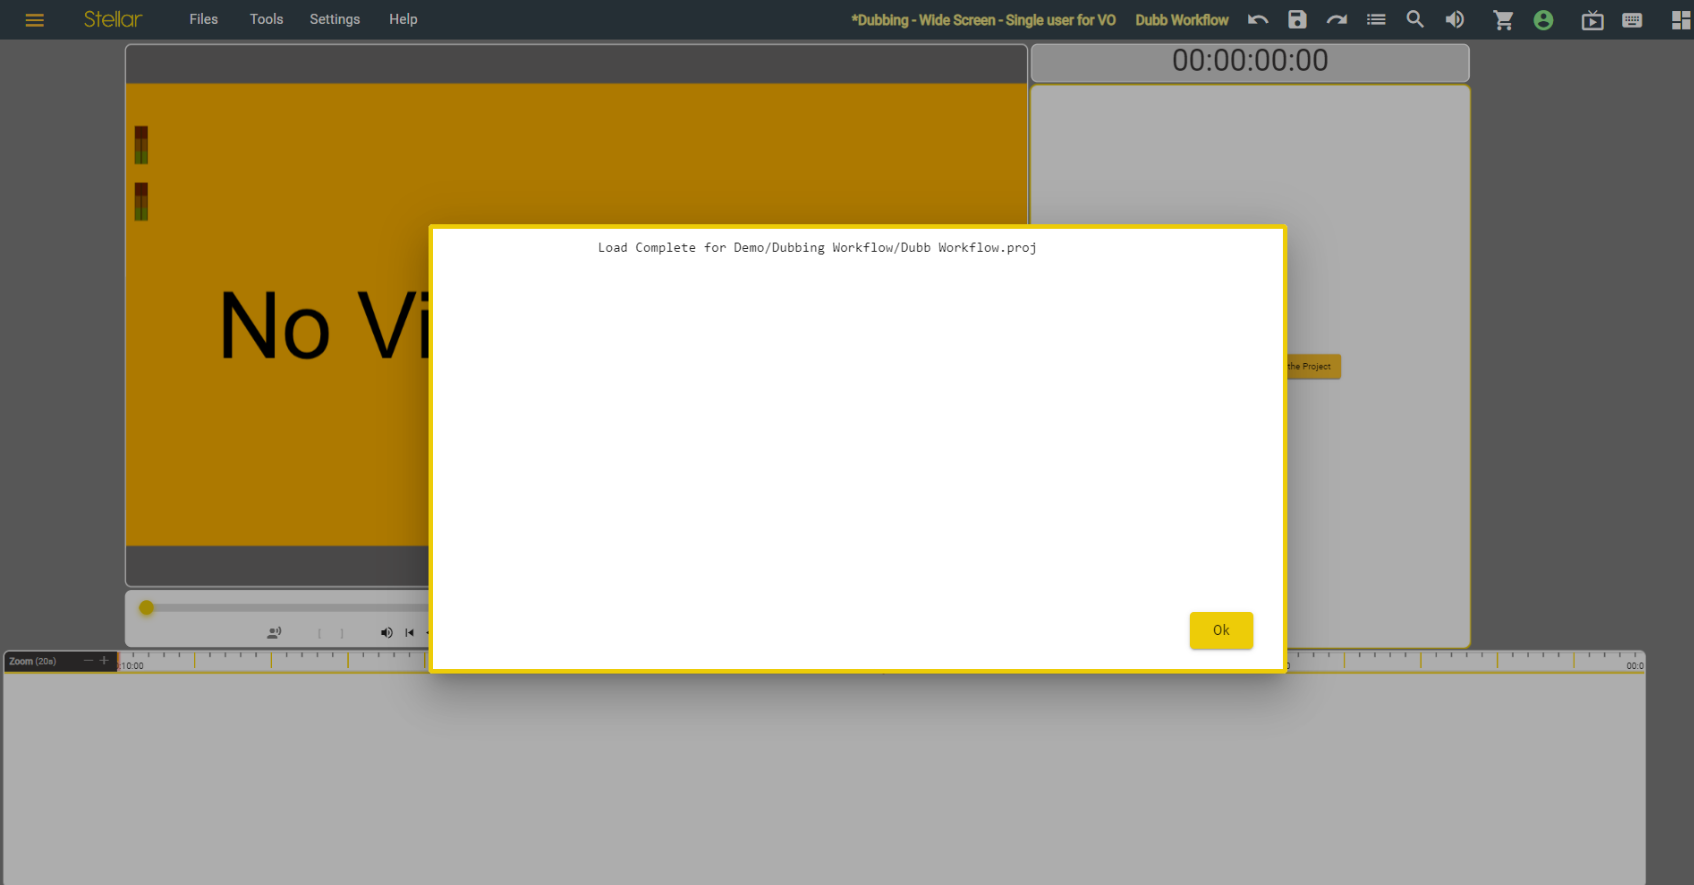
You can press OK to go back to Stellar.
Project Open
To open an existing project Files → Project → Open

The Project windows will appear with the Open Tab already selected. You can use the ![]() button to navigate back a folder.
button to navigate back a folder.
To access a folder - click once on the folder Icon. 
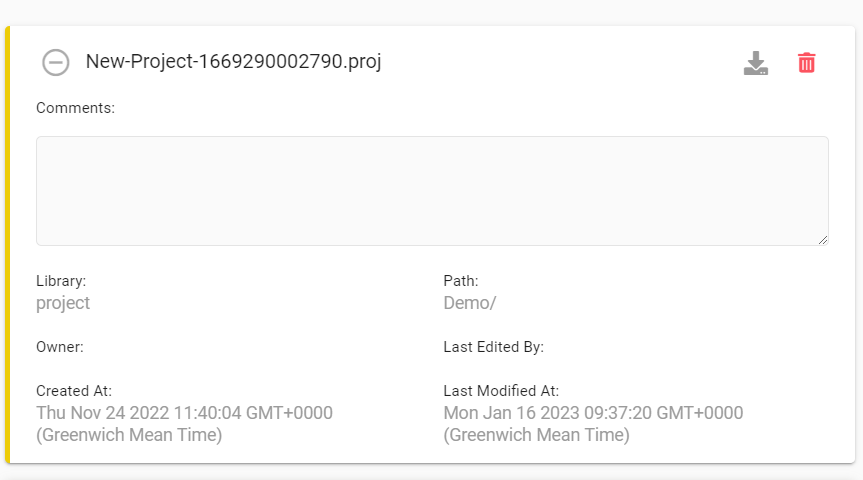
To see details of a project, click on the project row.

This will open the details section for the selected project.
To open a project, you can press on the open icon. ![]()
The project will then be opened in Stellar.
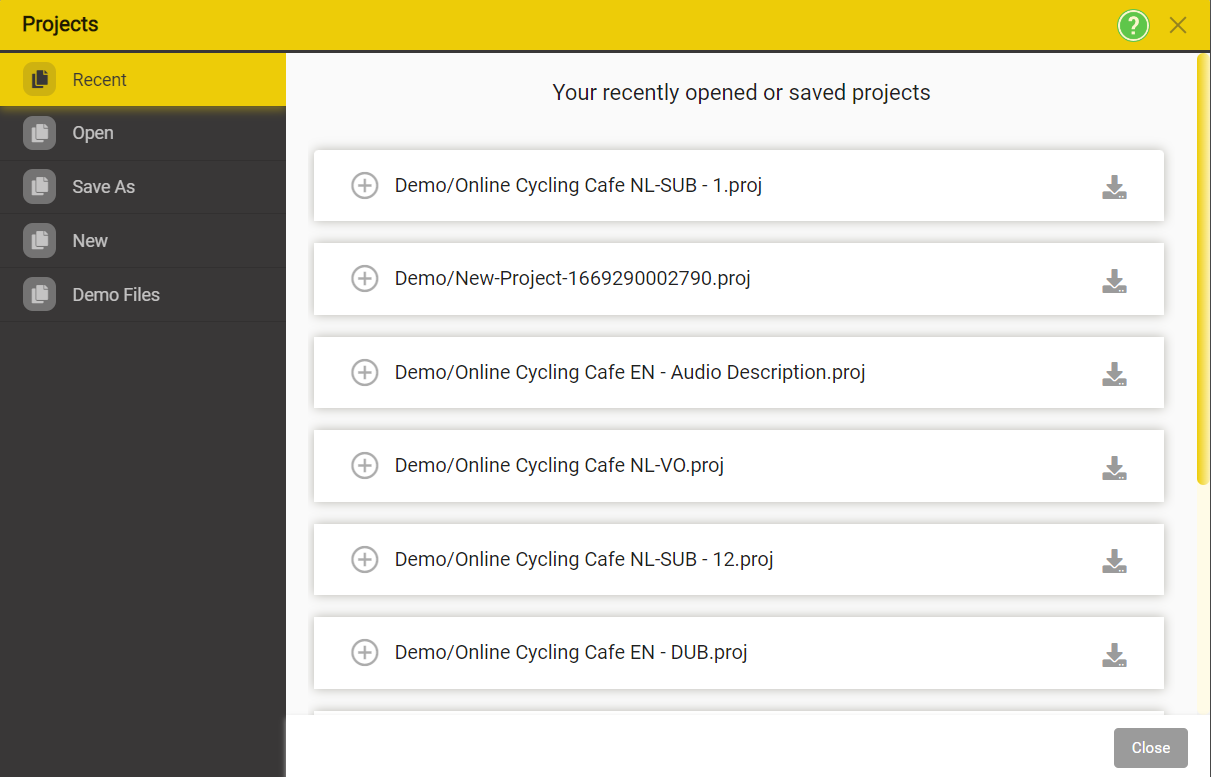
Alternatively, if you had opened or saved projects in Stellar already, you can go to the Recent Tab in the Projects Window to select from a list of previously opened/saved projects.
Project Comments
Files → Project ->Recent
Files → Project → Open
Click on the the project for which you want to add comments.
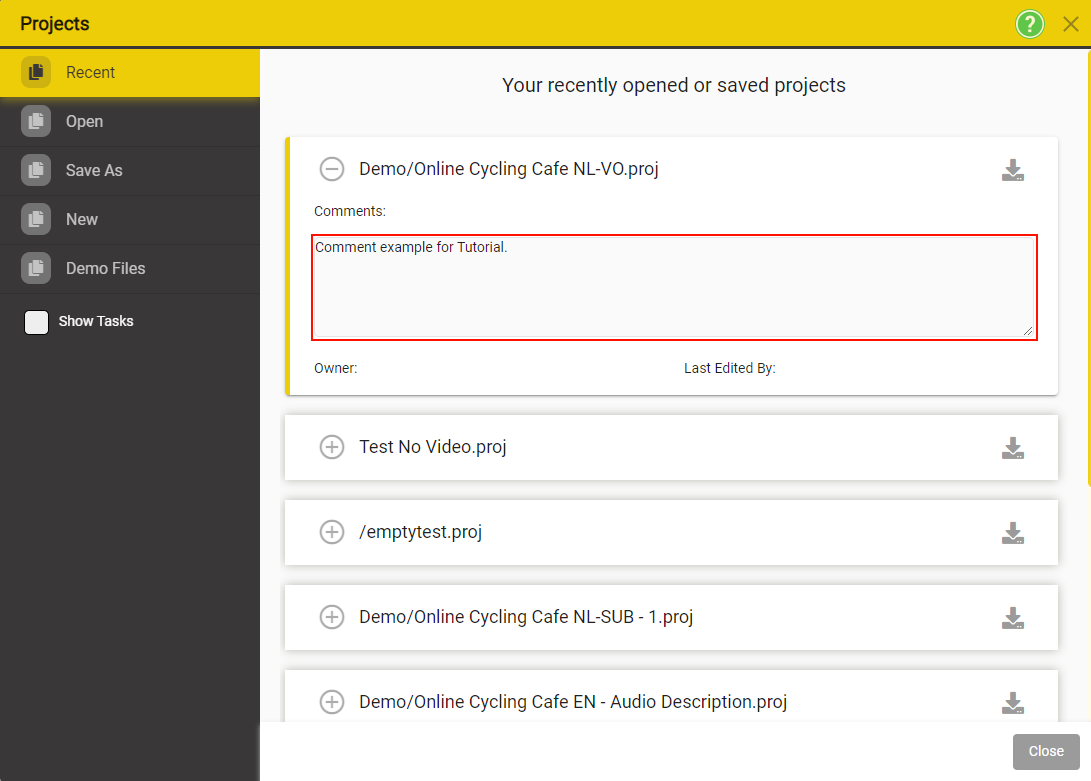
Add the comments in the Comments section. There is no need to press save, the comments are saved automatically.
Save As
Open the Project dialog as above,
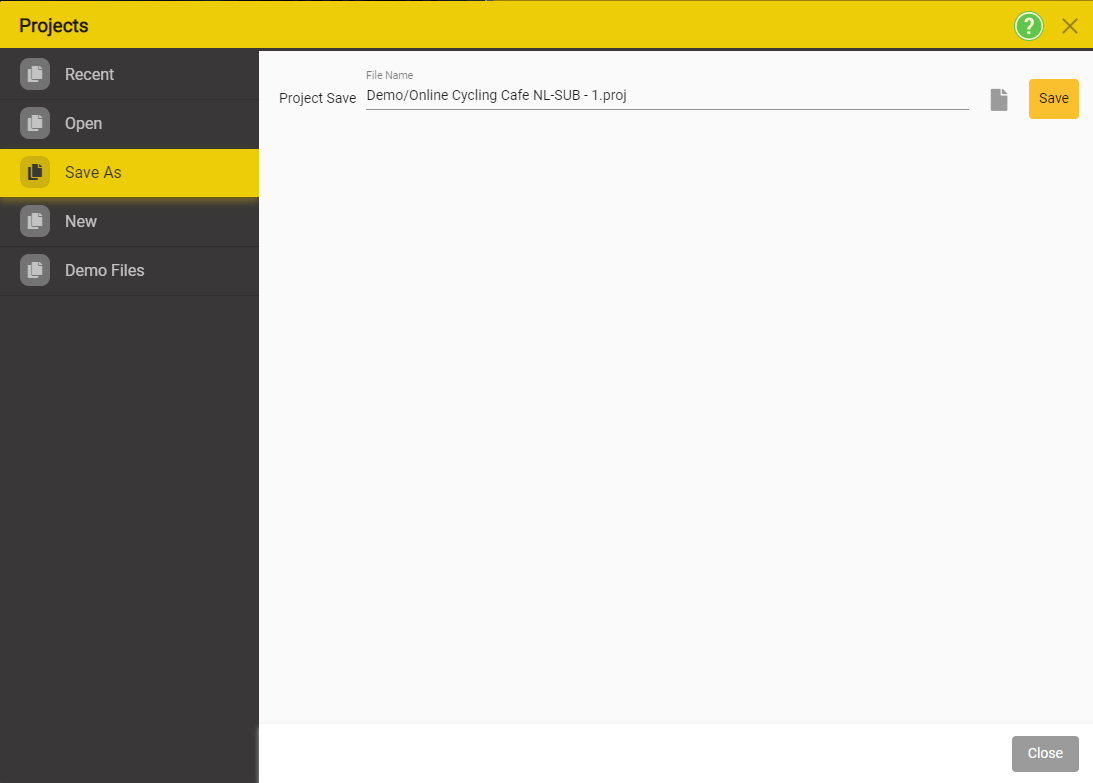
Then select Save As on the left hand menu.
Enter a file name and click Save.
NOTE: Save As only makes a copy of the Project file. All text, audio and media files referenced by the original Project are unchanged, and the new project references the same files
Click Close to remove the dialogue.