Export Text File
You can Export a text file from the current Project with or without a format conversion.
Text files include subtitle, caption, AD and Dubbing Scripts and other timed text file formats.
You can Export a file to any location visible on your PC or Mac.
You can select to Export all the contents of the file, then timing information without the text or just the text without the times stamps.
In the case of AD and Dubbing files you can export with or without the associated audio files.
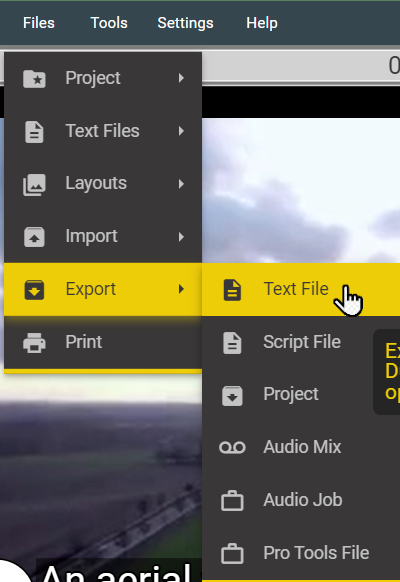
Files → Export → Text File
-
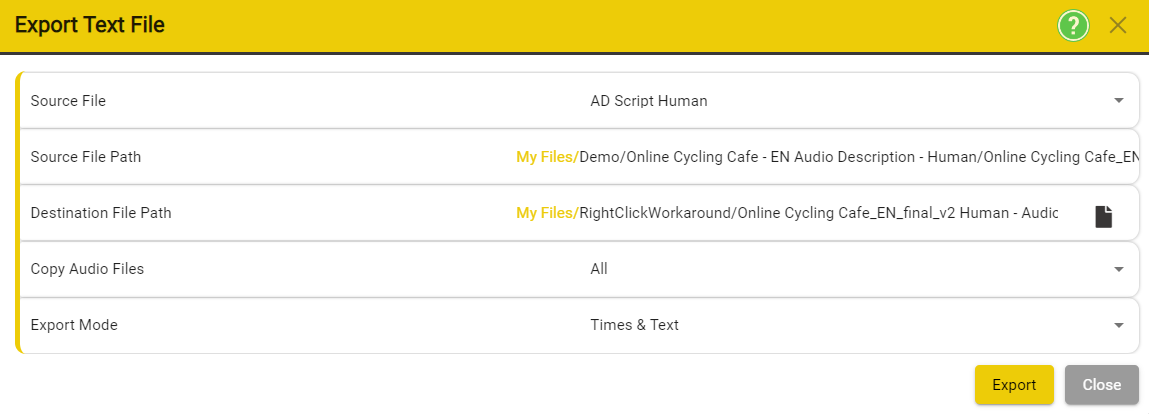
Source File – Select from one of the Text Files currently in the Project. Defaults to the currently selected column
-
Source File Path – Displays the path and filename of the file being exported. – This field is read only.
-
Destination file name – use the Browse button to set a file name, location and file type for the new file.
- The file name will default to be the same as the source file with ‘-copy’ appended
- The file type will default to be the same as the source file
- If you want to convert the file to a different type you can select between any of the supported file types.
-
Note: Not all file types support all styles and content types.
- Caption files don’t support italics.
- Many file types don’t support comments
- It is possible data will be lost in the conversion process.
-
Note: Not all file types support all styles and content types.
- If you want to convert the file to a different type you can select between any of the supported file types.
-
If the Source file is an AD or Dubbing file a new option will be visible:
- If selected any associated audio files will be exported
- If not selected only the script file (srtad, esf or srtad) will be exported.
-
Export Mode:
- Times and Text – the new file contains all the text and timing information from the source file.
- Times Only – The new file only contains blank subtitles. This is useful for creating a blank template when translating between languages
- Text only – the new file contains text subtitles but no times. – this is useful if a file needs to be retimed.
-
The new file will be stored in the selected location.
Export Audio Mix
Requires Audio Tools Plug-in
Your timeline has to be present in the project in order for the Audio Mixed to be able to work.
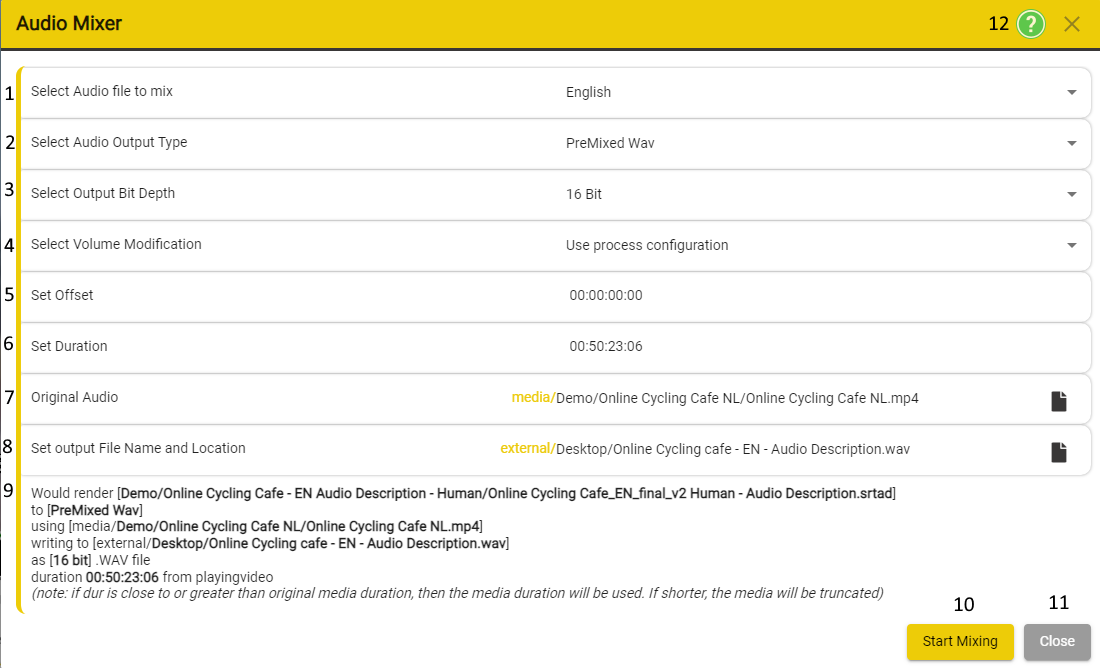
- Select Audio file to mix - Use the drop-down to select one of the currently loaded AD or Dubbing files.
-
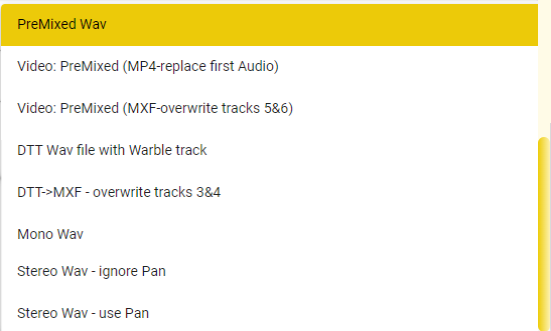
Select Audio Output type - Use the drop-down to select which output format you want to create.
| Output | Description | |
|---|---|---|
| Premixed Wav | — | An audio Wav file for the whole program containing the original program audio plus the AD audio mixed together and using the Fade levels set for each audio clip |
| Video: Premixed | — | Adds AD or Dubbing audio mixed in to the program audio to either an .mp4 or .mxf video file. In an mxf file the audio replaces any audio currently on tracks 5&6. |
| DTT Wav file with Warble track | — | An audio Wav file for the whole program containing just the AD audio in the format used for the UK DTT broadcast services. This consists on a mono audio track containing just the AD audio and a separate control (warble) track created using the Fade and Pan levels set for each audio clip. |
| DTT->MXF | — | Updates an MXF file with an additional pair of audios on tracks 5&6 containing just the AD audio in the format used for the UK DTT broadcast services. This consists on a mono audio track containing just the AD audio and a separate control (warble) track created using the Fade and Pan levels set for each audio clip. |
| DTT-MXF | — | overwrite tracks 3&4. |
| Mono Wav | — | An audio Wav file for the whole program containing just the AD or Dubbing audio. Any Fade or Pan settings will not be used in this format. |
| Stereo Wav – Ignoring Pan | — | An audio Wav file for the whole program containing just the AD or Dubbing audio with the same signal on both tracks of the stereo pair. Any Fade or Pan settings will not be used in this format. |
| Stereo Wav – With Pan | — | An audio Wav file for the whole program containing just the AD or Dubbing audio taking into account any Pan settings. Any Fade settings will not be used in this format. |
- Select Output Bit Depth: 16 or 24 bit
-
Select Volume Modification - The Audio Mixer allows user to change the Overall AD volume on output.
- Use process configuration.
- Volume unmodified - volume is not modified.
- Normalise to ( dBFS value) - applies a constant amount of gain to bring the amplitude to a target level.
- Decrease by (dBFS value) - decreases the volume by the selected dBFS value.
- Increase by (dBFS value) - increases the volume by the selected dBFS value.
- Set Offset - This option can be used to offset the starting point - Defaults to 00:00:00:00
- Set Duration - This option ca be used when you want to mix parts of the program, instead of the full program. - Defaults to the program length.
-
Original Audio - Select the original Audio File:
- Audio Description - select the file
- Program mix
- Specify the source program audio file.
- Must be a PCM Wav file - either 16 or 24 bit.
- File must be located in the Stellar Media Folder (…stellar\media) or a subfolder.
- If a video file is specified, then the audio track will be extracted to create a WAV file.
- If the output type selected is an MP4 Video, then you specify the original video file. The AD audio will be mixed into a new copy of the video file.
- Set output File Name and Location: Allows you to select the location and the name of the output file.
-
This area offers you an easy to read explanation of what the previously selected settings.
a - Full path to the file that would be rendered. - set at point 1
b - To the - Audio Output Selected at - point 2
c - Using the - file that was set up at - point 7
d - Writing to - path/name - set up at point 8
e - As - output that was set up at point 2 - with a Bit Depth of - set up at point 3
f - With a length of - duration set at point 6 - Start Mixing - starts the mixing process using the settings that are described at point 9.
- Close - closes the current window
- Help - opens the Audio Mixing process Help page

Once you have your chosen your export settings, press Start Mixing.
When the process has finished you can click Open File Location to find the exported .zip file.
Export Audio Job
An Audio Job consists of the script file (srtad, esf or srtdub) and any associated audio files (wav) combined in a single Zip file.
Tools → Audio Tools → Export Audio Job
Or
Files → Export → Audio Job
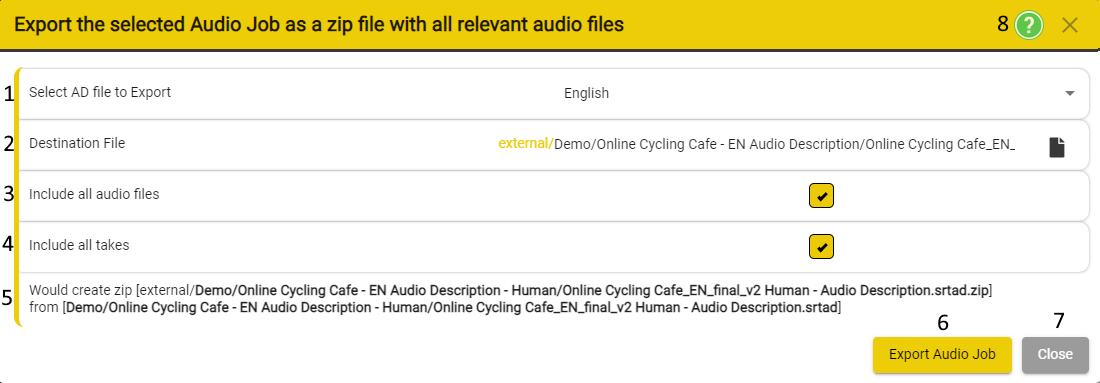
- Select AD file to Export - Allows you to select which AD file you want to export. This will default to the first AD or Dubbing file in the current Project (normally there would be only be one).
- Destination File - Allows yo to set the Path/Name of the exported file.
-
Include all audio files :
- Checked by default - All audio files will be included in the Audio Job Zip export.
- Unchecked - Another UI element will appear under the Include all audio files element

To select the date, press on the Calendar icon in the right side. This will open the Calendar an allow you to search and input the correct date.
Only the files that were recorded after the selected date will be included in Zip file. This feature is useful when you are required to send updates, rather than the entire project.

-
Include all takes
- If checked it will include all the Takes in the Zip File, even the ones which are marked as muted.
- If not check, only the Takes which are active / market as unmuted will be included in the Zip File.
- This area gives an explanation about how the previously set settings influence the Export Audio Job process.
Once you have your chosen your export settings, press Export Audio Job. A pop-up will appear which will inform you how much this action will cost. You can proceed, or choose to cancel this action.
When the process has finished you can click Open File Location to find the exported .zip file.
Export Pro Tools File
Stellar offers the option to Export to a Pro Tools file - A Pro Tools Project consists of the audio files (wav) and associated metadata combined in a single .ptx file. This is the best method of exporting audio and timing information from Stellar to Pro Tools.
File → Export → Pro Tools File
Or
Tools → Audio Tools → Export Pro Tools File
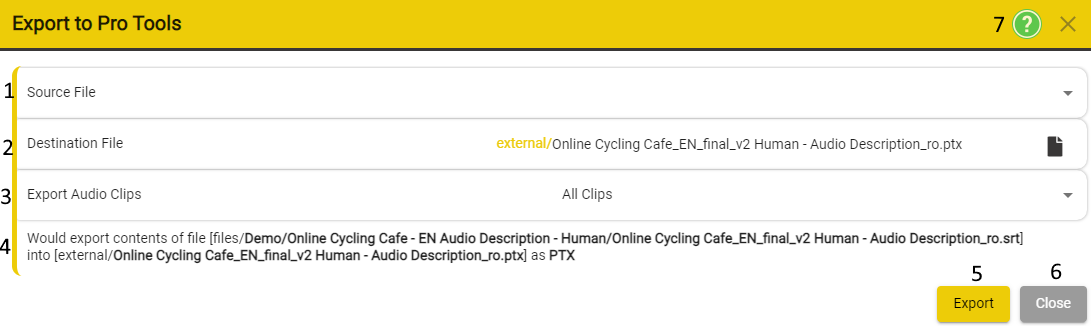
- Source File - Allows you to select the file that will serve as a source for the Export process.
- Destination File - Allows you to set the path/name of the exported file.
-
Export Audio Clips - Two options can be selected from the drop-down menu.
- All Clips – will include both enabled and disabled/muted Takes
- Active Clips will only include active/unmuted Takes
- This area gives an explanation about how the previously set settings influence the Export Audio Job process.
- Export - Starts the export process using the details from point 4.
- Close - Closes the export window.
- Help - Opens the coresponding help page.
Once you have your chosen your export settings, press Export to Pro Tools. Depending on the size of the project, it might take several seconds. The State element will contain information on the progress of the export process.
Export a Script File
Create a copy of a subtitle file, AD or Dubbing script in a spreadsheet format.
The default format is compatible with Netflix requirements.
All Spreadsheets are output in CSV format that is compatible with all spreadsheet an other text editing systems.
To convert to a specific spreadsheet format (E.G. xls or xlsx) open the csv file in Excel and Save As the required format.
Files → Export → Script File
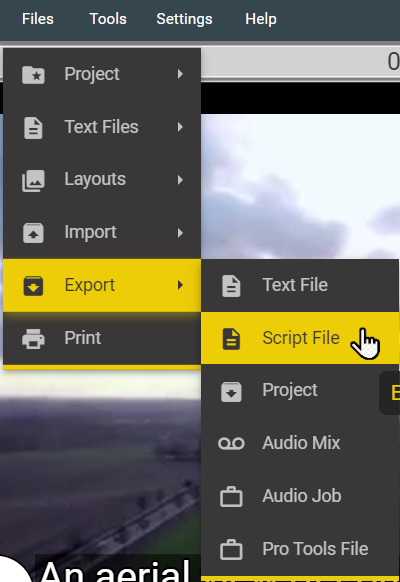
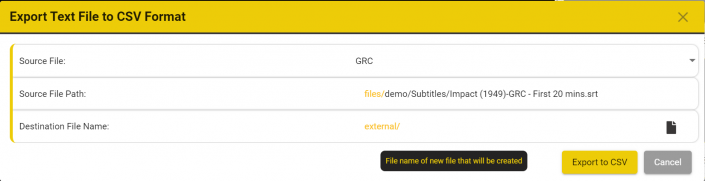
This will open Export Text File to CSV Format
-
Source File – select which file in the current Project to export as a spreadsheet.
- Defaults to the current file if more than one present in the Project.
- Source file name – shows the file name of the selected file – read only.
-
Destination file name – set the output file name and location.
- use the browse button to find the right folder.
- Export to CVS button – complete the output.
- A confirmation box will pop up with the option to open the output file location.
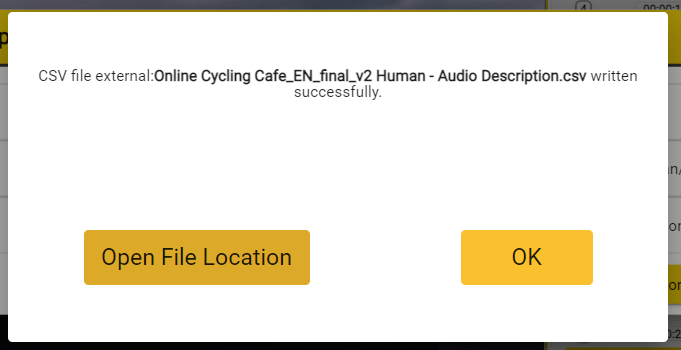
Open File Location - to open the path where the .csv file was saved.
Ok - to close the window