You can Drag and Drop any supported text file format into a Project, or create a new blank Project.
Add to current Project.
- Drag the file and drop it into the text editor (text column) area.
- A new copy of the file will be added to the folder used by the Project for text files
- The file will be added to the current Project
- The title of the new file in the column tab will be the source file name
- You can edit this by clicking on the name in the top tab.
Open the text file in a new blank Project – Ideal for quickly viewing or editing a text file on it’s own.
- Shift+ Drag and Drop the text file into the text editor (text column) area.
- A new copy of the file will be created in the Stellar\Files folder
- A new blank Project will be created and a the text file added to it.
Note: You can Drag and Drop multiple files in one go.
Selecting a File
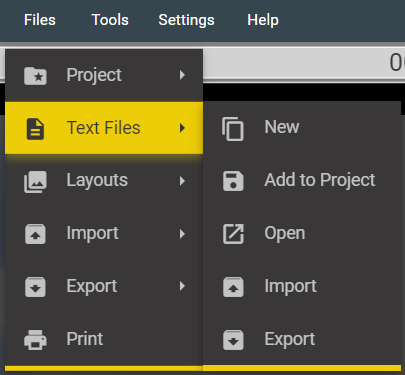
Files → Text Files
-
New – Create a new Text file in one of the supported formats and add it to the current Project
-
Add to Project – add an existing Text file from the Stellar\files folders to the current Project
-
Open – Open an existing Text file from the Stellar folders in a new blank Project.
- This is useful if you just want to take a quick look at a number of text files.
-
Import – Bring in a Text file from outside of the Stellar folders, convert to a different file format (optional) and add it to the current Project
- Note: a new copy of the file will be made inside the Stellar Folders
-
Export – Create a copy of a Text file in a new External location – optionally, convert to a different file format.
- Note: a new copy of the file will be created in the specified location. The original file remains in the Internal file location and is unchanged.
An Alternative way of adding and removing files is to:
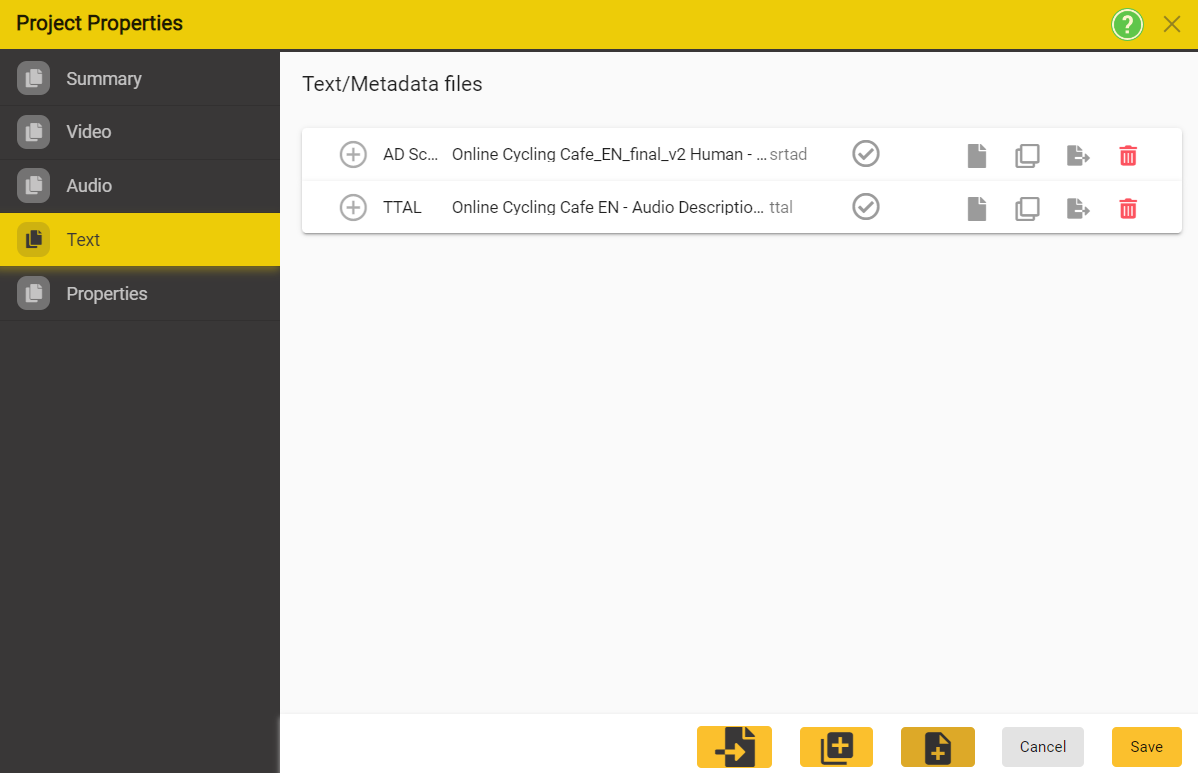
Open the Project Properties dialog as above,
and select Video, Audio or Text on the left hand list depending on which category of file you want to Add, Edit, Remove or Duplicate.
Text Tab
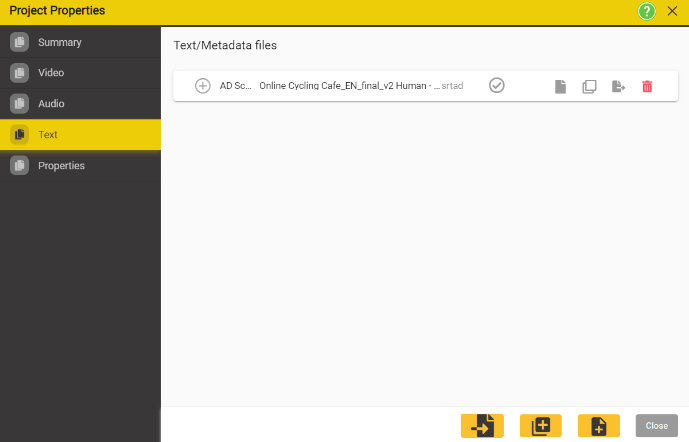
All the files in the chosen category currently in the Project will be listed.
To create a new empty file and add it to the Project
Click on the Add New Button ![]()
This will open the File Browser
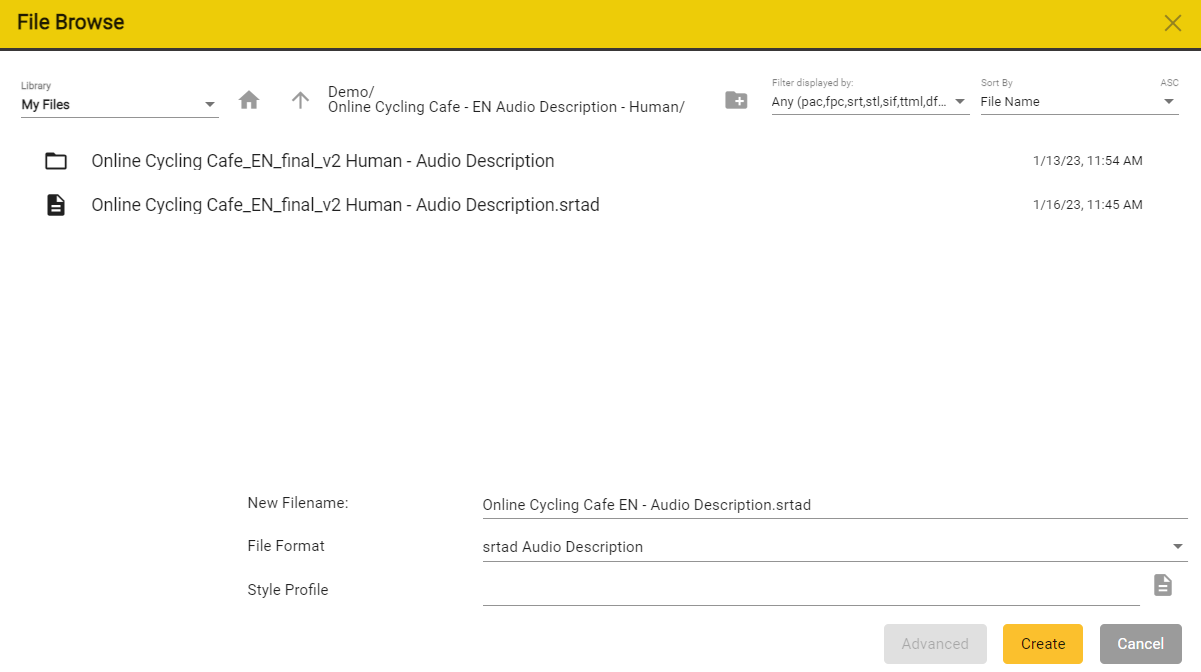
- Either enter an new name or select an existing file name and modify it
- You can use the Filter Display to limit the display to files of a specific type or types.
- Use the Create File As selector to define what type of subtitle, caption, AD or Dubbing file you want to create.
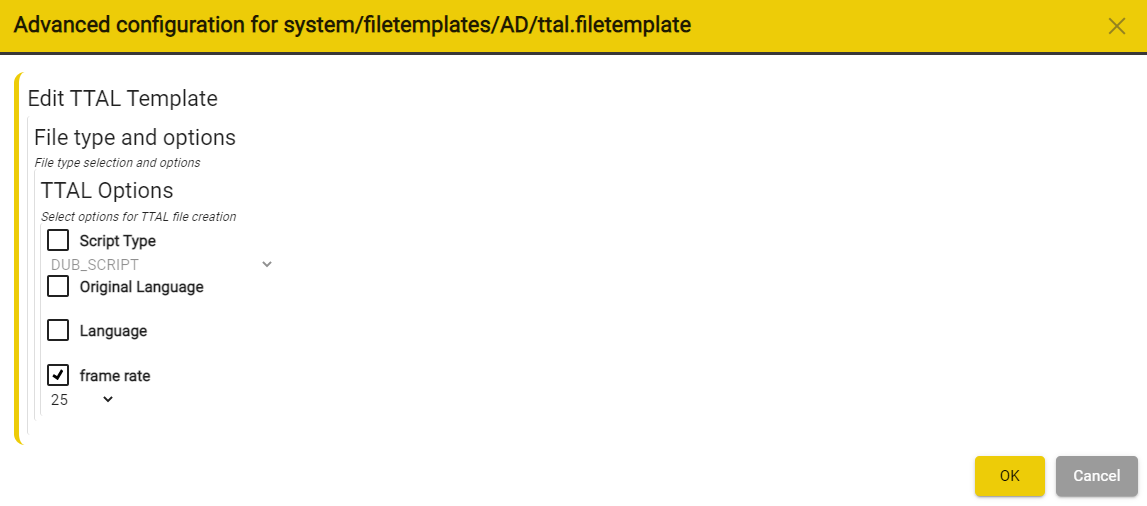
For some file formats, such as TTAL AD/Dub - the  button will be active.
Clicking on it, will allow you to open the Advanced Configuration Window.
You can also set the Style Profile that you want to be applied to this new file.
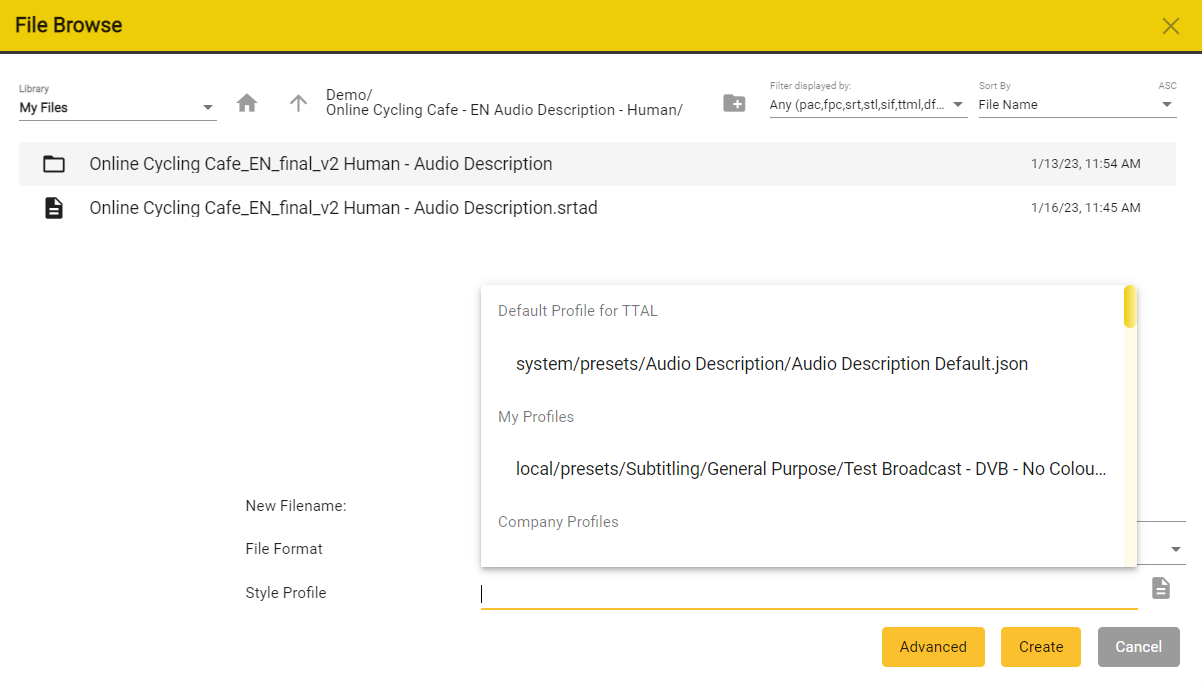
When you are happy with the options you have selected, press on Create.
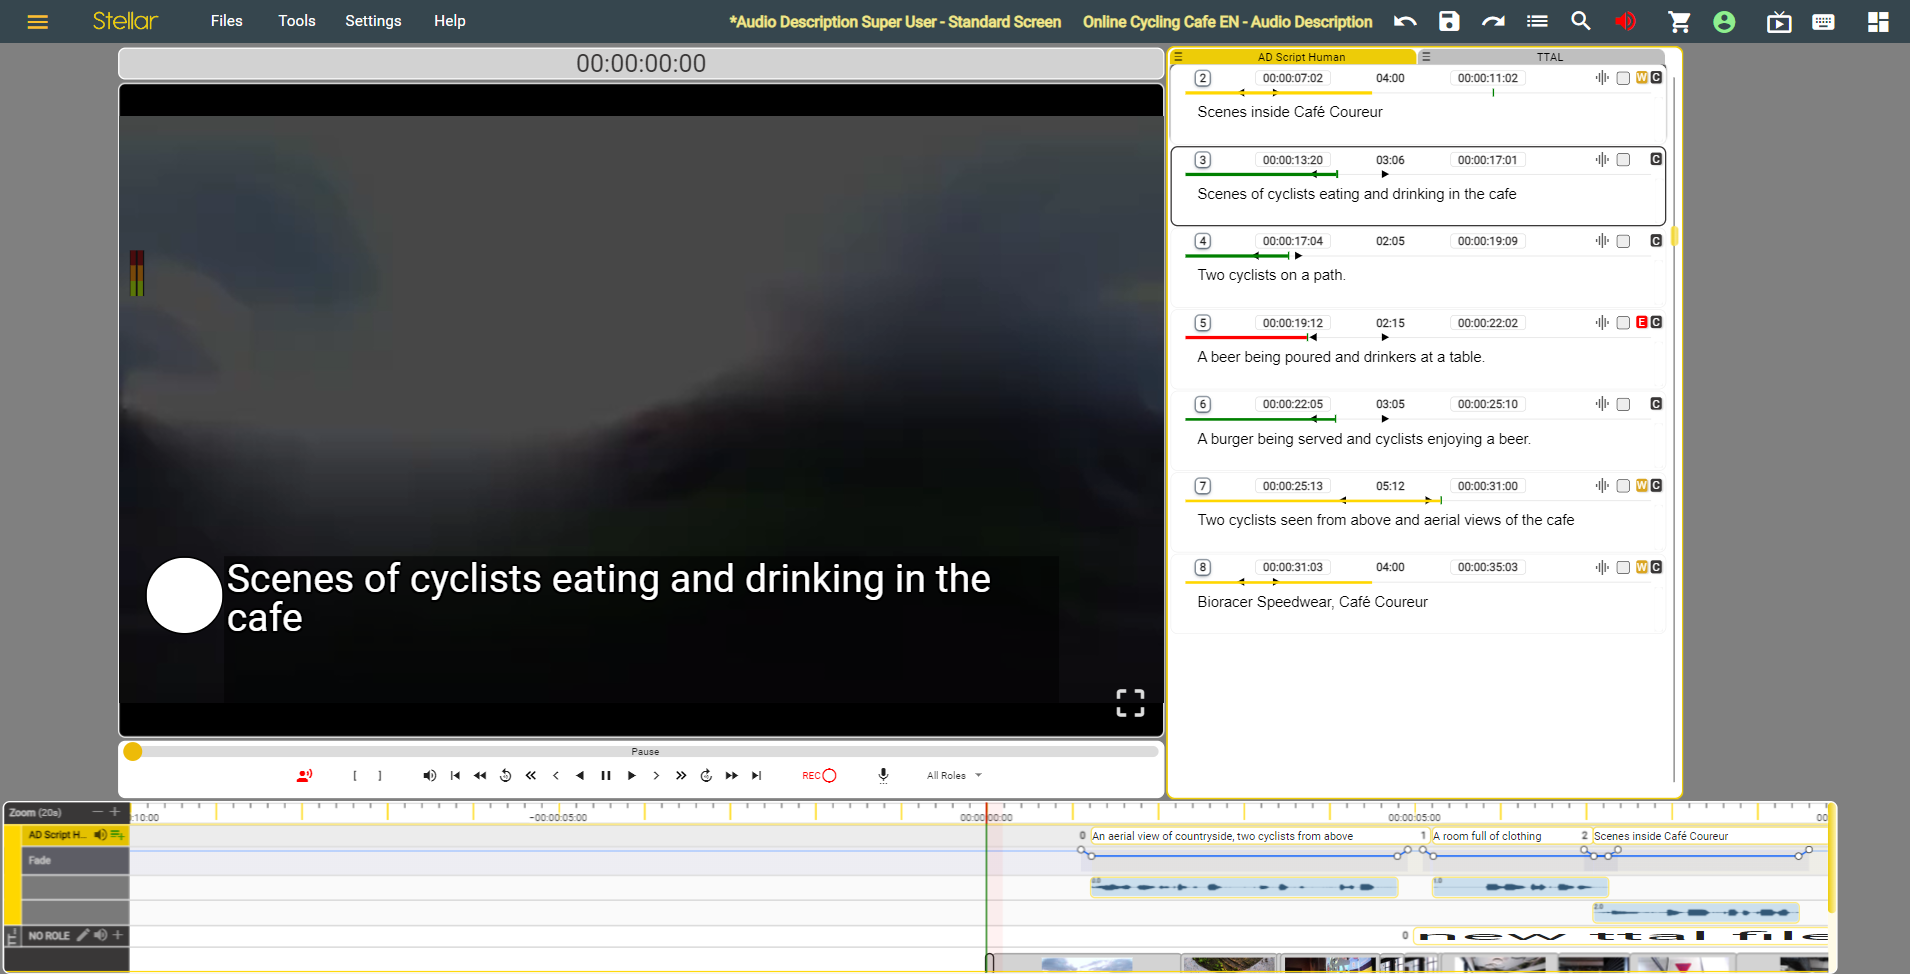
The new file will appear in the list.
Press save to go back to Stellar.
The file will now appear in the Timed Text Editor.
Add Existing File
Click on the Add Existing button 
This will open the File browser:
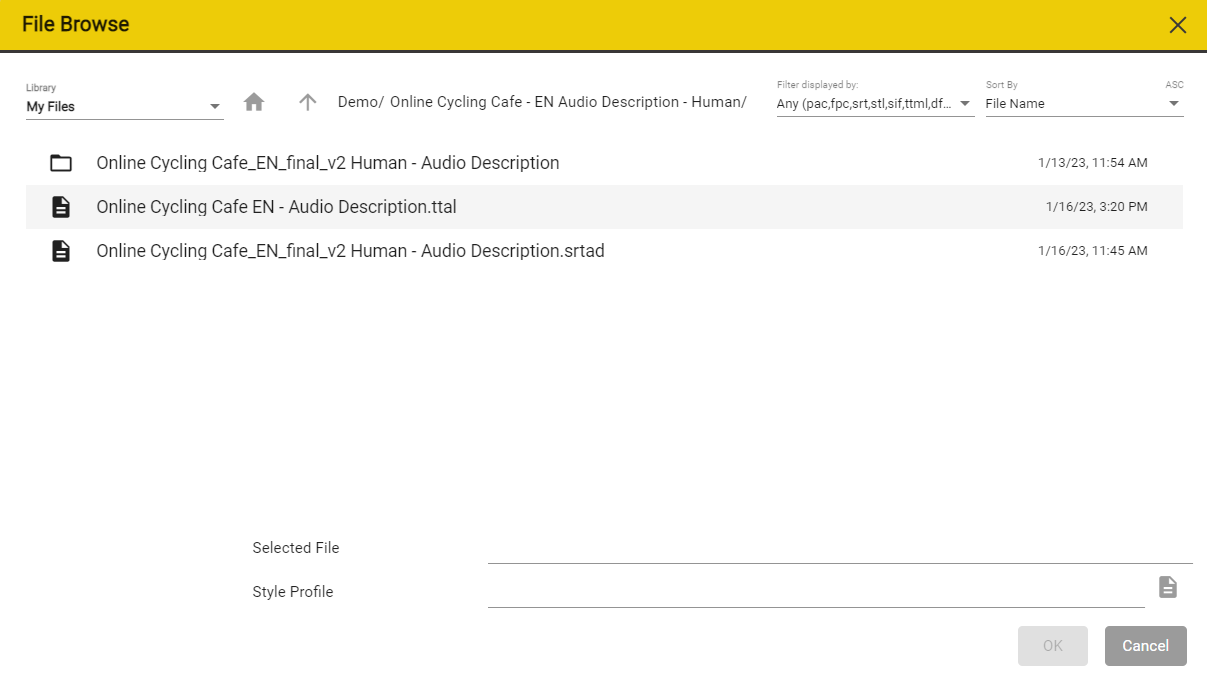
- Browse to find the file you want to add to the Project

- You can use the Filter Display to limit the display to files of a specific type or types.
- And the Sort control to sort the files by name or modified date
- When you add a text file to a Project you can also select a Style Profile – this sets the editing and QC rules for the file, including line length, reading speed etc.
- Click on the browse button to select a Style Profile
- Click Ok

Import an existing file to the Project
When Importing there are two main differences to just adding an existing file:
- You can access files outside of the Stellar internal folder area.
- You can convert between file formats.
See Importing Text Files for full details.
Replace an Existing File
Click on the browse button next to the file you want to replace then browse to the required location and select the file to use instead and click OK.
The file is now added to the current Project in place of the previous file. (See above to add an additional file to the Project)
- other details like comments and the Style Profile selected are unchanged.
Remove a File from the Project
There is a red Bin button on every file line. Clicking on the button will remove the file from the Project.
This will pop up a dialog with the options to either:

- Remove the file from the Project but leave it on disk
- Remove the file from the Project and delete it from disk
- Cancel to not delete the file.
- HINT: Use Shift and click on the Bin button to remove from the project without the confirmation pop-up.
Drag & Drop
You can Drag and Drop any supported text file format into a Project, or create a new blank Project.
Add to current Project.
- Drag the file and drop it into the text editor (text column) area.
- A new copy of the file will be added to the folder used by the Project for text files
- The file will be added to the current Project
- The title of the new file in the column tab will be the source file name
- You can edit this by clicking on the name in the top tab.
Open the text file in a new blank Project – Ideal for quickly viewing or editing a text file on it’s own.
- Shift+ Drag and Drop the text file into the text editor (text column) area.
- A new copy of the file will be created in the Stellar\Files folder
- A new blank Project will be created and a the text file added to it.
Note: You can Drag and Drop multiple files in one go.