Files Summary
Files → Project → Properties
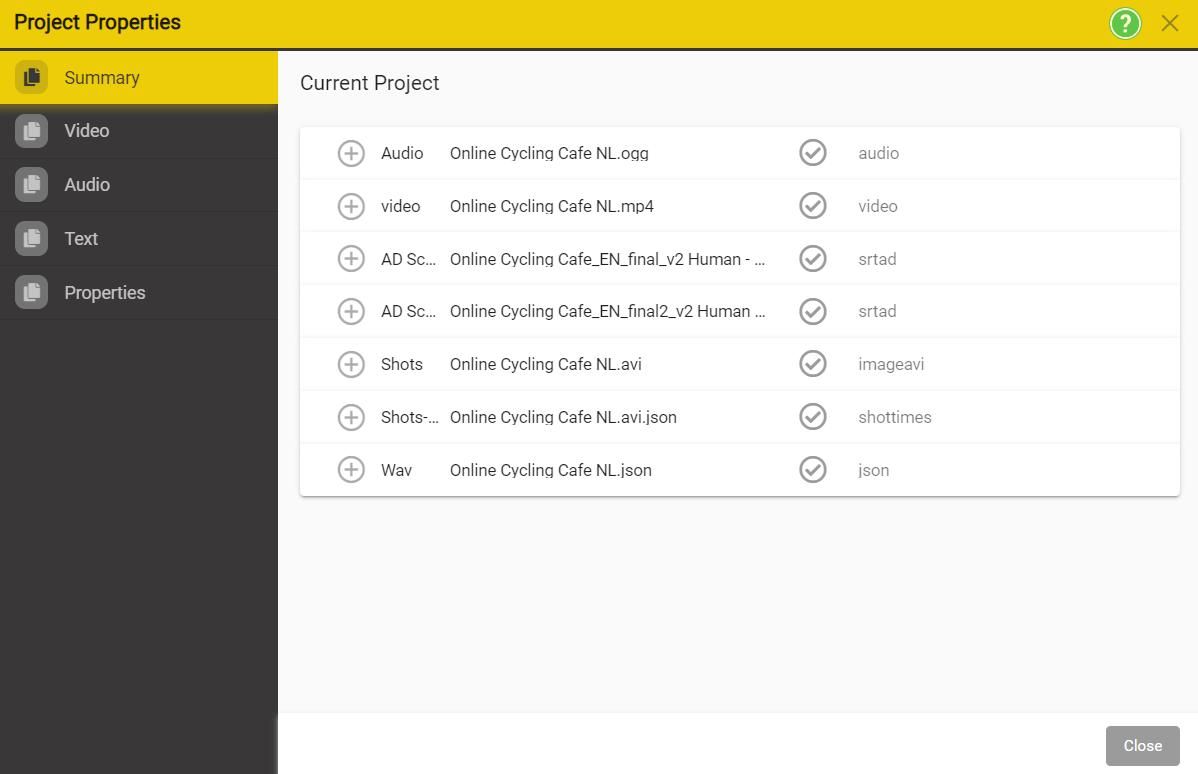
The dialogue shows a summary of all files of all types contained in the Project.
File Types
Files are divided into three categories Video, Audio and Text and each of these categories can contain files of different types.
Video
- Video file – one per Project – MP4 format – transcoded from all other video formats by a Nebula Process.
- Shot Change file – one per Project – .avi format – created by a Nebula Process.
- OCR Image file – .avi format – contains images of the OCR (text detection) process that is used to find text in the video images.
Audio
- Audio file – any number per Project – .ogg format – created by a Nebula Process – used for second audio tracks or for audio scrubbing.
- Waveform file – any number per project – .json format – created by a Nebula Process – used to display an audio waveform on the Timeline.
Text
- Subtitle files – any number per Project – a range of subtitle and caption formats supported (srt, stl, pac, fpc for full editing, other types for read only or limited editing) See Importing Text Files for more information.
- Transcription files – any number per Project – .json format containing a timed word list – created by a Nebula Process.
- Audio Description files – any number per Project – .ESF or .srtad formats – Associated .wav files are loaded automatically if present.
- Dubbing Scripts – any number per project. – .srtdub file format only. – Associates multiple audio files to each Line in the script. Supports multiple Roles, multiple audio Takes and individual word timing for audio adaptation (lip sync).
- Pain timed text any number per Project – .srt format- timed text without subtitle formatting.
- Timed word list files (transcripts) – .json format – often the output of ASR (Speech to Text).
Text files are grouped into two types
Internal
- Internal files are formats that are supported directly in Stellar. You can open and edit these formats without any conversion.
- This is a large benefit when editing existing files as it removes all risks that the input and output conversion may make unexpected changes to the file.
- These are the types that can be edited within Stellar.
- Subtitles – STL, SRT, PAC, FPC & IMSC-Rosetta
- Audio Description – ESF or SRTAD
- Dubbing – SRTDUB & TTAL
External
- All other file types can be convert to and from one of the internal file formats
- External formats include:
- DXFO, VTT, CAP, SIF, .890, XML, TTML, TDS, SMI, SUB, ULY, ITT and others
Full list of formats can be accessed here Supported File Formats
File Locations
There are Two configurable File Locations for Stellar:
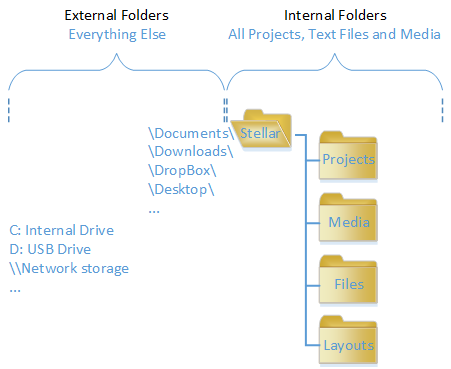
Stellar Internal Folders
- All files, Projects, media and configurations are stored in a specific location on you PC or Mac.
- All media (video, audio etc.) MUST be in the Stellar/Media folder or a sub folder
- All text (subtitles, captions, transcripts etc.) and AD files MUST be in the Stellar/Files folder or a subfolder
- Each AD or dubbing file (srtad, srtdub or esf) MUST be in a separate subfolder to keep all the associated audio wav files in the same place and separate from other AD files. Otherwise it’s very easy to get the wav files from different AD Projects mixed up.
- The location is set as part of the Stellar Process in Nebula and is fixed, the default is your Documents folder: Documents/Stellar.
- When Opening a Project or adding a file to a Project you are limited to this Stellar folder and to sub folders of it.
- We do this to keep the files all in one place and help you organise your work.
- For example, if some files were stored on external drives or pen drives then if these were removed a Project would be broken.
- WARNING: Do not move or rename files or Folders within the Stellar folder or its subfolders. Doing so may Break any Projects containing those files or folders.
External Folders
- External Folders are used when you are Importing and Exporting files, audio jobs and Projects.
- In these cases you will be able to browse to the External Location configured.
- External can include any location on your PC or Mac, any network drives accessible from your machine and file sharing systems like OneDrive and Dropbox.
- Note: It is possible that the range of External locations you can access has been restricted by your System Administrator.
Creating new folders
- Whenever you are setting the location for a new file in Stellar (Save As) then in the top of the file browse screen you will see a New Folder icon. * Click on this to create a new subfolder of the current folder.

Folder Shortcuts
You can create Shortcuts to any folder on any storage location accessible to your computer.
Using Shortcuts
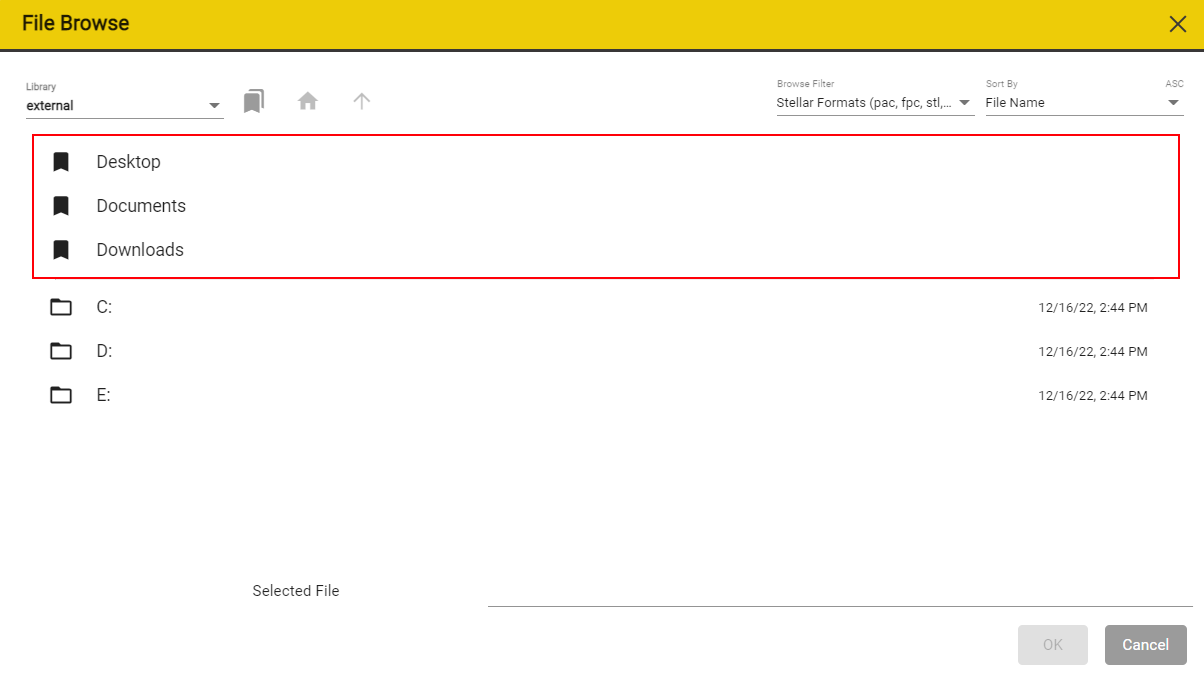
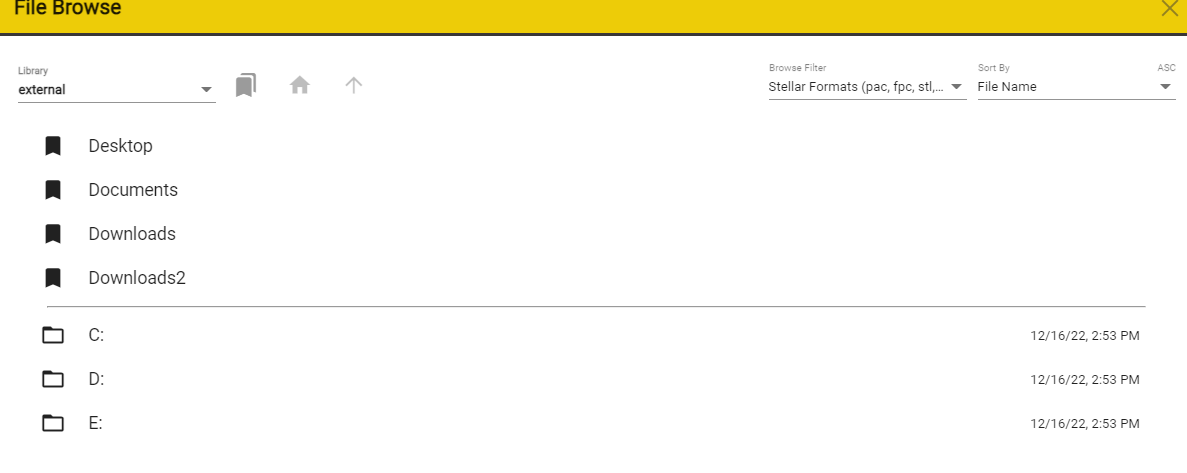
Whenever you open the File Browser you will see any existing shortcuts at the top of the dialog.
Click on the Shortcut to jump to the folder location set by the Shortcut.
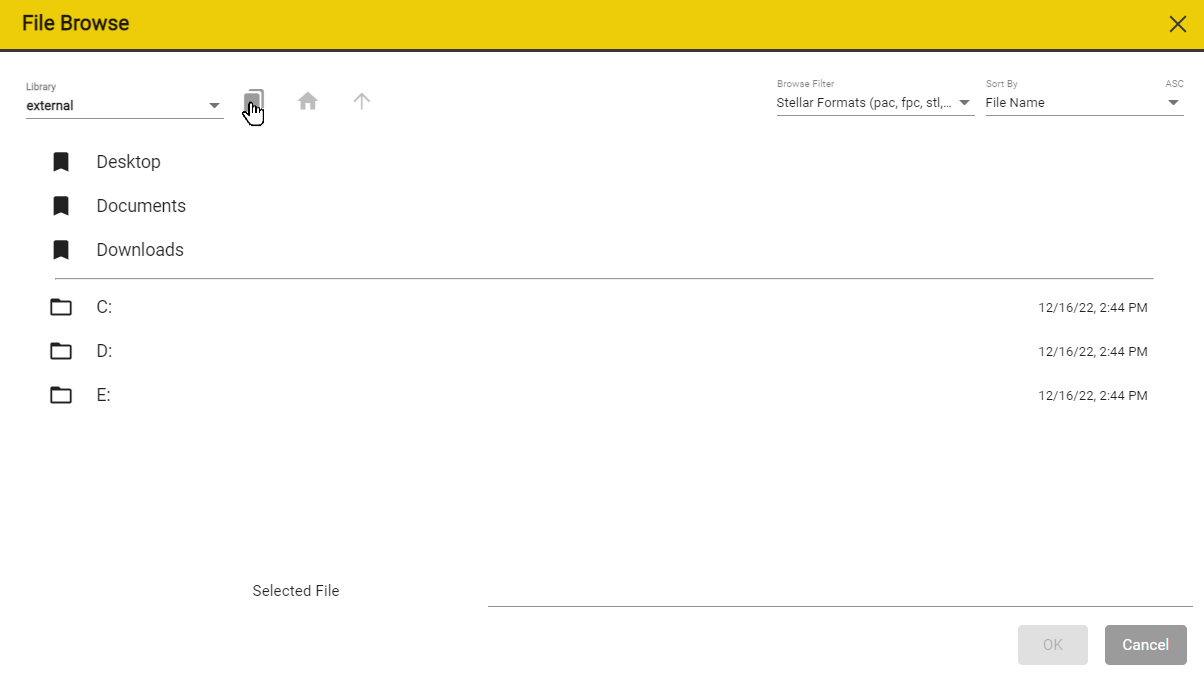
Creating a Shortcut
Create a new Shortcut by browsing to the location you want and clicking on the ![]() button to open the New Shortcut dialog.
button to open the New Shortcut dialog.
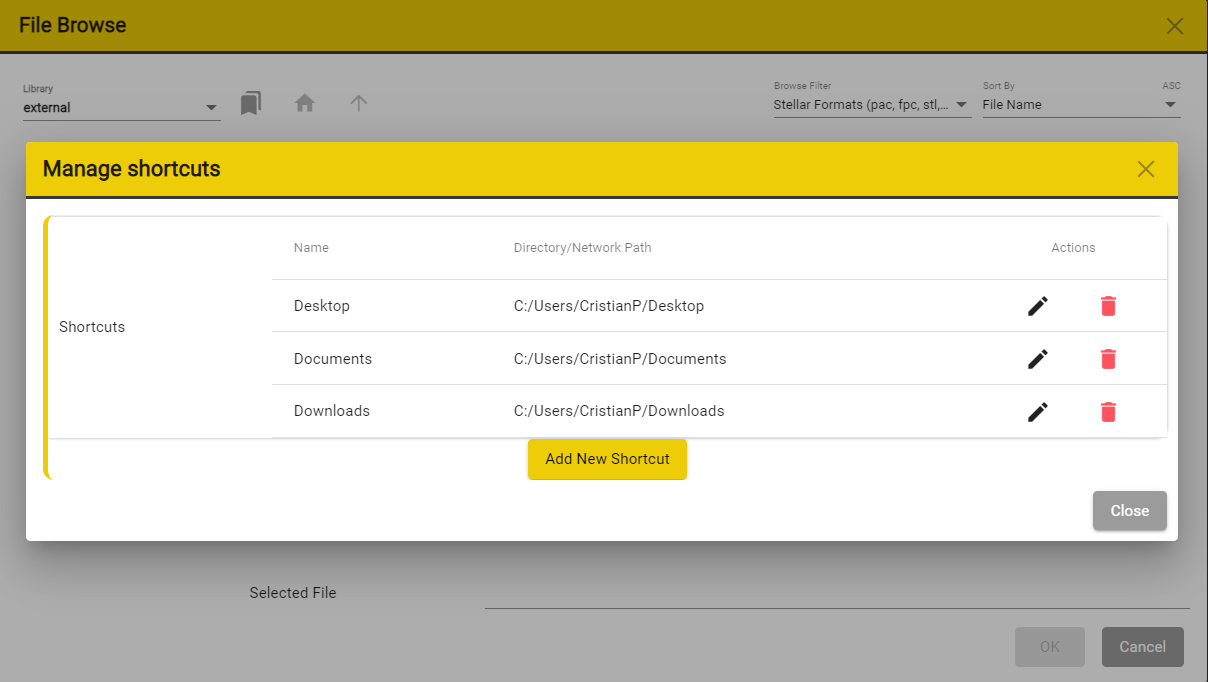
Click on Add New Shortcut
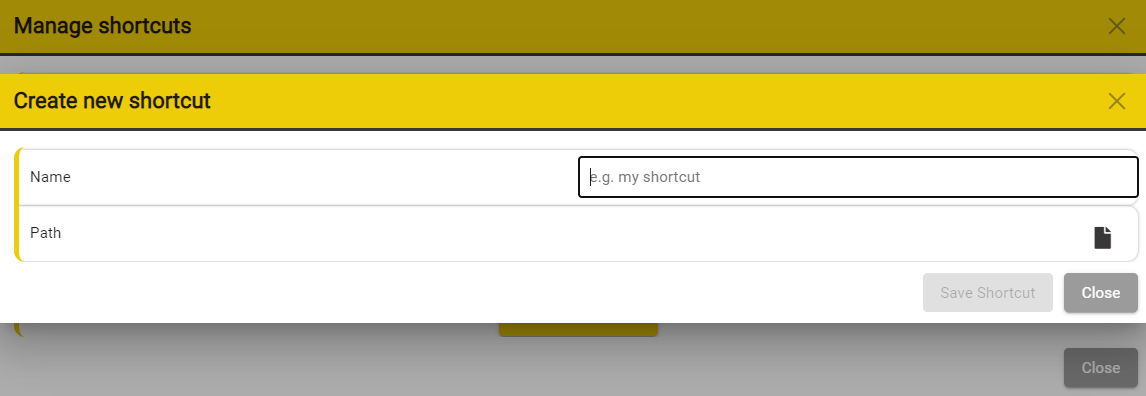
Add the Name for you Shotcut.
Use the File Icon to navigate to the Path that you want your shortcut to direct to. Select the folder and then press OK.
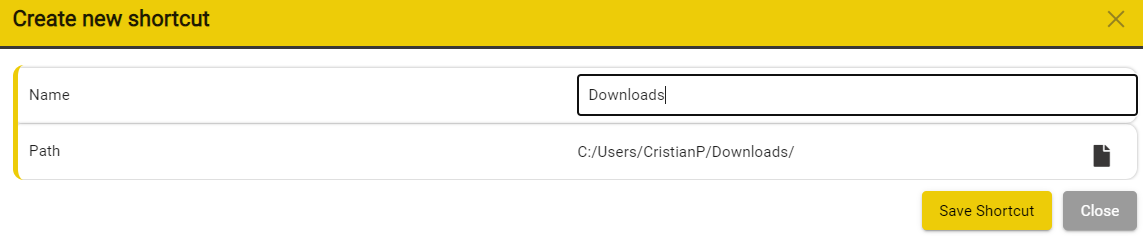
On the next window, Save Shortcut.
The shortcut will appear in the list.

You can edit a Shortcut by pressing on the Pencil Icon corresponding to the shortcut that you want to edit.
To delete a Shortcut, press on the red Trashcan Icon.
To exit, press Close or X. The new Shortcut will appear in the Shortcut List in the File Browse Winwdow.
Changing File Locations (Advanced)
To change the path for either the Stellar Folders or the External Folders you will need to change the Settings for your copy of Stellar. This is a systems level setting and would normally be set for you. Changing either of these settings could mean that folders and work you have been using are no longer visible to you so proceed with caution!
The Default locations are:
Stellar Folders: ~/documents/Stellar – this will put all your Stellar files in a subfolder called Stellar within your normal Document section.
External Folders:
- The default setting for External Folders is blank, this allows access to all folders and external devices attached to your computer
- If set to ~/ – this makes all of the User folders on your Mac or PC visible but not the systems area.
- If set to specific location, this prevents you accessing any other locations when browsing in the External library
To change the Locations:
- Open the Device page.
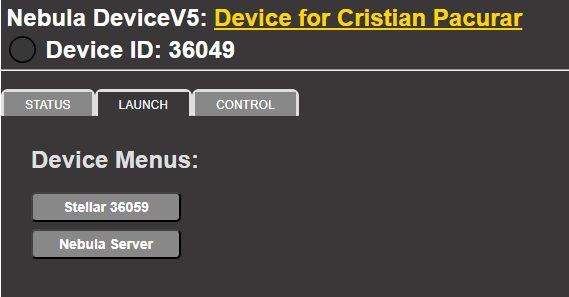
- Click on the Nebula Device Link at the top of the page (the name will be different)
- This will open Nebula to show your device.
- You may need to log in to Nebula first using the credentials supplied in your original email (unless you have changed them since)
- Expand the Device and the Project sections using the + icon on the left of the name
- Locate the Stellar Application (the name may be different)
Click on the cog wheels icon ![]() to expand Device and the Project sections.
to expand Device and the Project sections.

In the left side, click on the Digit/Running icon  .
.
This will expand the full process list for that device.
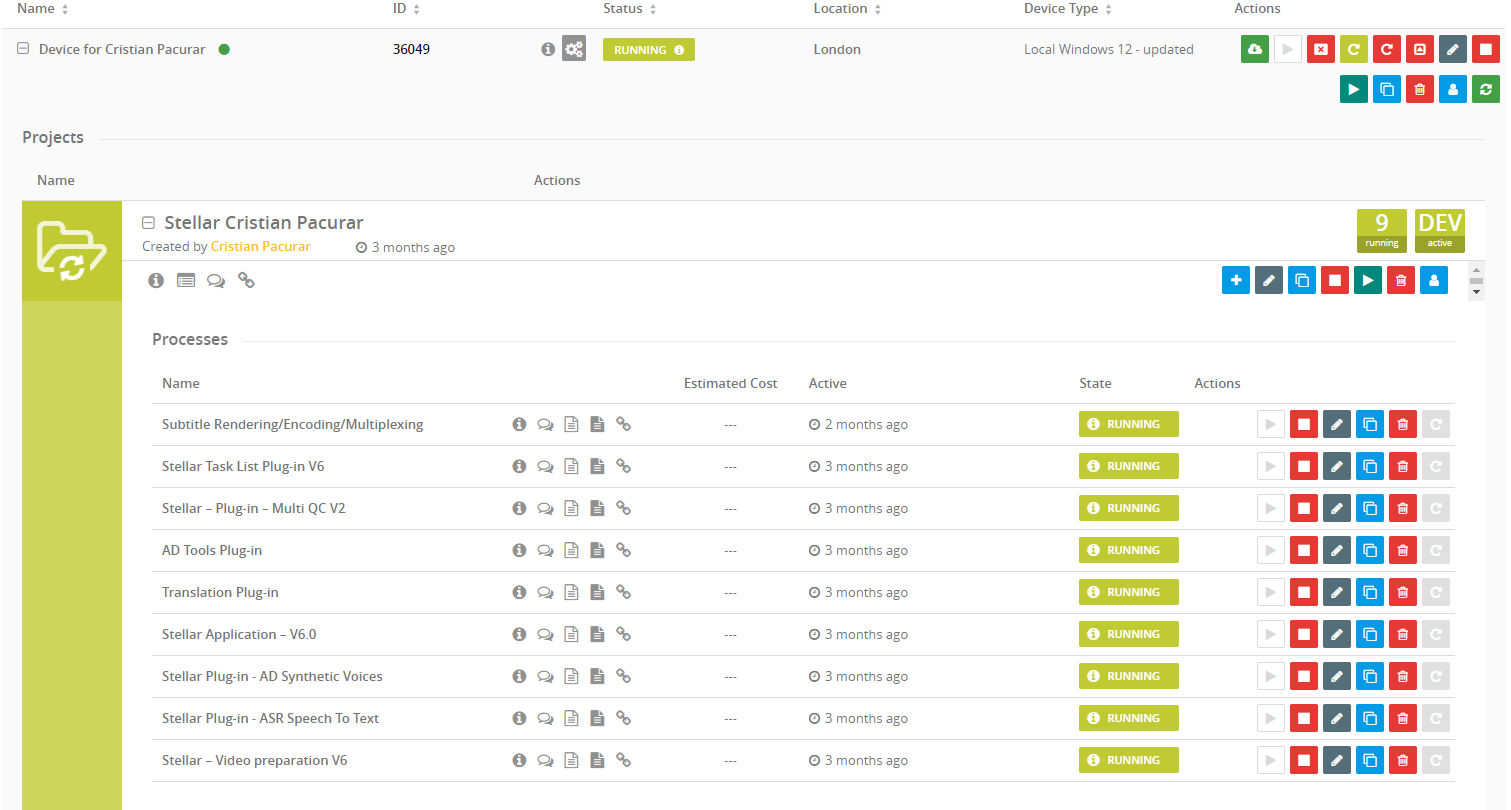
Locate the Stellar Application VX.xx - the Version number might differ for you.
Press on the pen icon ![]()
This will open the Configuration Window.
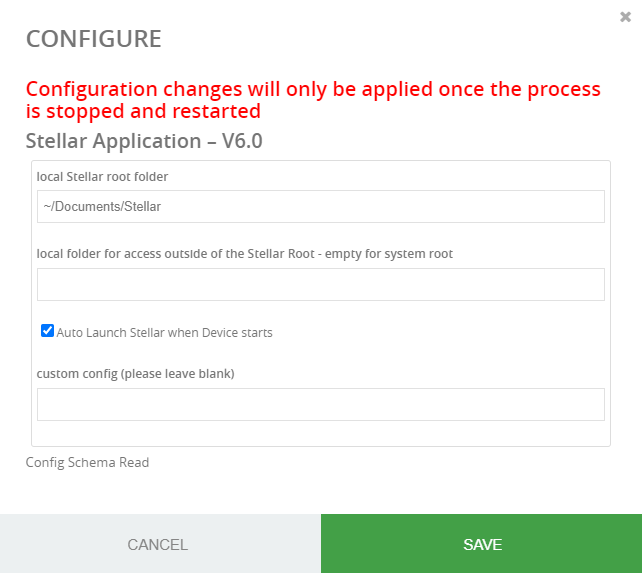
Local Stellar Root Folder - Will set the Stellar Folders Path
- All other sub folders (Media, Projects, Files etc.) will be subfolders of this.
- Other entries can be left blank unless you want to customise the subfolders
Local folder for access outside of the Stellar Root:
-
External Folders path and can be any valid path visible to your PC or Mac. ( for example D:/)
-
Click Save
-
The paths visible within your version of Stellar have now been changed.
Note: In file paths use / not \ as this is compatible with all operating systems.
Properties
Open the Project Properties dialog as above,
and select Video, Audio or Text on the left hand list depending on which category of file you want to view.
Or right click on the column tab and select Project Properties.

All the files in the chosen category will be listed.
Click on a file item and the line will expand to show the Properties for the selected file type. The Properties shown will vary depending on the file type but most include:
-
Display Name – the description displayed in Stellar at the top of the text column and on the timeline.
-
Comments – a user comment section for your notes about a file, this can be expanded if required.
-
Editable – Sets the level of editing permitted for this file.
- Default All
- Options:
- All – Full editing allowed
- Times only – use when adjusting the timing or conforming a file so the user can’t edit the text by mistake
- Text – Only text content and comments (but not Insert, Delete, Split or Merge) – ideal for translators working from a template
- Times and Text (but not Insert, Delete, Split or Merge) – limits the level of editing available
- Text, Style and Position – allows more control over text styling and position but still prevents other edits (but not Insert, Delete, Split or Merge).
- Comments Only – Great for getting feedback from clients.
- Read Only – no editing at all.
-
NOTE: This control interacts with the Subtitle Widget editability setting – The most restrictive setting applies.
-
Protect Text
- You can additionally set the Protect Text switch to On.
- If text editing is allowed by the Editable setting, then the Protect Text option ads an edit pencil to the text editor box. This is useful if you want to prevent accidental text edits, but still make edits possible. Ideal for protecting a Template subtitle file, or a dubbing script during recording.
- If text editing is allowed by the Editable setting, then the Protect Text option ads an edit pencil to the text editor box. This is useful if you want to prevent accidental text edits, but still make edits possible. Ideal for protecting a Template subtitle file, or a dubbing script during recording.
- You can additionally set the Protect Text switch to On.
-
Type – a type for the file that tells Stellar how to handle the data in the file
-
Library – The Library location for this file.
-
File – the path and name of the File.
-
Offsets – time offsets for aligning the start time of different files. – See Set Video Timecode for more information.
