Audio Description
How do I set up Stellar for AD
When you first start Stellar you will get a default Layout loaded. The layout sets how the screen looks and what controls and tools you have available. Because Stellar can be used for a wide rant of work it’s important that you load a suitable layout and a number of default Layouts have been provided.
Settings → Settings Layouts → Settings Layouts Load
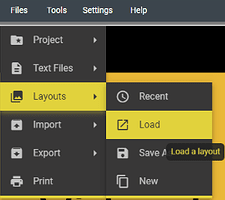
This will open the Layouts Window.
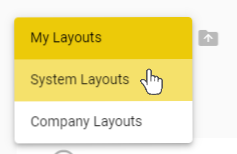
Click on the Layouts Library Dropdown list.
![]()
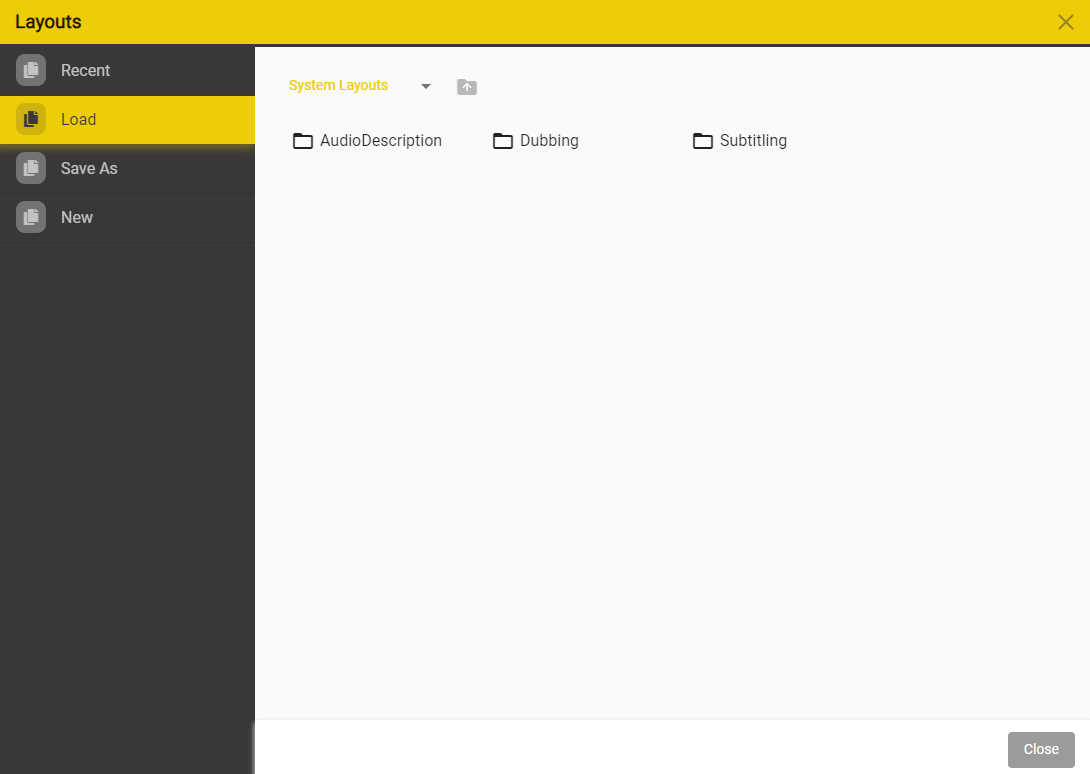
Select System Layouts
Select AudioDescription - this will open the Subtitling Layout list

Decide on a Layout depending on your needs.
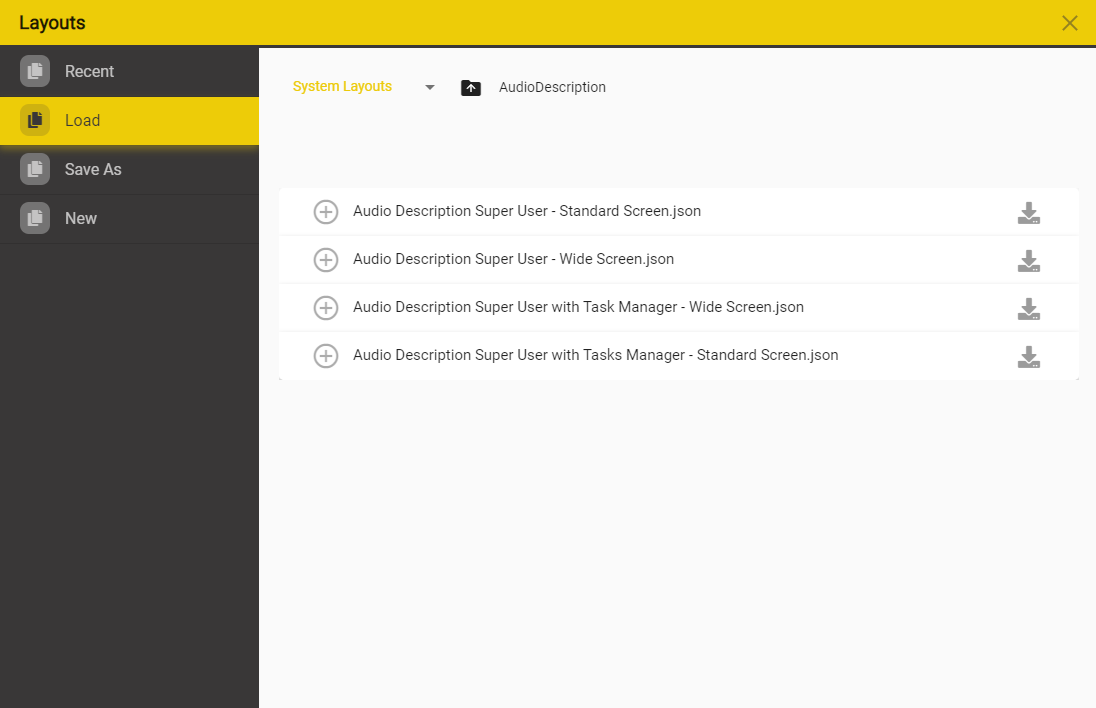
Press the Load Button  corresponding to the the layout you want to try.
You can swap between layouts at any time and you can create your own Layouts and save them for future use.
How to - Microphone & AD Recording
Once you have a Project loaded and have added an AD script file in ESF, SRTAD or TTAL format you’re ready to start recording.
First you’ll need to make sure the microphone and audio inputs are correctly configured. Follow the instructions here.
How to select a Microphone.
How to calibrate your Microphone
How to Record using the Audio Recorder Widget
How to Deliver a finished AD Project
Once you have recorded and checked your AD Project you will want to deliver the results in some format.
There are three main options:
-
Export a Stellar Project with some or all all the elements of the Project.
- This option will create a Zip with the AD script file, all the Wav files, any other text files and optionally the media files from the Project
- Another user will then be able to Import this Project into their copy of Stellar and start working straight away.
-
Export an Audio Job – Create a ZIP file containing the AD file and associated WAV files.
- This option will create a Zip file with just the AD script and WAV files in it. No other parts of the project will be included.
- Another user can use this in Stellar or other AD systems (if you used the industry standard ESF file format)
-
Mix the audio output yourself.
- Stellar provides tools that allow the mixing of AD output in a wide range of formats.
- These files will be in standard WAV or MP4 formats and can be used in all media editing tools (Pro Tools etc.)
How to Mix an AD Output Audio
-
There are several output formats available:
- A single audio file containing just the AD Audio
- A single audio file containing the program audio mixed with the AD audio
- An MP4 video file with the program audio and AD audio mixed together.
- A single audio file containing just the AD audio and a control track suitable for use on the UK Digital Terrestrial TV services (DTT)
-
Load the Project containing your recorded AD audio
-
Make sure you have the right audio Takes selected (only applies to srtad file type)
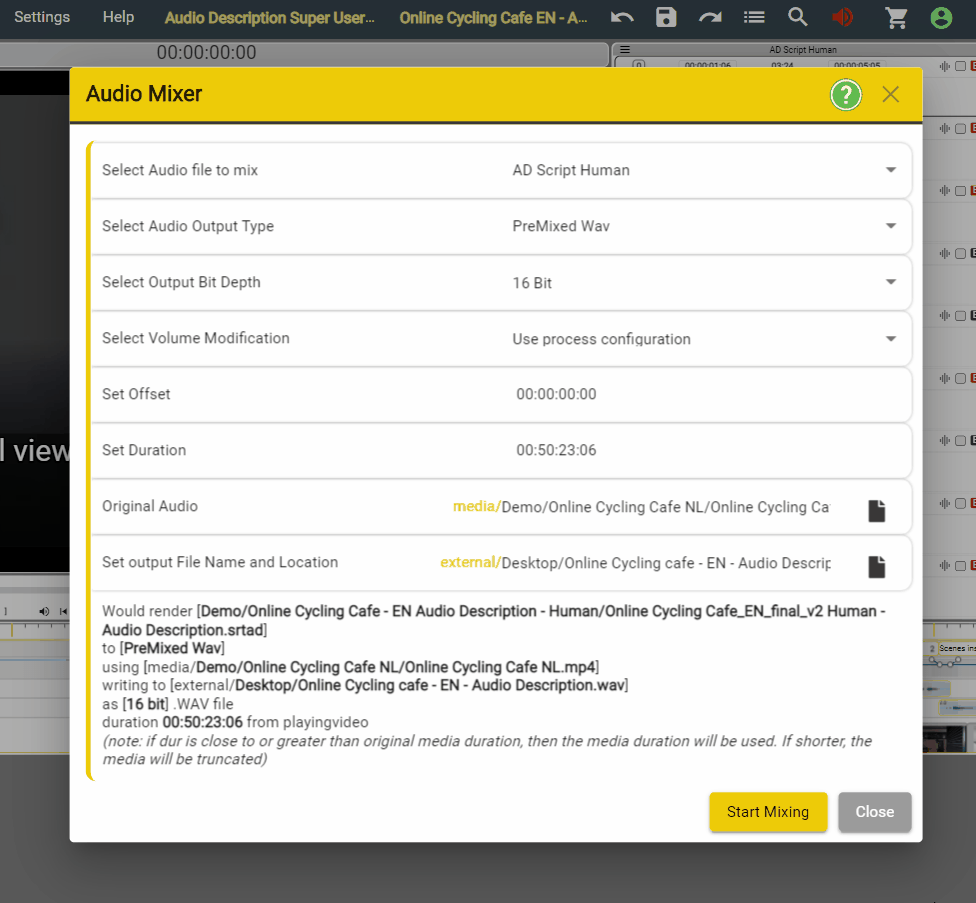
Tools → Audio Tools → Audio Mixer
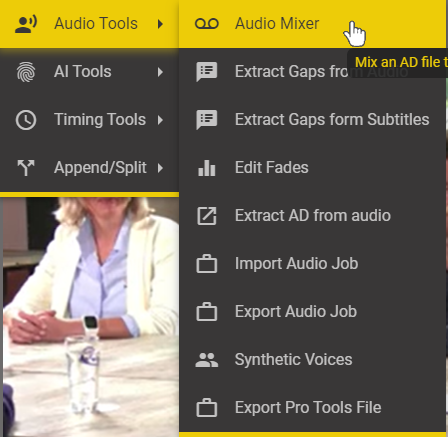
This will open the Audio Mixer Window
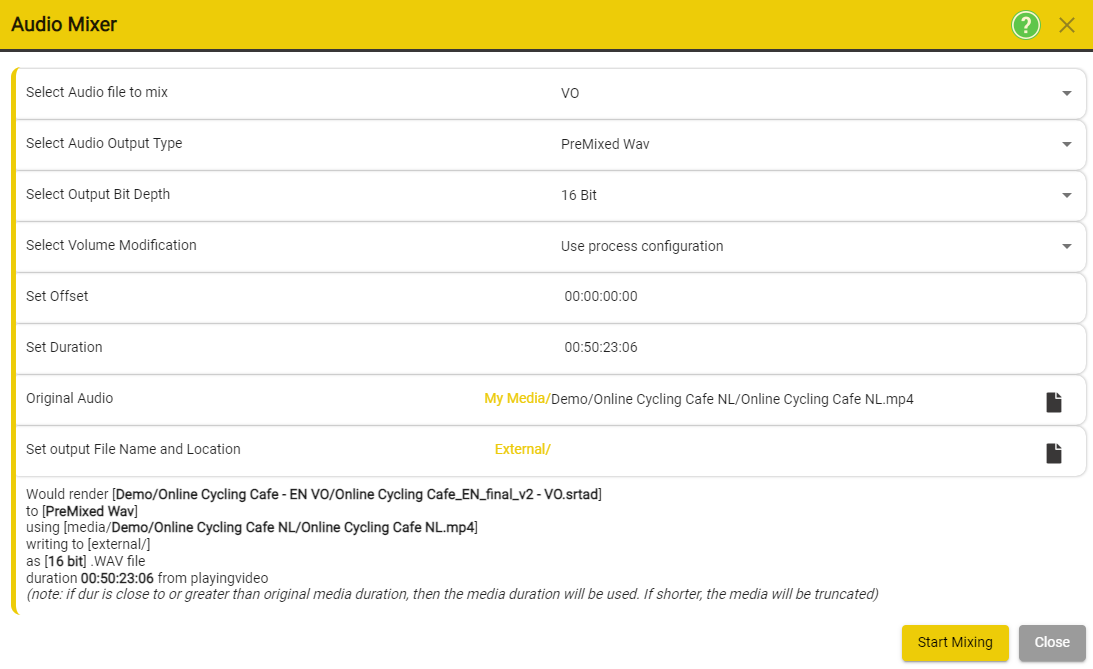
- For full details on all the options see here: AD Mixer
- Once you have set the options and file locations click on Start Mixing.
- Depending on the length of the program this will take from a few seconds to a few minutes.
In the State section, you will be able to follow the progress of the Mixing Process.

Once the mixing process has finalized, you will be able to press the Open File Location and check the exported file.
How to set the Fade Levels
How to edit Fades
Fades Handle Tutorial
How to work with ESF files
ESF Files are an existing AD file format that has been in use for many years. You can create, open, edit and export ESF files directly in Stellar. However there are certain technical limitations with the ESF format that you should be aware of. If you don’t HAVE to use the ESF file format we would recommend you always use the srtad format. This is a much more comprehensive and flexible format as it allows you to store multiple Takes, trim audio Takes and has fewer timing restrictions.
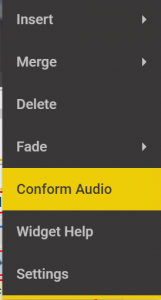
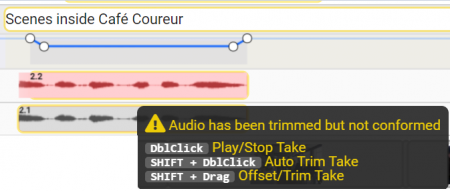
The ESF file format only supports a single audio for each text block and the audio has to be trimmed to the exact end points. To create a single audio file from one or more Takes, each possibly with different Trim points you must Conform the audio for each text block. You can do this by Right clicking on either the audio Take or the Text box.
-
Any audio Take in an ESF file will be shown in Red if it needs to be Conformed or it is positioned in a way that is not supported in the ESF file format.
-
A Text warning message is displayed if you hover over the audio waveform or the Text block showing what the error is.
Possible errors are:
- Audio starts before Text box.
- Audio has been trimmed but not conformed.
- Audio gain has been changed but not conformed.
- There is more than one active audio for this Title and it hasn’t been conformed
When setting or editing the Fade for an AD title you can drag the four points on the Fade waveform to get the fade slope and depth you need.
- In and ESF file it is not possible to set the start and end points of the Fade outside of the associated Text block.
- On a timeline track for an ESF file, you can’t move the fade outside of the text box. (This is not a limitation for srtad files).
- Extending the size of the text block, or the size of the audio Take will allow the fade point to be moved.
You can always convert between file formats so even if you work in an srtad format you can export as an ESF file for delivery and Stellar will impose the limits for you automatically.