Volume Manager
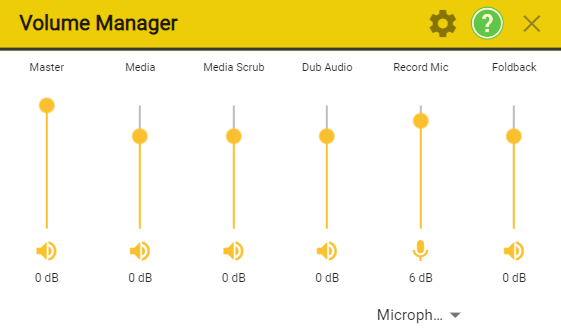
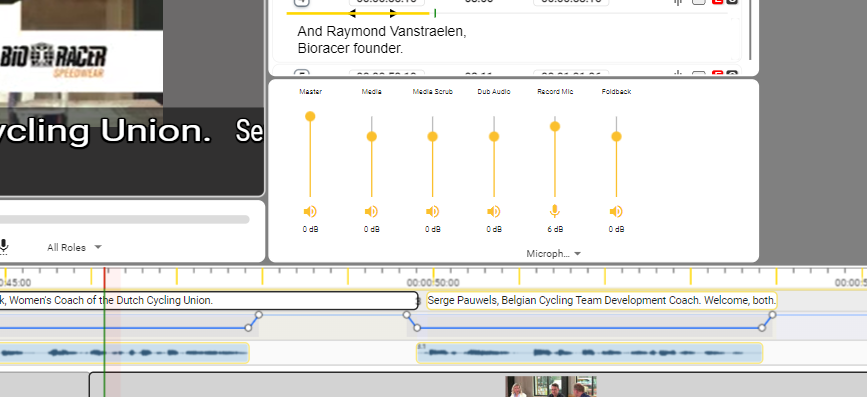
The Volume manager Widget adds a set of volume controls that allow control of all the different audio levels in a single widget.
![]()
The Volume Manager Widget can be used in two different modes:
-
Hidden – the controls will pop up when you click on the Speaker Icon in the top bar and close when you click again or press Esc.
-
Fixed widget – the controls are always visible and can be positioned anywhere on the screen. (You can still use the pop up version too)
If the Speaker Icon is Red it indicates an error with one of the audio inputs.
![]() - Most likely the input is set to none, or the microphone that was previously connected is not selected in the Volume Manager.
- Most likely the input is set to none, or the microphone that was previously connected is not selected in the Volume Manager.
Select from the available microphones by using the drop down selection below the Recording, if present.
Each slider has a mute button below to mute that output or input.
Microphone inputs, if present, each has a source selection dropdown.
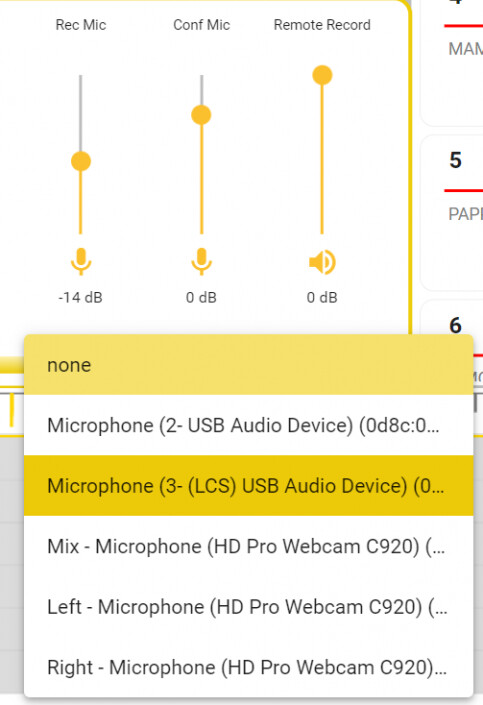
- Note: Microphone selections are stored as a personal preference on your copy of Stellar and are not part of a Layout.
- This means that you only need to make the selection once, unless you change the microphones available on your Mac or PC.
If no valid input is selected the associated slider will turn Red.
Note: the Recording microphone for recording AD and dubbing audio must be set for 48kHz sample rate.
- Any other rate will give an error.
- See Here for instructions on how to configure the microphone inputs on PC or Mac.
The number and type of volume controls displayed is determined by the other widgets selected.
- Master Volume – always preset. Sets the overall output volume, has no impact on input (microphone) levels.
-
Media Controller Widget
- Media – sets the level for the program audio in Play mode
- Media Scrub – sets the level of the scrub audio when single stepping the video.
-
Audio Recorder Widget
- Dub Audio – sets the level of the playback and scrubbing (if enabled) of the recorded audio (AD, Voice Over or Dubbing)
-
Dub Audio – sets the level of the recorded audio playback during preview.
- IMPORTANT – the Dub Audio level only sets the level during playback within Stellar. To get a realistic representation of the final output mix set the Media Level and the Dub Audio level to the same setting.
- Foldback – sets the level of program audio, and any other audios enabled, you will hear (if enabled) during a recording. This would normally be the level you hear in your headphones as you record.
-
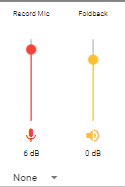
Record Mic – sets the input microphone gain with associated microphone source selection.
- Note – in a multi-user recording session this control will set the gain of the recording microphone on whichever user is set to record.
- The record gain level for that user is stored on the local machine.
- Remote Record – When recording with a remote user this control sets the level you will hear in real time. Does not effect the level of the audio actually recorded and is used only to set the audio balance for your local workstation.
Settings
There are two settings:
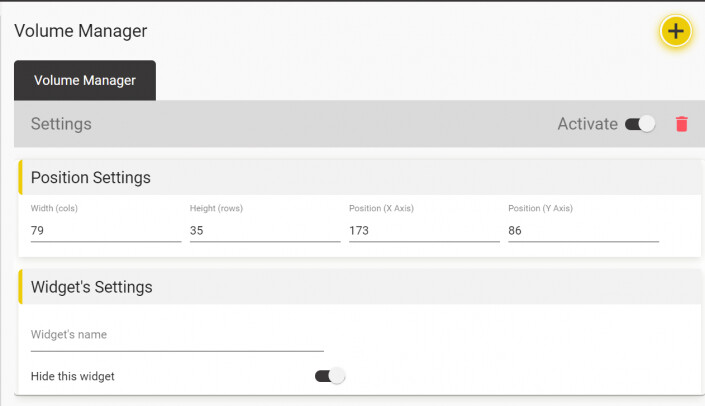
Widget Name - if you want to rename the widget
Hide this widget - toggle display of widget in the Stellar Work area.
Context menu
Right click inside the widget to access the context menu.
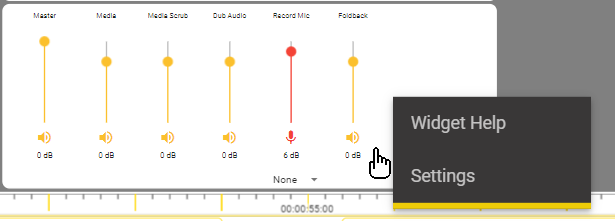
- Widget Help – Open a new tab with the help section for this widget
- Settings – Open the settings dialog for this widget
Mouse Actions:
Right Click in widget area – Open widget specific context menu.
Alt+ Right click in widget area – Open widget specific Settings dialogue.