Creating a Task Server
This section will take you through the steps needed in order to create your own Task Manager Server which can then be used to create and work with Tasks.
NOTE: You only need to do this if you need to create a private Task Server and NOT using the public Task Server provided by Yella Umbrella.
You will need an AWS account.
This brief guide assumes some AWS knowledge.
Outline requirements:
A private S3 bucket with CORS setup.
An intel based EC2 running Amazon Linux 2023 - e.g. c7i.large
A Postgress database server (either local or RDS or other) - two separate databases will be used.
Creating an S3 Bucket
Go to the S3 Management Console in AWS
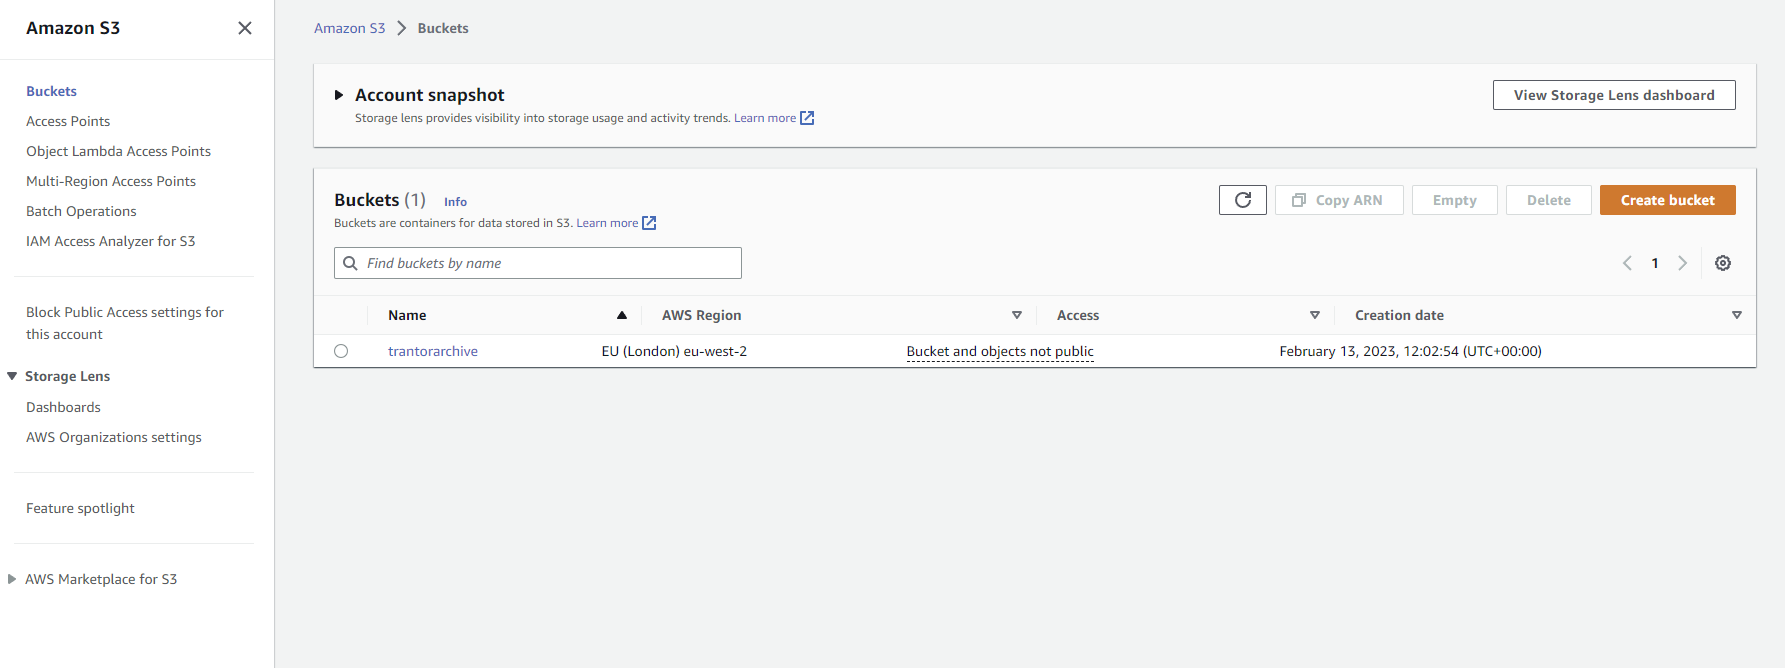
Click on create Bucket to navigate to the Bucked Creation Section.
The following section has a large amount of settings that can be adjusted - S3 FAQ - we are going to create a basic S3 Bucket.
General configuration:
Bucket name - Add a name
AWS Region - Select a region - it should be in the same region as your EC2.

You will need to set the CORS configuration of the bucket to allow Stellar to access Pre Signed URLS issued by the task server. Go to the bottom of the Permissions tab for the bucket, and edit the Cross-origin resource sharing (CORS) section. Add the following:
[
    {
        "AllowedHeaders": [
            "*"
        ],
        "AllowedMethods": [
            "HEAD",
            "GET",
            "PUT",
            "DELETE"
        ],
        "AllowedOrigins": [
            "*"
        ],
        "ExposeHeaders": [
            "ETag"
        ],
        "MaxAgeSeconds": 3000
    }
]
The rest of the options can be kept as default for the purpose of this tutorial.
Creating an EC2 instance
Go to the EC2 Management Console in AWS.

Click on instances

This will take you the Instances | EC2 Management Console
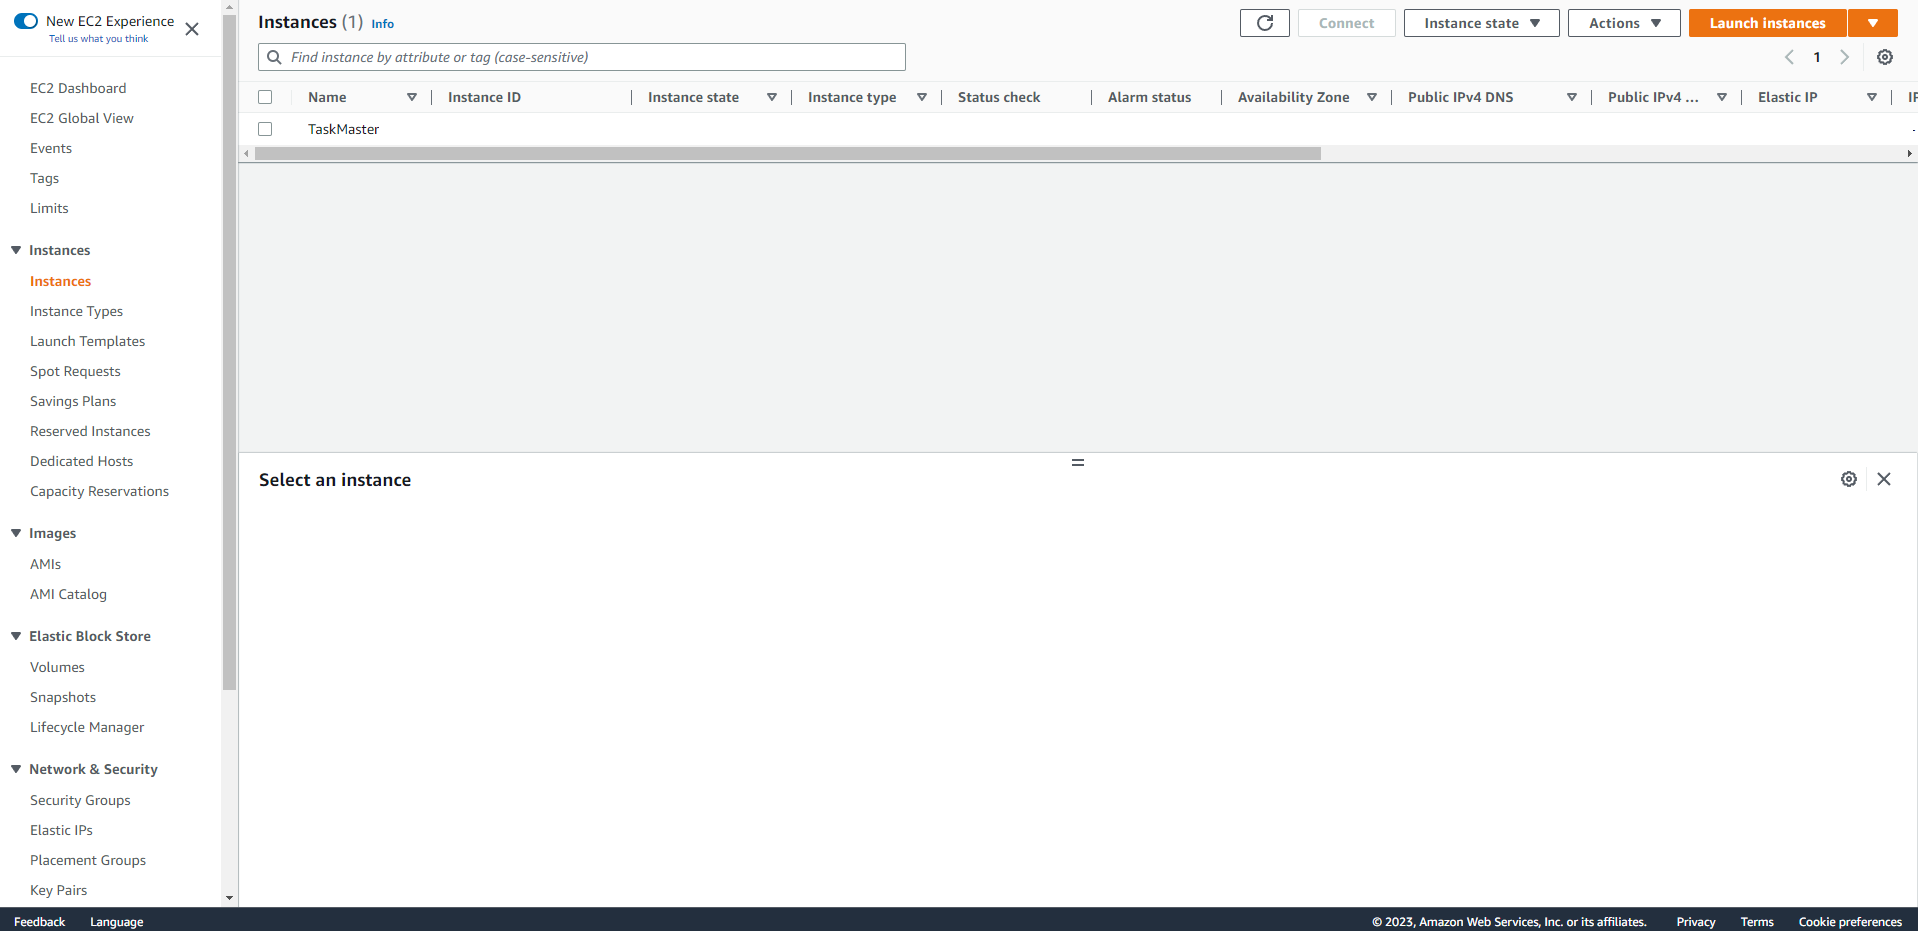
Click the Launch Instances button.
The following section has a large amount of settings that can be adjusted - see EC2 Faq for more details which are not covered in this tutorial.
Name and Tags - add a name for your Web Server

Application and OS Images (Amazon Machine Image)
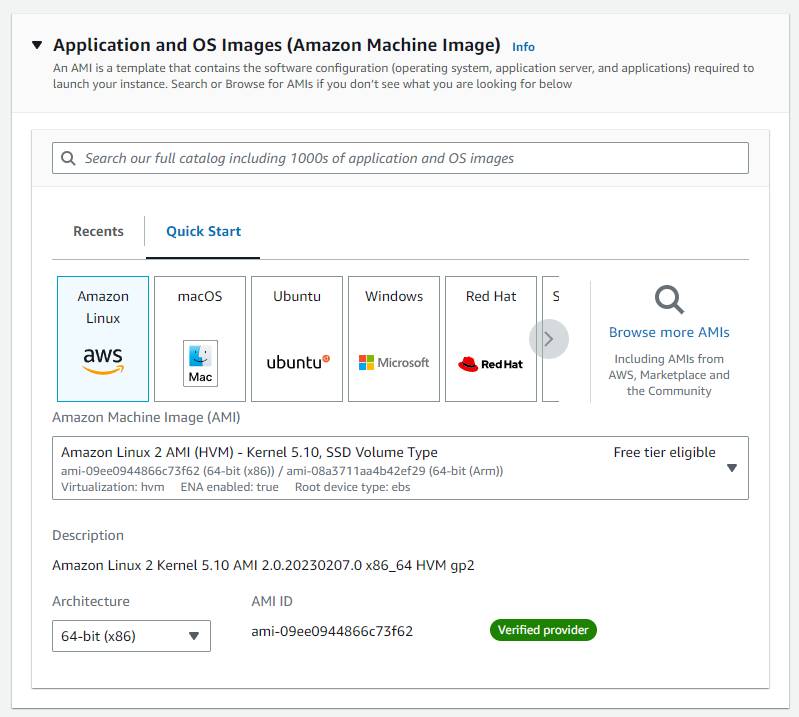
Select Amazon Linux as the AMI
For example, you can select - Amazon Linux 2023 AMI
Make sure that you are choosing 64-bit (x86) Architecture
Note - the Amazon Linux 2 in the above image is depreciated in favour of Amazon Linux 2023
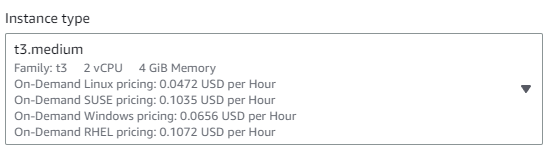
Instance Type - This is where you will choose the type of machine you will run. It allows you to select from various option which come with different memory/processor configurations.
We suggest using a c7i.large - 4Gbytes and 2 cpu
Key Pair (Login)
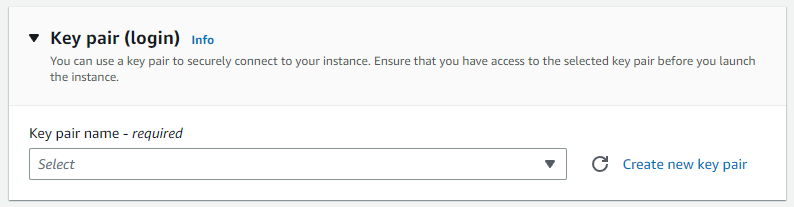
You can choose an exiting pair, if you already have one. If not, you can create a new keypair.
NOTE: This setting cannot be changed at a later date.
Click on Create new key pair
This will open the Create key pair window.
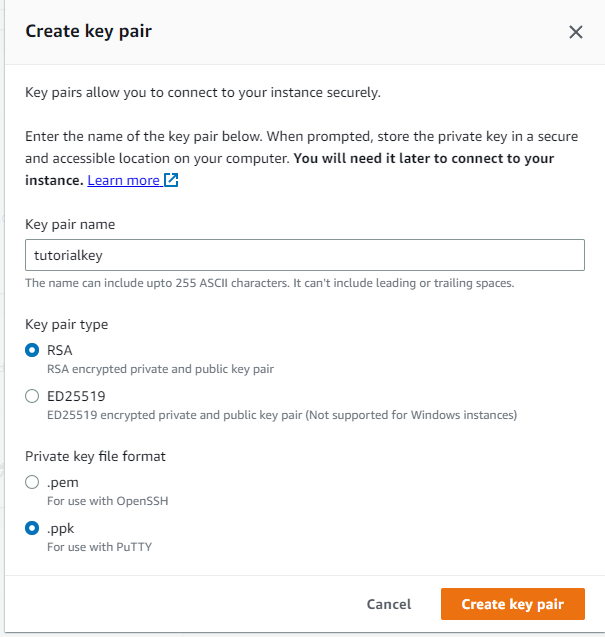
Key pair name - choose a name for the keypair.
Key pait type - RSA
Private key file format - Depends on what software you are using for SSH. Choose .ppk if you are going to use PuTTY

Select your key from the drop down. If it does not appear, press on the Refresh button.
Network Settings
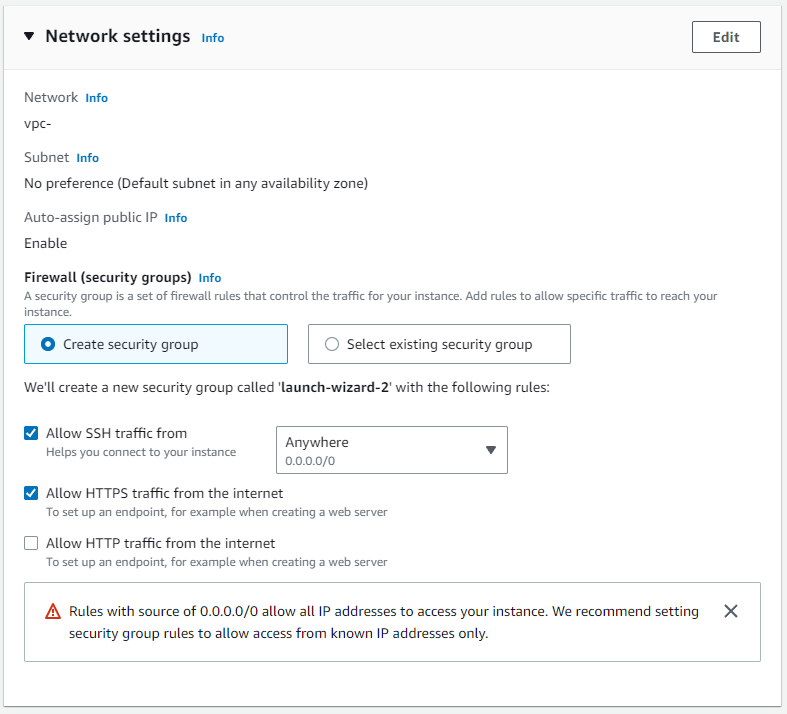
Choose a security group - or let Amazon create one (check “Allow HTTPS traffic from the internet”).
We suggest that you lock down SSH to specific IP addresses later.
Note: In a corporate environment you may wish to have an ALB or ELB in front of your EC2. In this case, your EC2 would not have any public IP, and you would not allow traffic from the public internet. It is beyond the scope of this tutorial to explain SSH access in such a scenario, but you could look into ‘SSM – AWS Console’ and transfer any files via the S3 bucket.
Configure storage
EBS volume storage

For a Small to Medium Task Servers, 20 GB should be enough.
Choose gp3, it’s faster and cheaper than gp2.
(the linux plus task server install is ~2.5Gbytes. The task server database, if stored locally, does not grow very quickly)
If you intend to do any conversions or other Actions on the EC2, then select enough extra EBS to cover 5 of the largest media you expect.
e.g. if you intend to process films of 50Gbytes each, allocate 20+250Gbytes.
Theoretically, you can expand the EBS volume in the future.
IAM Instance profile
In IAM instance profile, we wish to enable the EC2 to access the S3 bucket created earlier.
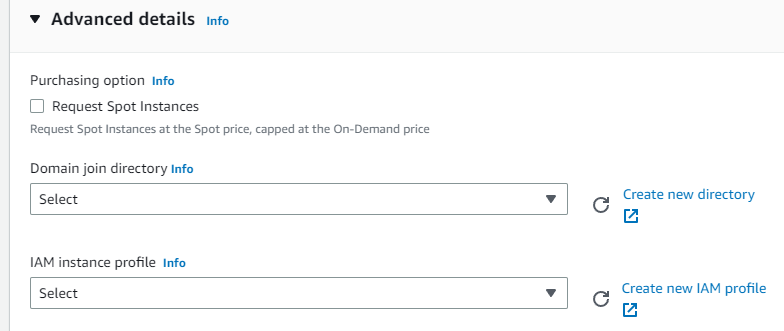
Click on Advanced Details → IAM Instance profile → Create new IAM profile

Click on Create Role
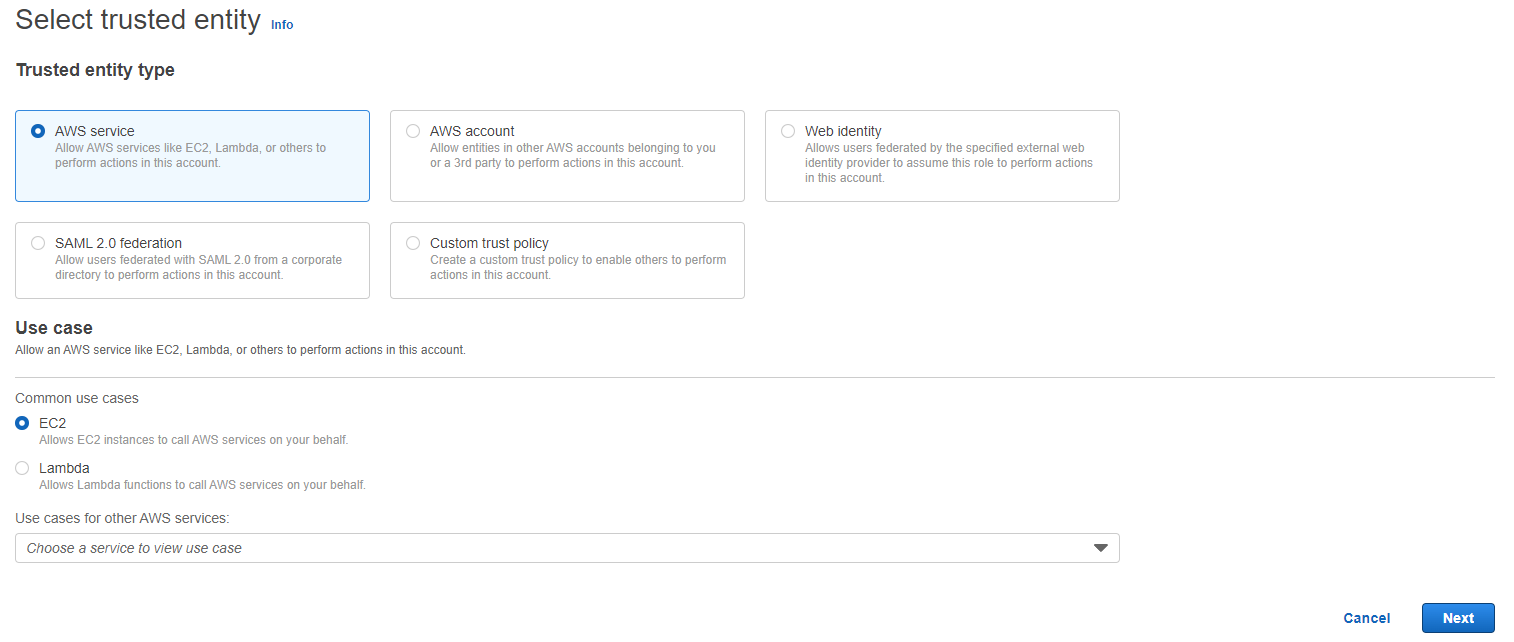
Trusted entity type - choose AWS Service
** Use Case** - Choose EC2
Press Next
Add permissions
In the search bar, write AmazonS3FullAccess then press Enter.
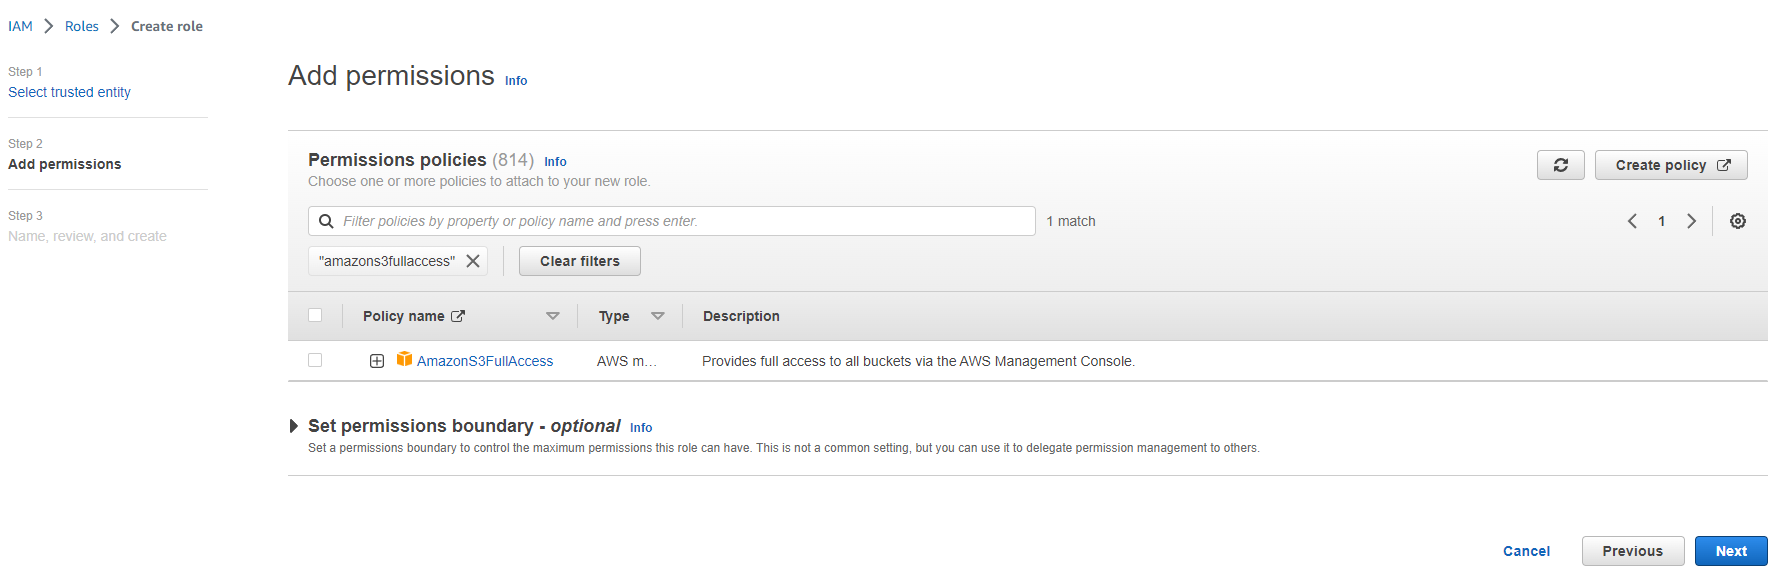
Check the box corresponding to AmazonS3FullAccess entry to add the policy name.
Press Next.
Role Details
Add a Role name
Add a Description
Scroll down and then press Create Role. If everything went fine, you should see a Green Banner which says will tell you that Role was Created.
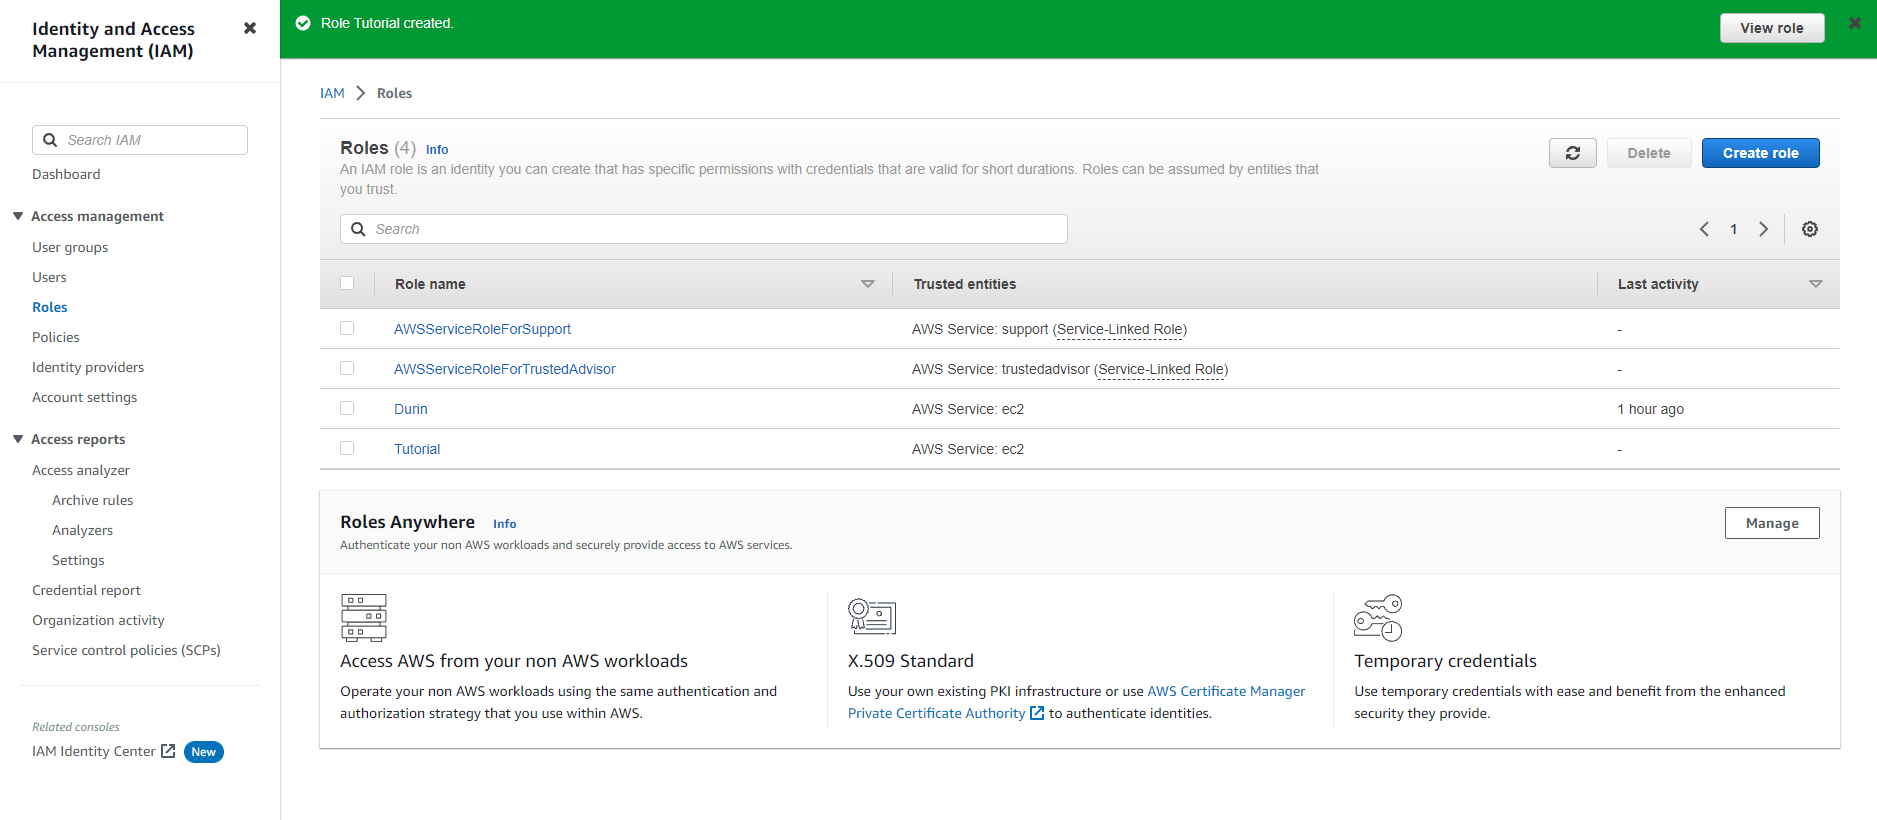
You can now return to the EC2 Console.
In Advanced Details → IAM Instance Profile

Select the IAM from the drop-down list. If it does not appear, press the refresh button then press the drop-down list again.
NOTE: you should investigate limiting the role to the single bucket - this is beyond the scope of this simple explanation. The minimum S3 permissions required are (replace the bucket name):
{
    "Version": "2012-10-17",
    "Statement": [
        {
            "Effect": "Allow",
            "Action": [
                "s3:ListBucket",
                "s3:GetBucketLocation"
            ],
            "Resource": "arn:aws:s3:::your-bucket-name"
        },
        {
            "Effect": "Allow",
            "Action": [
                "s3:GetObject",
                "s3:PutObject",
                "s3:DeleteObject",
                "s3:ListMultipartUploadParts",
                "s3:AbortMultipartUpload"
            ],
            "Resource": "arn:aws:s3:::your-bucket-name/*"
        }
    ]
}
Termination Protection - scroll down and Enable Termination protection

This will prevent information loss in your EBS volume.
Double check your settings then press Launch Instance
If everything went well, you should see a Success Message.
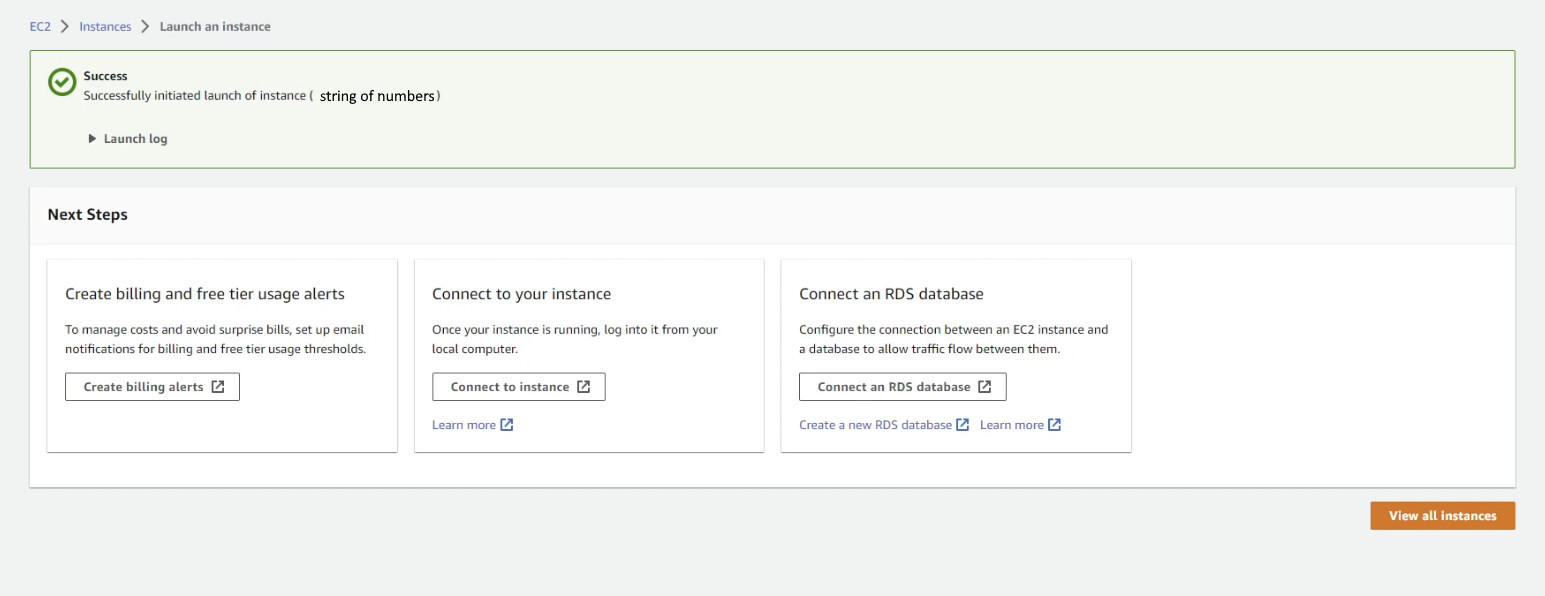
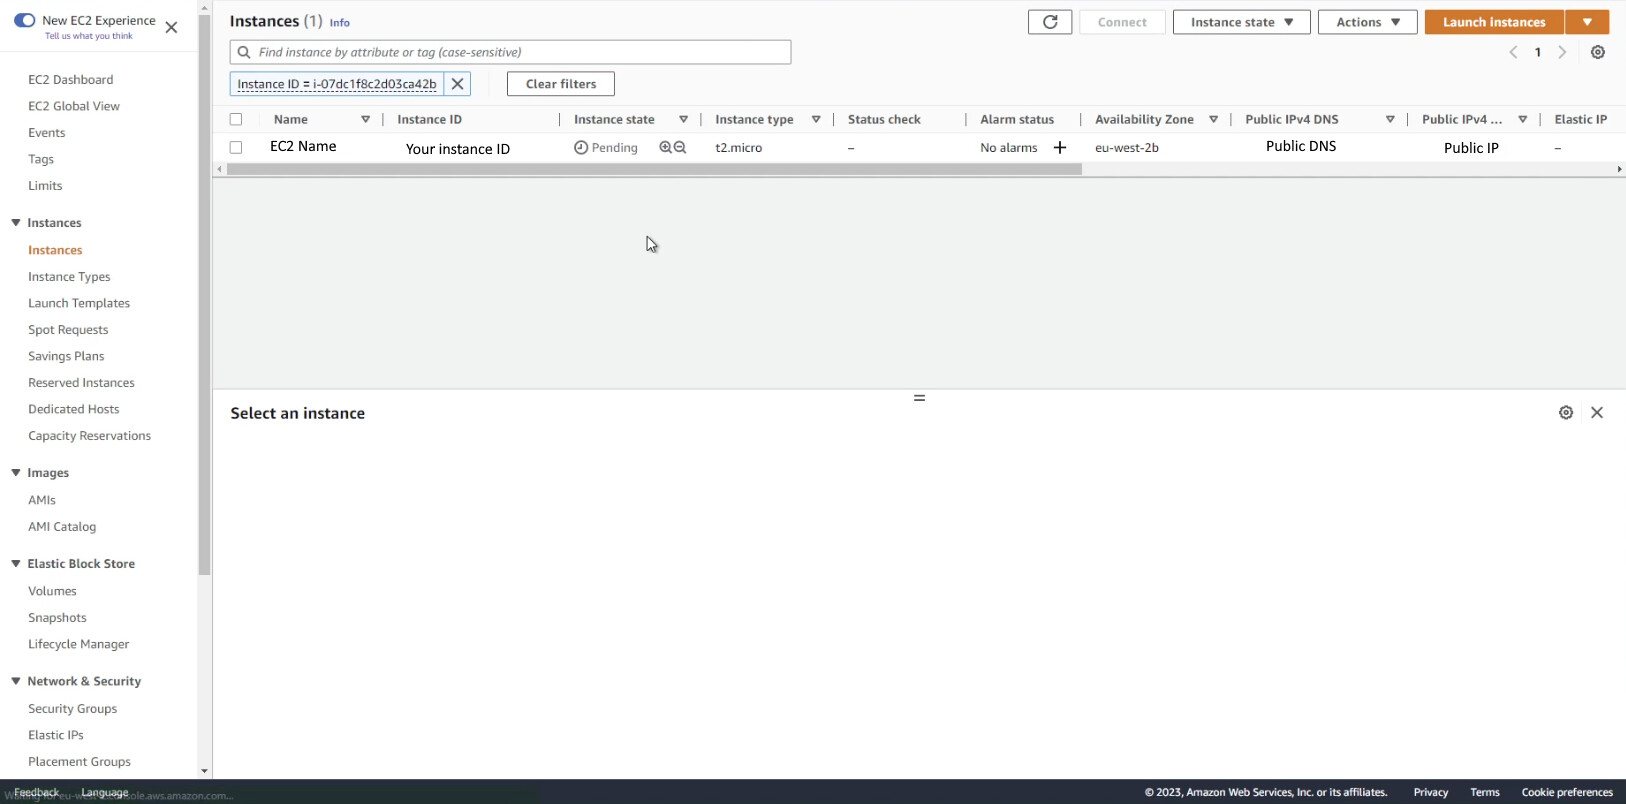
You will now be able to see the EC2 you created in the AWS Console
Domain Name
If you are happy with the Task Server domain name ending in .taskserver.net, the device can automatically create DNS entries and HTTPS certificates. This is only applicable if port 443 will be exposed publicly (i.e. you will NOT use an ELB or ALB in front of your EC2).
For example, you can choose a domain name yourcompany.taskserver.net and configure the task server for this domain, the Server will automatically become available on this domain and as HTTPS.
In cases where you want to use a different root url (different from the .taskserver.net) you can either:
Terminate the HTTPS at an ELB or ALB
(Elastic Load Balancer)
(Application Load Balancer)
You must supply your domain name and certificate yourselves. In this case, configure the Websocket Distribution Process for port 80, and disable SSL there. Then direct traffic as HTTP from the ELB/ALB to the EC2 on port 80.
Use a local certificate
Place certificate files in a location on the EC2, and specify their locations in the configuration.
In this case the Websocket Distribution Process needs to be configured for HTTPS and for the certificate locations.
Task Server Device
Now that we have configured the environment where the Task Server will run (EC2 + S3) we can create the Task Server Device.
Go to https://nebula.yella.tv/ and login using your credentials.
In the left side, select Devices then choose the Templates tab. This should bring you to a list of available templates.

From this list choose EC2 Task Server Template and then press the Clone Icon ![]() - this will open the Clone Device window.
- this will open the Clone Device window.
Device Name - Give the device a name.
Clone Suffix - You add here any text that you want to differentiate between devices if you have more than one with the same name.
Description - Add a description for this device.
Location - Select a location. Should be in the same area where your EC2 and S3 are situated.
Device Type - Amazon Linux 2 service (it will default to this)
Create Template - No
Clone Type - Device and all project and processes
Press on Clone device to start the cloning process. Once it has finished, the device will appear in your Devices list. ![]() with Status of
with Status of ![]()
![]()
Click on the cog wheels icon ![]() to expand the device.
to expand the device.

Click on the this icon  to expand and see the Processes on this Device.
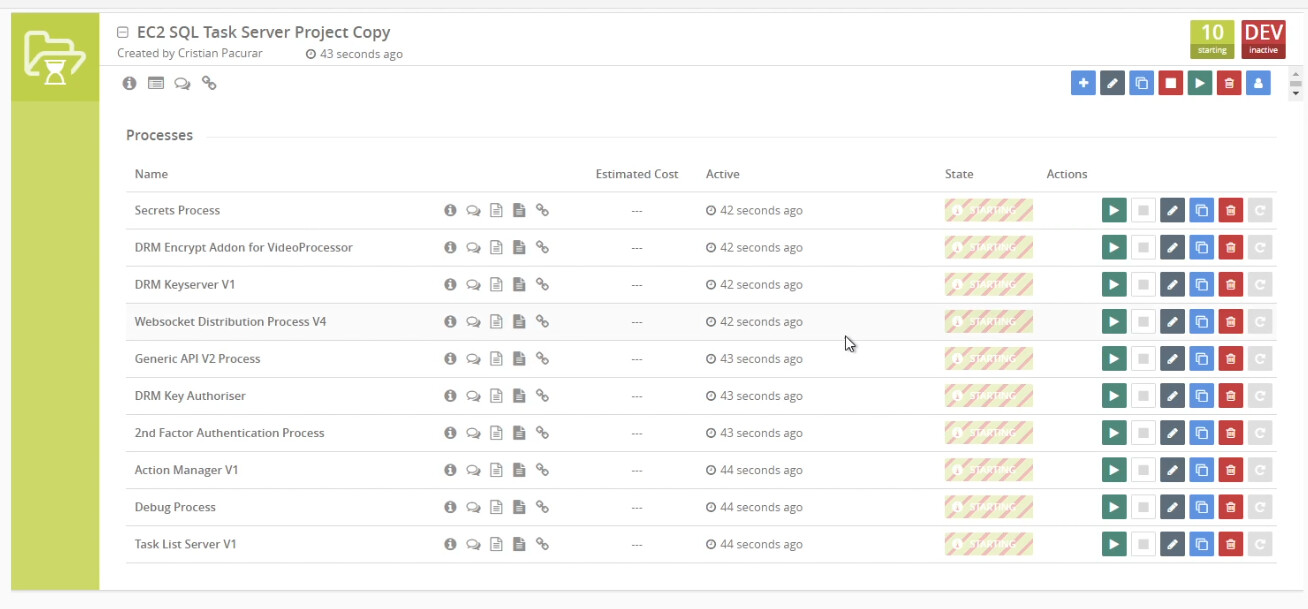
Task Server Configuration
Configuration of a Task Server devices requires configuring several processes.
Prerequisites:
Your domain name - we will use a .taskserver.net domain in this tutorial
Your S3 bucket link - it should look like s3://bucket-with-the-name-you-created
Configure all processes for this URL, pre-pended with https:// (or http:// if you want to run without SSL - not recommended).
Generic API V2 Process
Websocket Server - Add the websocked secure link

Websocket Authentication - copy the string here, we will be using in another process

Websocket Distribution Process V4 - press the pencil icon ![]()
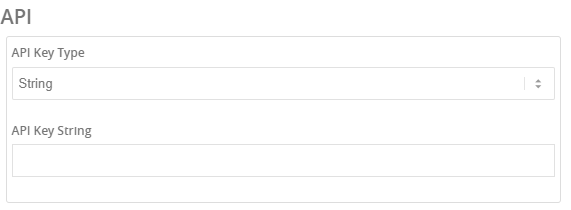
Add the server domain in the following box.

In the API section - paste the Websocket Authetication that copied in the previous step in the API Key String section
2nd factor process
2nd Factor URL - Insert your domain name with the https://

Action Manager
Server URL - Add your domain URL in the Server URL section

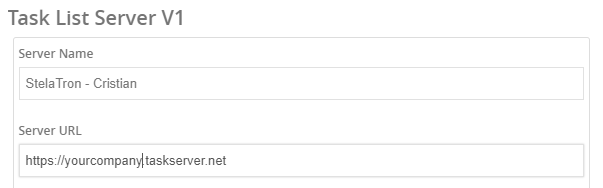
Task List Server V1
Server Name - Add the Server name
Server URL - Your domain name
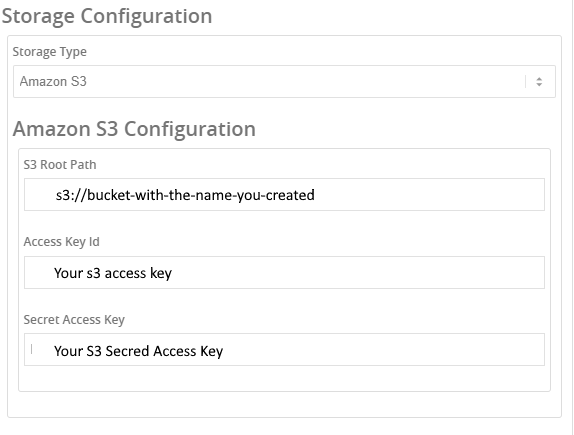
Storage configuration - Amazon S3
Storage Type - Amazon S3
S3 Root Path - The link to the S3
Access Key ID - Your S3 access key id
Secret Access Key - Your S3 secret access key
PostgreSQL - Task Manager and Action Manager
The Task List Sever process requires a Postgres database.
The Action Manager process requires a Postgres database.
They can share the same Postgres server.
They both have similar configurations in the process configuration:

Add json files to configure the two processes. (for your security, it is better to specify these in json files rather than in the Nebula configuration).
We suggest they could be put in:
/home/ec2-user/nebula/actionmanager/dbConf.json
/home/ec2-user/nebula/taskserver/dbConf.json
Example json for locally installed postgress for taskserver:
{
“type”: “postgres”,
“connection”: {
“host”: “localhost”,
“port”: 5432,
“user”: “postgres”,
“database”: “task_server”,
“password”: “PasswordForPostgres”
}
}
Example json for locally installed postgress for action manager:
{
“type”: “postgres”,
“connection”: {
“host”: “localhost”,
“port”: 5432,
“user”: “postgres”,
“database”: “action_manager”,
“password”: “PasswordForPostgres”
}
}
Note - if using RDS, then in theory the only change required is to specify the RDS host instead of localhost, and ensure that the EC2 can reach that host.
Note - if using RDS please download the global, or your regional pem from Using SSL/TLS to encrypt a connection to a DB instance or cluster - Amazon Relational Database Service
then add
“ssl” : {“ca”: “global-bundle.pem”} to the json.
Note - the user postgres is generally an admin user. taskserver and action manager will create the databases if they do not already exist. Using alternative usernames for access to only specific databases with specific rights is recommended, but beyond the scope of this guide. One method is to launch it with using the postgres user, so that the taskserver and action manager can create the databases, and then switch to more restricted users later.
Note - for security, you should use an SSL connection to a remote Postgres DB. in this case the extra config "ssl": {"ca": "/yourfile.pem", "rejectUnauthorized": true} should be added along with a pem file.
If you do not want to use SSL, you can leave the CA field empty set rejectUnauthorized to false.
If you are using a self-signed cert, add it in the CA field and set rejectUnauthorized to true.
Creating the Device
Once you have finished configuring the processes, you can press on the download icon
![]() coresponding to your device.
coresponding to your device.
![]()
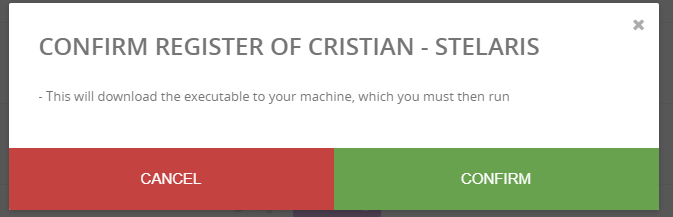
Confirm on the next message.
Press download on the next message.
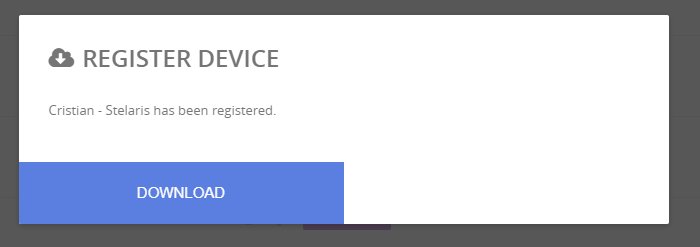
A zip file containing the required files will be downloaded.
Connecting to EC2
You can use Putty or Kitty to connect to your EC2 server.
(if in a private subnet - look up AWS SSM).
From the EC2 console, you will need:
Your - Public IPv4 DNS
The Key - The key you saved when creating the EC2. It’s a .ppk file that you downloaded when creating your EC2 instance.
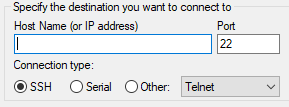
Putty
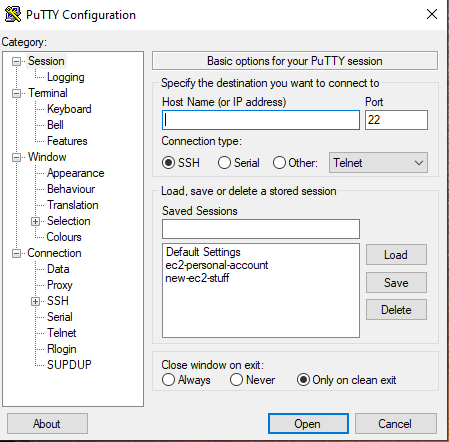
Go to Sessions - put the Public IPv4 DNS in the Host Name (or IP address) field.
Go to SSH → Auth → Credentials
Private key file for authentication - Browse for you .ppk file.
Go to Sessions → Saved Session → Enter a name → Save
This will save the session configuration so could access it in the future without having to re-input the details.
Click on Open.
When prompted with login as: ec2-user and then press Enter
If everything went fine you will see a message that says:
Authenticating with the public key “your key name here”
Last login:
   __|  __|_  )
   _|  (     /   Amazon Linux 2 AMI
  ___|\___|___|
And then you should have terminal access to your EC2.
Copying Task Server Files
First we will need to connect to the server using another piece of software which will allow us to upload the required files. WinSCP is a good choice for this.
WinSCP

Host name - Public IPv4 DNS
User name - ec2-user
Click on Advanced → Authentication
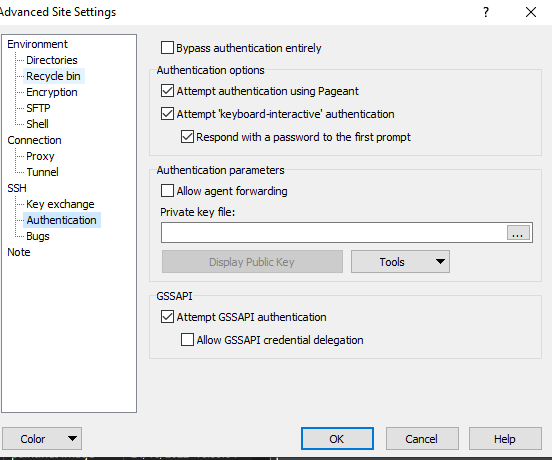
Browse for your .ppk file then press OK.
Once you have entered all the details, press save to save the session details.
Site name - give the session a name then press OK.
It should appear in the right side column.
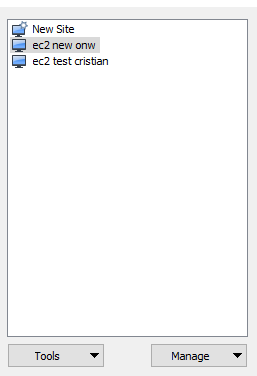
Select your session and then press 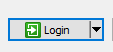
If all went well, WinSCP should contain two windows. The left one allows you to browse content on your device, while the right one allows you to browse content on your EC2 Server.
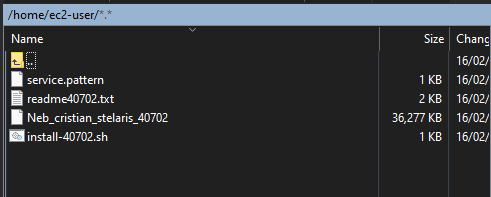
Find the device ZIP that we previously downloaded and unzip its contents. You should see 4 files similar to these:
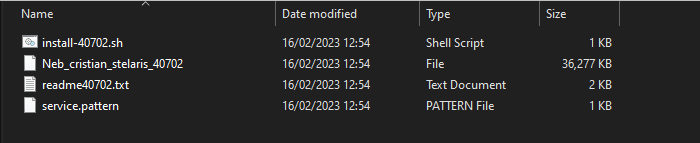
We need to transfer these files to our EC2 in /user/ec2-user/
In WinSCP, make sure that you are in /user/ec2-user/
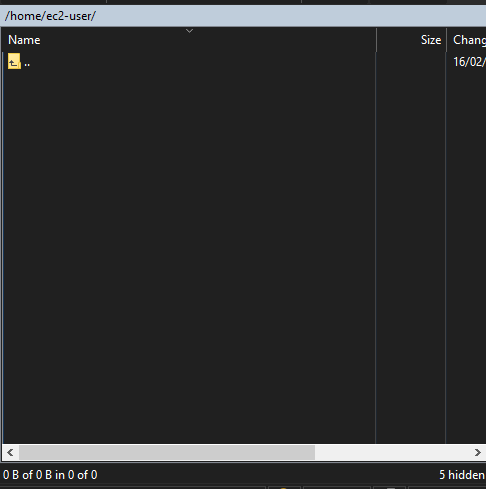
Select the the 4 files we have previously unzipped and drag them in right window of WinSCP
And upload window will now appear
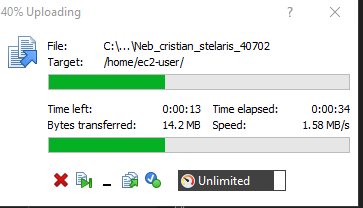
Once finished, it should look similar to this:
You can now close WinSCP
Installing the Task Server
Go back to Putty and connect to your EC2.
To check that the required files are present, type ls and then press enter.
This will list all the existing files in the ec2-user folder.
[youruserhere]$ ls
install-40702.sh  Neb_cristian_stelaris_40702  readme40702.txt  service.pattern
Go back on your Desktop and find the readme.txt file in the folder that we unzipped and then open it in notepad.
This readme file contains all the commands that we have to run to start the device, and also how to do several other operations.
Your install command should look similar to this.
chmod 755 install-40702.sh; ./install-40702.sh
Copy and paste this command in the terminal and then press Enter.
If all went well you should see a message prompting you to:
To run it now use:
- sudo systemctl start YourDeviceName.service
- or reboot
Copy the first command
sudo systemctl stop YourDeviceName.service and then press Enter
If all went well, in you Nebula Dashboard you should be able to see all processes Green Running.

List of Commands - The exact commands for your device can be found in the Readme.txt file.
start the device:
sudo systemctl start yourdevicename.service
stop
sudo systemctl stop yourdevicename.service
restart
sudo systemctl restart yourdevicename.service
disable startup at boot
sudo systemctl disable yourdevicename.service
enable startup at boot
sudo systemctl enable yourdevicename.service
view logs
journalctl -u yourdevicename.service
view last logs
journalctl -e -u yourdevicename.service
follow latest logs continually
journalctl -f -u yourdevicename.service
Using Tasks
This thread contains all the information on how to use the Task System.
Whitelist
System !!!
- !!! https://nebula.yella.tv !!!
Public Task Server !!!
- !!! https://public.taskserver.net/ !!!
Speech Synthesis
- texttospeech.googleapis.com
- cerevoice.com
- polly.eu-west-1.amazonaws.com
- polly.eu-west-1.api.aws
- westeurope.tts.speech.microsoft.com
- api.elevenlabs.io
- gateway.respeecher.com
- auth.respeecher.com
- marketplace.respeecher.com
- api.sarvam.ai
- restapi.deepdub.ai
ASR
- https://api.rev.ai
- https://speech.googleapis.com/
- https://asr.api.speechmatics.com
- https://transcribe.eu-west-1.amazonaws.com
- api.elevenlabs.io
- api.sarvam.ai
MT
M&E Generation
Access to external Let’s Encrypt. - device not starting !!!
- !!! lencr.org on 80 direct access via company firewall !!!
!!! lencr.org - for certificates !!!
!!! they will need to allow access to lencr.org - otherwise the certs can’t be checked for revocation. !!!
Access Revocation Links
- !!! For AWS (Amazon Trust Services) !!!
!!! http://s.ss2.us/r.crl !!!
!!! http://crl.rootg2.amazontrust.com/rootg2.crl !!!
!!! http://crl.rootca1.amazontrust.com/rootca1.crl !!! - For Azure (Azure Certificate Authority) !!!
!!! * http://crl3.digicert.com/DigiCertGlobalRootG2.crl !!!
!!! * http://crl4.digicert.com/DigiCertGlobalRootG2.crl !!!
Running as a service
One easy way to achieve this is to use NSSM
Download from this site:
http://nssm.cc/
The ‘Featured pre-release’:
http://nssm.cc/ci/nssm-2.24-101-g897c7ad.zip
Unzip, and find nssm.exe in the win64 folder.
I think it’s important to place the nssm.exe somewhere ‘permanent’ on the machine, because I have the impression that the nssm.exe is used as the service executable to launch the Nebula Device as a sub process. (i.e., if you removed it after installing the ‘service’, it would stop working…).
First, ensure that the Nebula device is installed and exe moved to C:\ProgramData\Yella.
This is done by running the Nebula Exe, and following the instructions on the installation screen.
(you will NOT want it to be in startup).
To install the Nebula device as a service, run from a command prompt:
Nssm install NebulaDevice
This will ask for admin elevation, then launch a dialog:
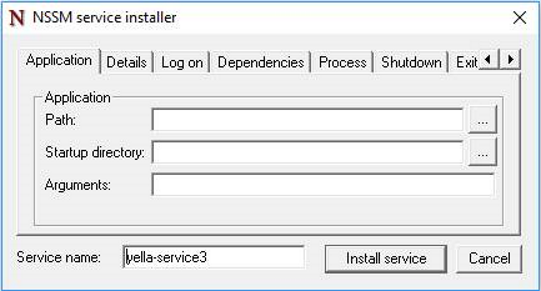
Fill out the Path and Startup directory.
e.g. if your Nebula Device executable is :
c:\ProgramData\yella\NebulaDevice1234.exe
then
Path → c:\ProgramData\yella\NebulaDevice1234.exe
Startup directory → c:\ProgramData\yella\
Then, in this tab:
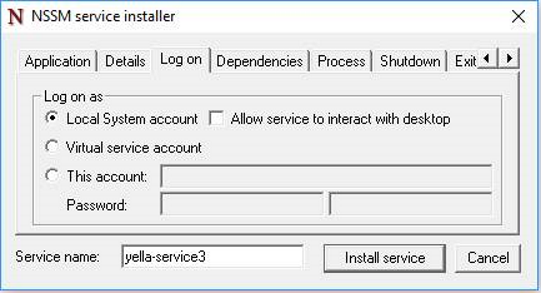
Although Nebula should run perfectly fine as the Local system account, I recommend to select ‘This account’, and enter the username and password of a specific user. This makes it easier to understand file and path access - i.e. if you can access the files you need from the user when logged in, Nebula will also be able to access them.
It is important to limit the access for the user to only the paths required for the operations Nebula will be performing.
Keep an eye on password policy and the password getting updated; I would assume that you would need to change the password in windows services if the users password changed.
All the other fields in NSSM may be left at defaults (there is a ‘Display name’ option in the details tab which you can set).
Click ‘Install service’.
You may install separately named services for separate Nebula device executables if required. E.g. NebulaDevice1, NebulaDevice2.
When configuring a device before download from Nebula, if you will run it as a service, you may wish to set a fixed port number for the device, else you will have no easy way of accessing the local status or process-specific HTTP.
Removing a service is done with:
Nssm remove
e.g.
Nssm remove NebulaDevice
Note that there are a few strange things around service removal – make sure Windows Management is not open, and Task Manager is not open, else it may not let you re-install the service with an error relating to ‘marked for deletion’. Worst case, a reboot will clear this.
Working with PostgreSQL
This is a basic PostgreSQL tutorial for the Standard installation for Standard Task Server install procedure. Depending on your architecture, might have to be adjusted. Please refer to your IT team for more details.
Step 1: Update System Packages
Before installing PostgreSQL, update your system’s package list:
sudo dnf update
Step 2: Install PostgreSQL 15
Install PostgreSQL 15 from the default repository:
sudo dnf install postgresql15.x86_64 postgresql15-server
Step 3: Initialize PostgreSQL
Initialize the database cluster:
sudo postgresql-setup --initdb
Step 4: Start and Enable PostgreSQL
Start and enable PostgreSQL to run at boot:
sudo systemctl start postgresql
sudo systemctl enable postgresql
Step 5: Secure PostgreSQL
Set a password for the PostgreSQL admin user:
sudo passwd postgres
su - postgres
psql -c “ALTER USER postgres WITH PASSWORD ‘your-password’;”
exit
Step 6: Configure PostgreSQL (Optional)
To customize PostgreSQL settings, edit the configuration file
sudo nano /var/lib/pgsql/data/postgresql.conf
Step 7: Create a Database and User
Create a new PostgreSQL user and database:
sudo -u postgres psql
CREATE USER your-username WITH PASSWORD ‘password’;
CREATE DATABASE database_name;
GRANT ALL PRIVILEGES ON DATABASE database_name TO your-username;
\q