Currently there are two main workflows for Audio Description in Stellar.
- Working with local Projects - described in this post.
- Working with Tasks - which will be explained in this tutorial.
Introduction
The Task List System allows Tasks to be assigned to one or more users and distributed anywhere in the world.
- A Task contains all the media and subtitle or script files required to do a specific task.
- Any changes to the task files (edits, additions deletions etc.) are automatically synchronized to the central store.
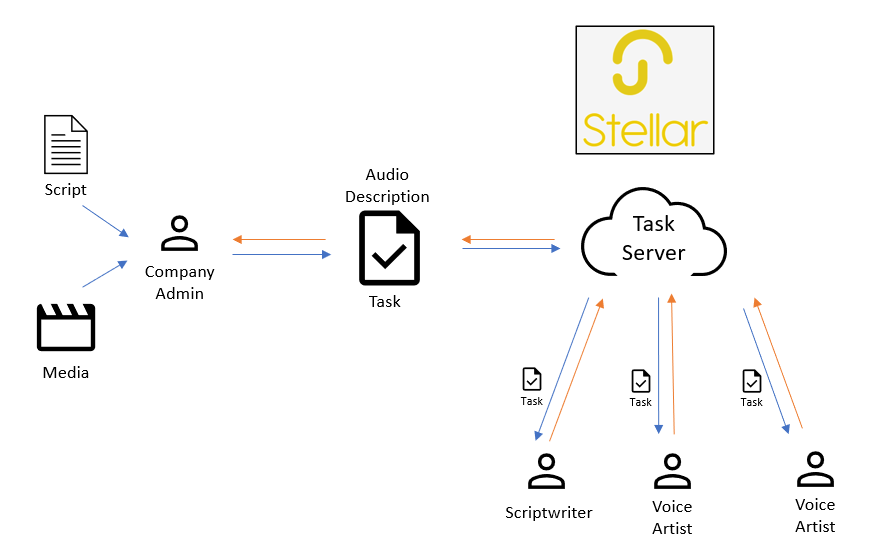
There are two aspects to the Audio Description Workflow with a Task System:
- The creation of a Audio Description Task
- Working on the Audio Description Task
Preparing the Task
Uploading Media File
- To upload a media file you must have Manager or Admin level access for the Company you want to add the media for.
- By Uploading a media file you are making it available to any other user in the same company via the Task Server.
- Uploading a media file will automatically trigger the creation of shot change, proxy video and audio files and audio waveform files.
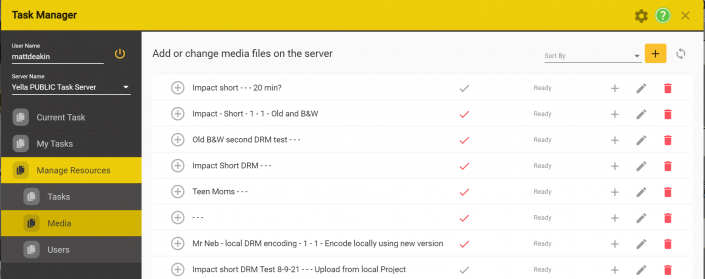
- Click on the Manage Resources – Media tab
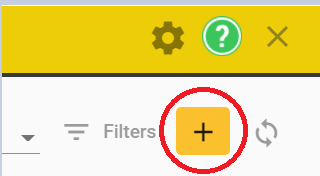
- Click on the Add new media button
- This will show the New Media controls:
- Click on the Manage Resources – Media tab

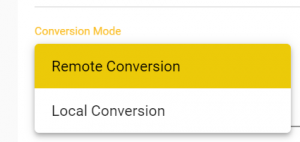
Select the Conversion Mode
-
Local Conversion
- The video file will be converted, and DRM added is selected, by your own PC or Mac.
- This may take some time.
- The video file will be converted, and DRM added is selected, by your own PC or Mac.
-
Remote Conversion
- This is an option and will only be available if configured by your company
- The Original media file that you select will be uploaded to the cloud server and converted, and DRM added if selected, there.
- This has the advantage of freeing up you PC or Mac for other work.
- This is an option and will only be available if configured by your company
-
Select the Original media File
- Use the document browse button to find the media file you want to convert and upload

- By default the currently loaded media file is selected.
- Use the document browse button to find the media file you want to convert and upload
-
Enter the Media Name – this is used for sorting and searching
-
Enter text for the description, series and episode.
- These are used for information only
-
Optionally
- Mark the media for DRM
- This will cause the media to be encrypted with Widevine DRM and will require second factor authentication by each user that downloads a Task containing this media.
- Default – Off
- Mark the media for DRM
-
Enforce Spoiler to video Playback
- This will cause the media to be watermarked when displayed in Stellar
- Default = Off
-
Display User Info in the Spoiler - Will display the current user information in the watermark.
-
Display custom text in the Spoiler - Allows you to add custom text in the watermark.
-
Notes – enter free form text instructions for this media file
Click on the Upload button.
The conversion process will start.
![]()
Once the conversion process is finished, the upload process will start.
![]()
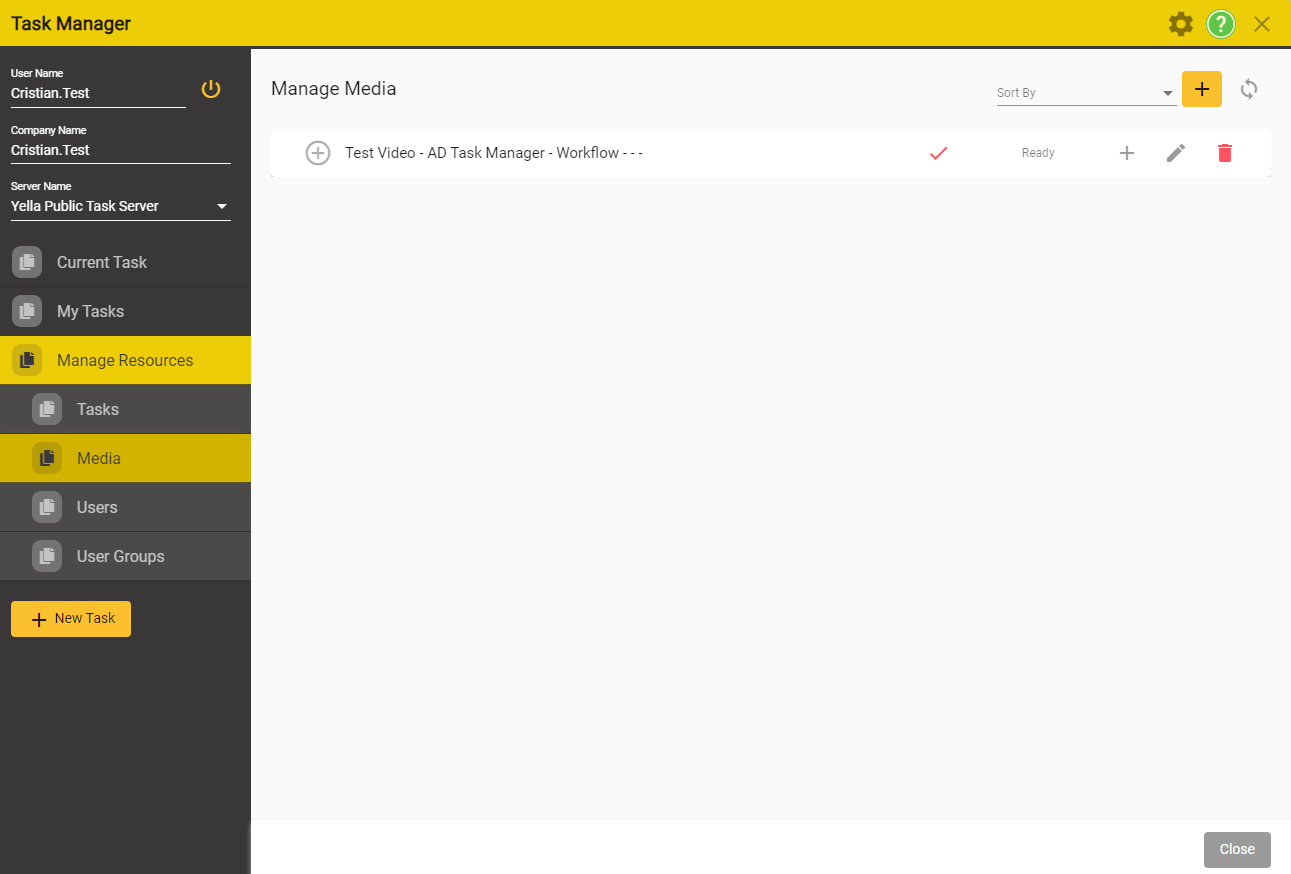
Once the upload process is finished, you will be able to see the new media entry in the Media Tab
Creating a New Task
- To create a New Task you must have Manager or Admin level access for the Company you want to create a Task for.
- If you have an Admin or Manager level of Access you will see the Manage Recourses option on the Task screen.
-
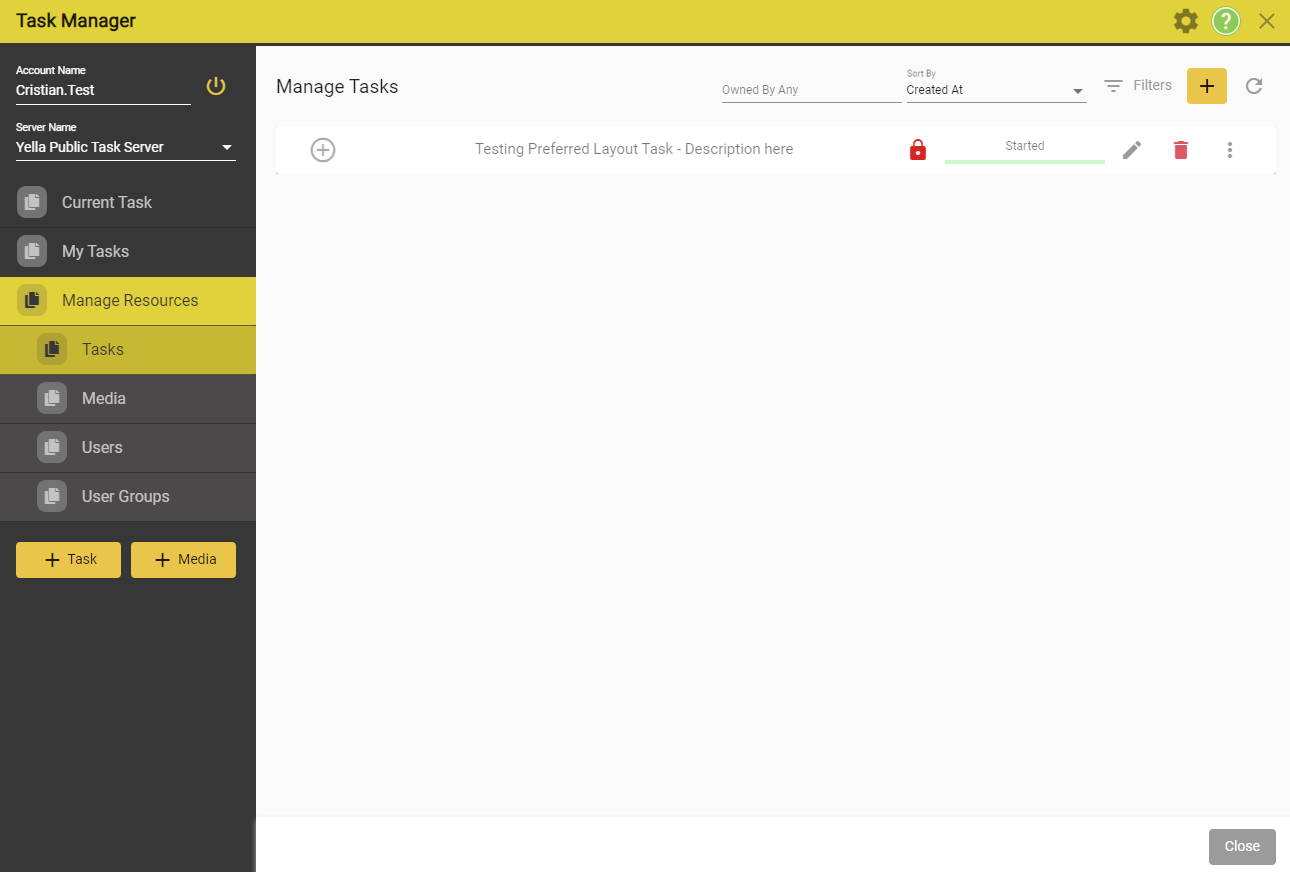
Click on Tasks
-
Select the Tasks option under Manage Resources
-
Click on the New Task button
-
From Remote Media
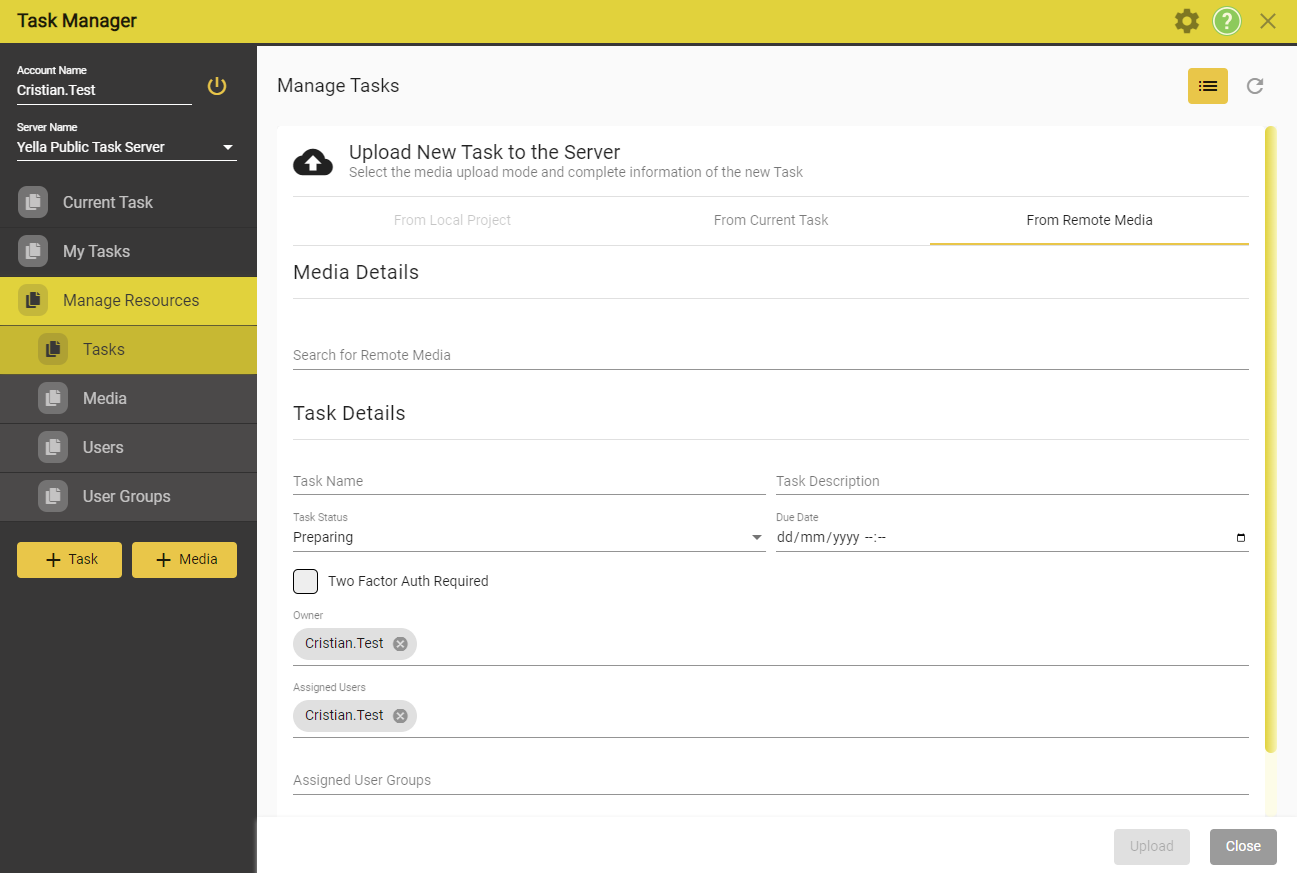
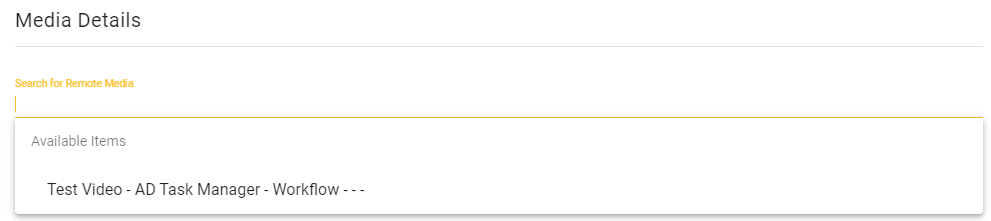
Media Details
- Click in the Search for Remote Media area and you will see a list of all available media
- Start typing to get a filtered list
- Start typing to get a filtered list
Task Details
- Task Name – Required
- Task Status – Default is Preparing
- Two Factor Authentication – If selected all users will have to authenticate by email or SMS when downloading this Task
- Assigned users – The current user is added by default – Click in the blank area to select users from all available
- Notes – enter free form text instructions for this Task
- You can’t set DRM encryption – but the media may have had DRM set when it was first uploaded.
- Click on the Upload button to create the new Task.
- Hint: To add subtitle or script files to the Task Download it and add the new files.
- Changes will be uploaded automatically.
Working on a Task
The users which have had a Task assigned to, will receive an email with information on how to start working on their task.
Dear [Username],
You have been invited by [Admin Name] from [Your Company Name] company to participate in a task:
Task Name: Name of the Task
Task Description: Description of the taskCheck out the Stellar Task Manager help page for more information:
Task ManagerSincerely,
Mr Neb
Opening a Task
Once the user has received the email confirming they have been assigned a task, they can go back in Stellar and open the Task Manager Window.
![]()
This open the following window.
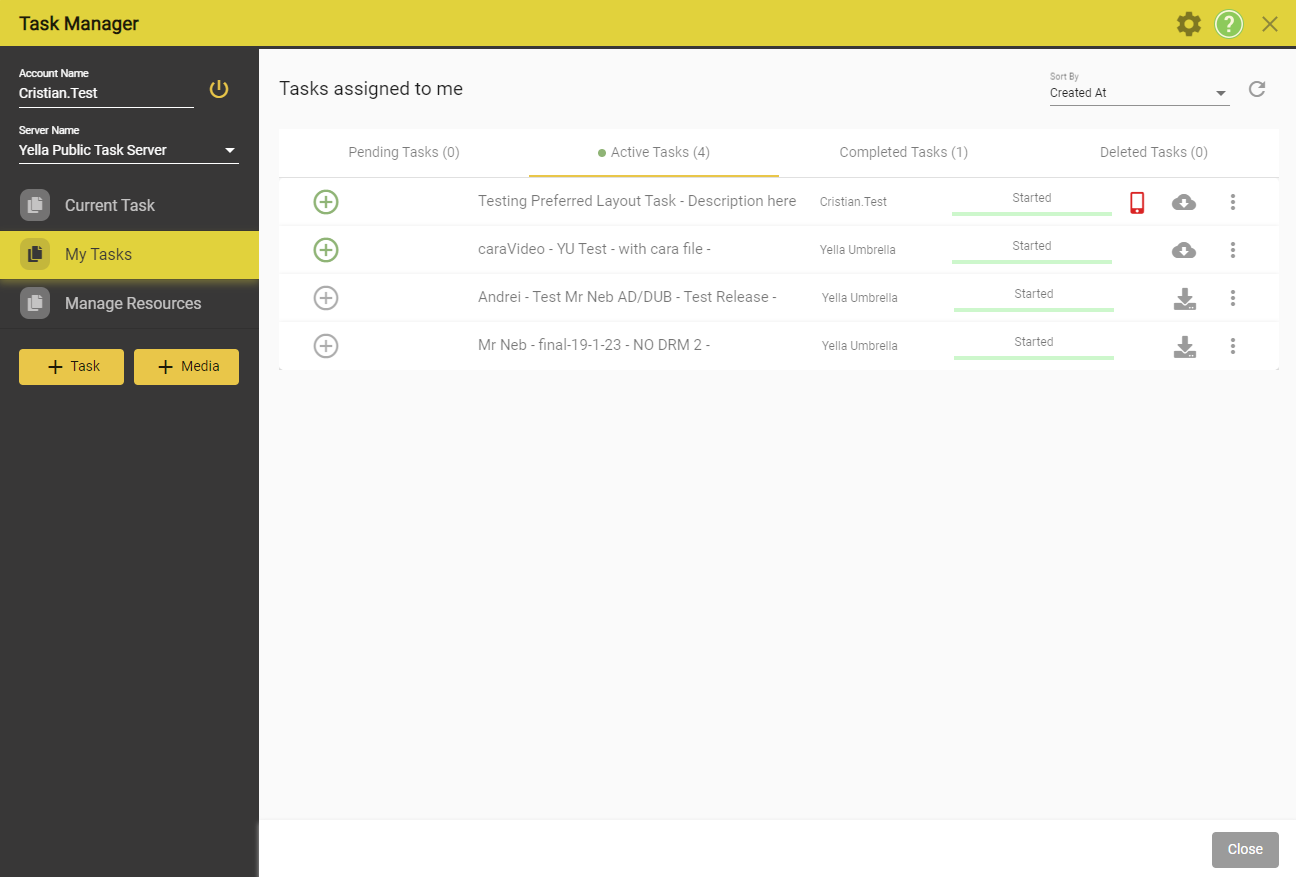
In the Active Tasks Tab, they will now see the new Task that was assigned to them. All the details of the task will have been received in the previous email.
Loading a Task
To load a task, left click on the download icon ![]() .
.
Hold Shift and then left Click on the download icon ![]() to download the task and the associated audio files.
to download the task and the associated audio files.
Layouts & User Information
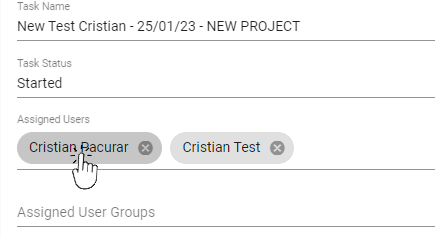
There are two types of layouts that can be set from a Company Manager account. When creating a a new task, after adding a used in the Assigned Users area, you can click them to see their information.

Click on the user that you want to see their information.
This will open the User Information window
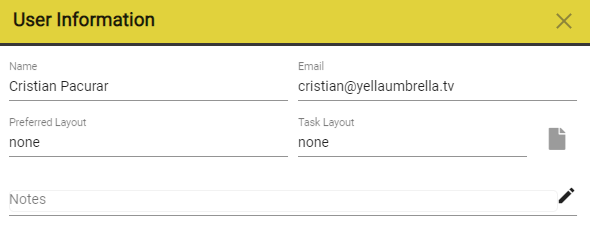
You can set the Task Layer for this user by pressing on the Browse Icon ![]() then navigate and select the layout you wish to assign.
then navigate and select the layout you wish to assign.
The system allows different Task Layouts for each of the users who have had the task assigned to.
As a Manager you can also set a preferred Layout for each user.
Task Manger → Manage Resources → Users → click on the ![]() pen corresponding to the user that you want to edit.
pen corresponding to the user that you want to edit.
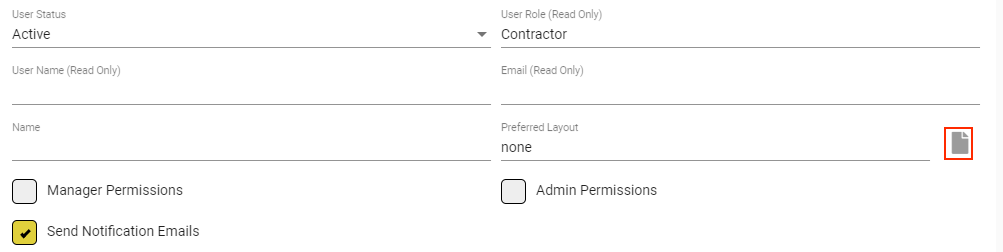
In the preferred Layout section - press on the Browse Icon ![]() then navigate and select the layout you wish to assign.
then navigate and select the layout you wish to assign.
Task Layout will override the Preferred Layout
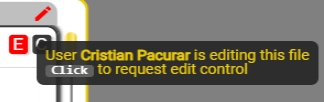
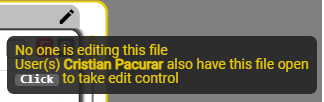
Edit Control
Multiple users can load the same task simultaneously. In order to prevent accidental edits, a user has to first take control of a text file before being able to edit. To take control of the file, press on the pen icon.
![]() - No one has control of the task.
- No one has control of the task.
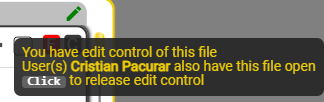
![]() - You have control of the task.
- You have control of the task.
![]() - Someone else has control of the task.
- Someone else has control of the task.
You can see who else is currently editing the task by hovering over the pen icon.
Task Synchronization
Since we are not working with local projects, but with tasks, all the progress will be automatically saved in the cloud several seconds after a modification has been done to the task files.
The Task Name will flash bright Yellow when the synchronization was successful and the sync icon will turn green.