Synthetic Voices
Stellar offers you the option to use Synthetic voices to render your Audio Description or Dubbing scripts.
This plugin has a prerequisite that has to be present in your Stellar project for it to work - Audio Recorder Widget.
Add the widget to your project.
Open the Widget Settings window, scroll down, select the Synthetic Voices plugin from the list and the create an instance of it for your project.
![]()
You can access the Synthetic Voices settings menu from the media player controls bar.
The same menu can also be accessed by *Top Menu Bar → Tools → Audio Tools → Synthetic Voices → Settings
- Left click on the icon -
 - Will start the rendering process using the Default Voice settings. The render will cover titles that are included in the current selection.
 - Right click on the icon - - will open the Synthetic Voices Settings window
Text To Speech
The text-to-speech option allows you voice existing titles using synthetic voices.
To use TTS, make sure you have ![]() tab selected.
tab selected.
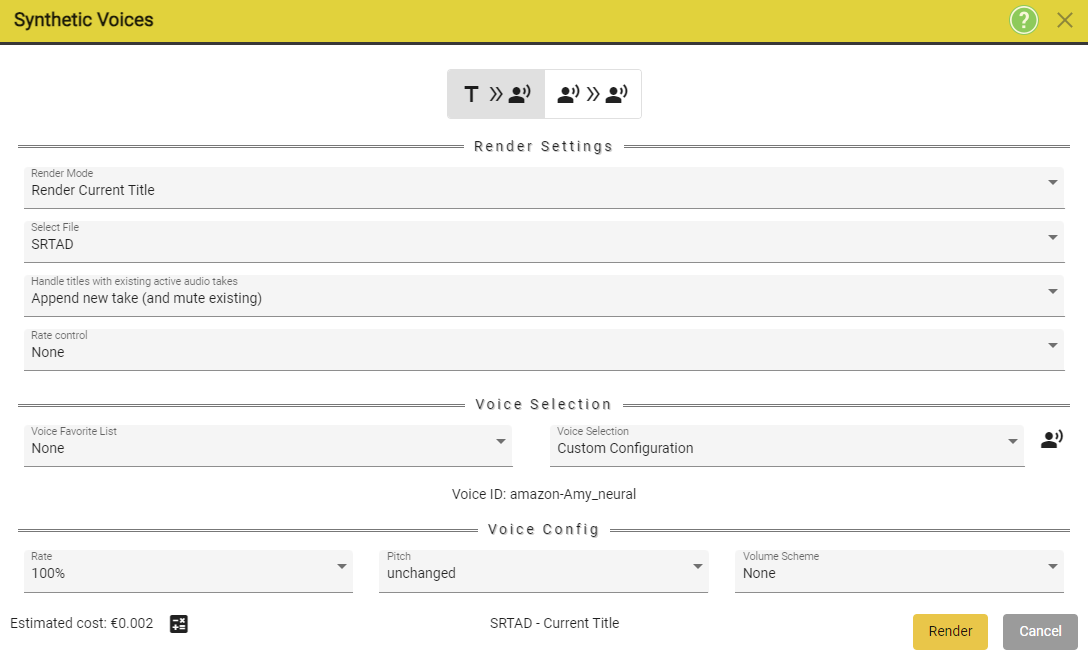
Render Settings
| Selection | Options | Details |
|---|---|---|
| Render Mode | Render Current Title | Will render only the currently selected title. |
| Render All Titles | Will render all titles from the currently selected title. | |
| — | — | — |
| Selected File | FileName | Allows you to select current file. |
| — | — | — |
| Handle titles which already have audio | Append new Take (and mute existing) | Will append new recording and mute the existing active one. |
| — | Don’t skip | Will render all titles. |
| — | Skip all audio types | Will skip all titles which already have an audio. |
| — | Skip human audio | Will skip all titles which already have human recorded audio. |
| — | Skip synthetic audio | Will skip all titles which either have STS or TTS generated audio. |
| — | Skip TTS Audio | Will skip all titles which have Text-to-Speech audio. |
| — | Skip STS Audio | Will skip all titles which have Speech-to-Speech audio. |
| — | — | — |
| Rate Control | Re-render if overlength | — |
| — | Re-render if overlength. | Will re-render the audio if the audio is longer than the title box. Might cause double cost. |
| — | Re-render to match length. | Will re-render the audio if previously generated audio did not match the length of the title box. Will almost certainly cost double. |
Voice Selection
This section allows you to select the voice:
Voice Favourite List
- allows you to select one of the existing Voice Favourite Lists available to your account. This can either be a personal list or a company list.
- if you select the None option you will be able define a custom configuration by pressing the
 icon.
icon.
Voice Selection
- if you have a Voice Favourite list selected, you will able to select one of the voices which are part of that list.
- if you have selected None, you will able to either set a custom configuration by pressing the
icon, or you can the voice which was configured for the role.
Voice Config
The entries in this section will vary depending on the selected voice and supplier. Nevertheless, all voices will have these 3 controls: Rate, Pitch and Volume Scheme. All the options that you will see in the Voice Configuration Window will also be mirrored in this Voice Config area of the Synthetic Voices Window.

Additionally, you will also see the Estimated Cost and the Name of the currently selected File and the Render Mode (Current Title, or all Titles).
Furthermore, you will also see the Estimated Cost for your selection: ![]() . You can force a recalculation by pressing on the
. You can force a recalculation by pressing on the ![]() button.
button.
Configuring a Voice
You can open the Voice Configuration Window by pressing the ![]() .
.
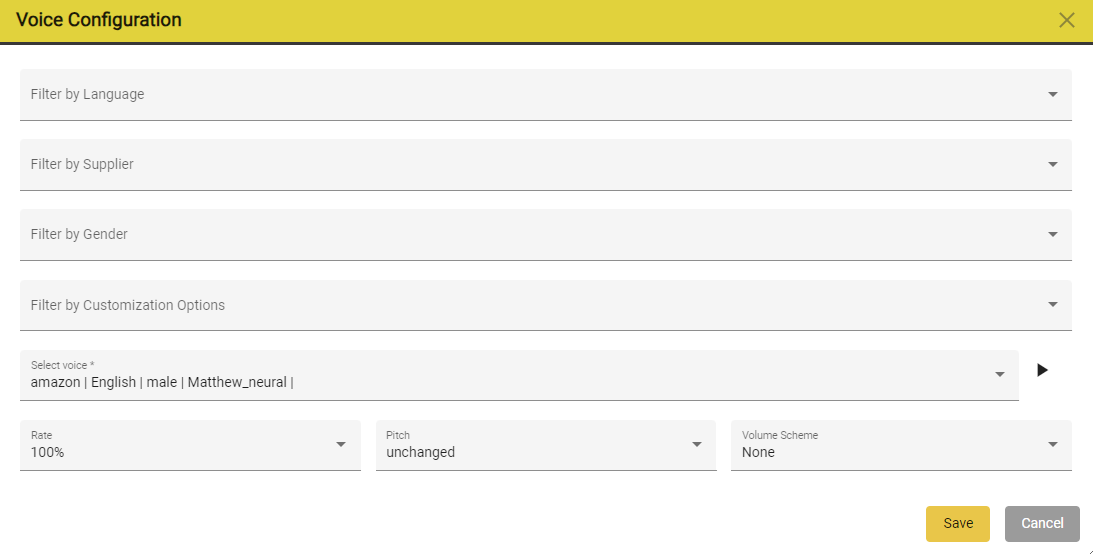
| Field | Option | Description |
|---|---|---|
| Filter by Language | Languages | Allows users to filter all available voices by languages. |
| Filter by Supplier | Supplier | Allows users to filter all available voices by suppliers. |
| Filter by Gender | Gender | Allows users to filter all available voices by gender. |
| Filter by Customization Options | Options | Allows users to filter all voices by their customization options. |
| — | Speaking Styles | Work only on certain Azure voices. |
| — | Fine Tuning | Works only on Elevenlabs voices. |
| Select voice | Voices | Allows the user to select a voice from the available ones. Is influenced by the filters which were already set. To show the entire list, do not apply any filters |
Speech To Speech
The speech-to-speech option allows you re-voice existing recorded lines using ReSpeecher’s speech-to-speech conversion.
To use STS, make sure you have ![]() tab selected.
tab selected.
Speech to speech only works if the title that you have selected already has audio associated with it.
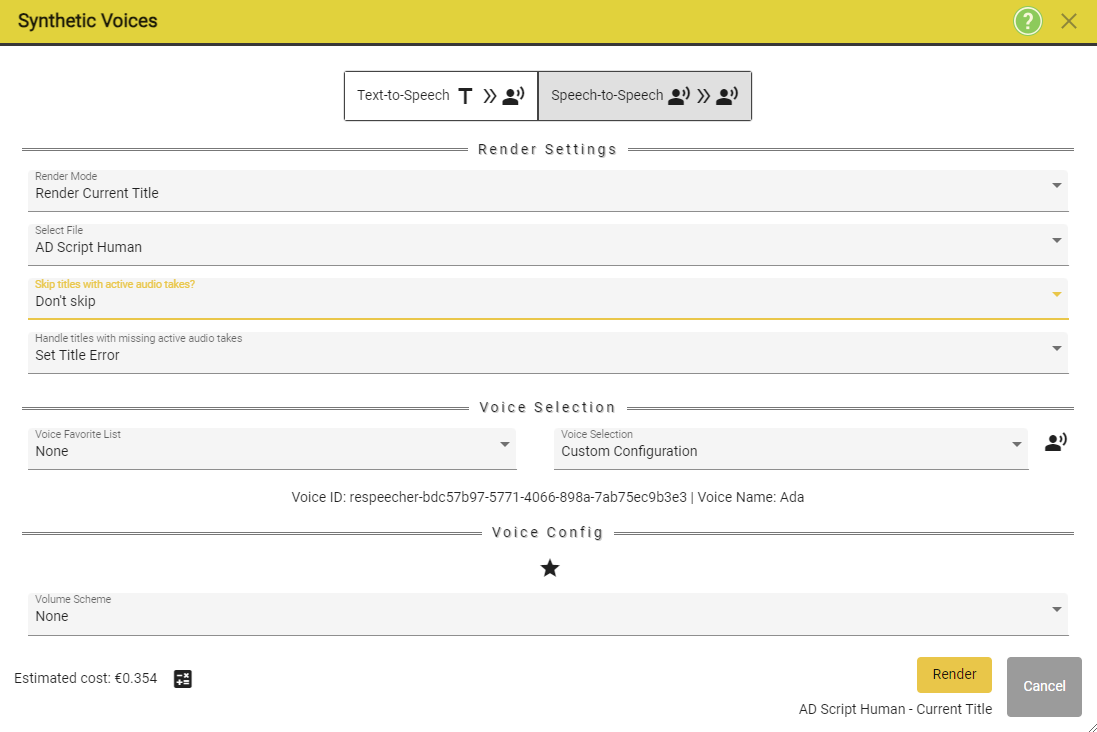
Render Settings
| Selection | Options | Details |
|---|---|---|
| Render Mode | Render Current Title | Will render only the currently selected title. |
| Render All Titles | Will render all titles from the currently selected title. | |
| — | — | — |
| Selected File | FileName | Allows you to select current file. |
| — | — | — |
| Handle titles which already have audio | Append new Take (and mute existing) | Will append new recording and mute the existing active one. |
| — | Don’t skip | Will render all titles. |
| — | Skip all audio types | Will skip all titles which already have an audio. |
| — | Skip human audio | Will skip all titles which already have human recorded audio. |
| — | Skip synthetic audio | Will skip all titles which either have STS or TTS generated audio. |
| — | Skip TTS Audio | Will skip all titles which have Text-to-Speech audio. |
| — | Skip STS Audio | Will skip all titles which have Speech-to-Speech audio. |
| — | — | — |
| Handle Titles with Missing Active Audio Takes | — | — |
| — | Ignore (skip processing) | Ignores missing audio and skips processing. |
| — | Set Title Error | Will create a red box and flag it as an error |
Voice Config
Speech-to-Speech voices have only one configuration Volume Scheme.
All the options that you will see in the Voice Configuration Window will also be mirrored in this Voice Config area of the Synthetic Voices Window.
Voice Favorite List

A voice favorite list contains a list of Voice Configurations. There are two types of Voice Favorite lists:
- Local - The list is stored locally for the current user.
- Company - The list is stored in the cloud and is available to every user from a company.
Voice Configuration
Voice Configuration allows the user to select an existing voice configuration which has been pre-created and is part of the Voice Favorite List.

Creating a Voice Configuration
A voice configuration contains a list of variables which are set to certain values in order to obtain a custom voice. To create a configuration, please click on the ![]() to open the Customization window.
to open the Customization window.
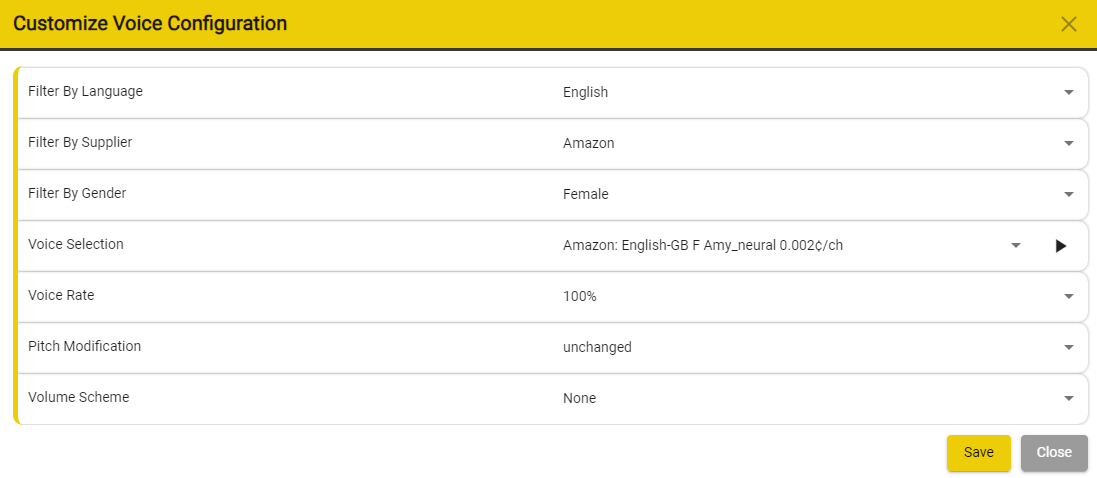
Filter by Language: Availability based on the select provider.
Filter by Supplier: Amazon / Acapela / Azure / Cereproc / Google
Filter by Gender: Any / Female / Male
Voice Selection: Selecting a voice from the list generated based on the previously set filters. By pressing the Play button you can listen to the selected voice.
Voice Rate: Controls the rate of speech of the voice.
Pitch Modification: Allows increasing or decreasing the pitch for the voice.
Volume Scheme: Allows increasing or decreasing the volume for the voice.
Once you have configured your voice, please press Save.
Currently, in the Voice Configuration entry, you will see Custom Configuration. To save this Configuration into a Voice Favorite List - please press on the ![]() icon.
icon.

Select the Voice Favorite List using the drop-down list OR Create a New Favorite List by pressing the “+” button.
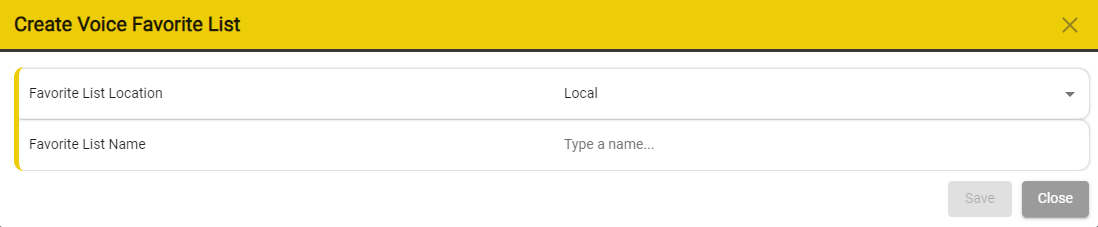
Choose Local if you want to create a local Voice Favorite list, or company if you want to have this list made available for your entire company. Name the favorite list and then press Save.
Select the Favorite List to which you want to save the Custom Voice Configuration.
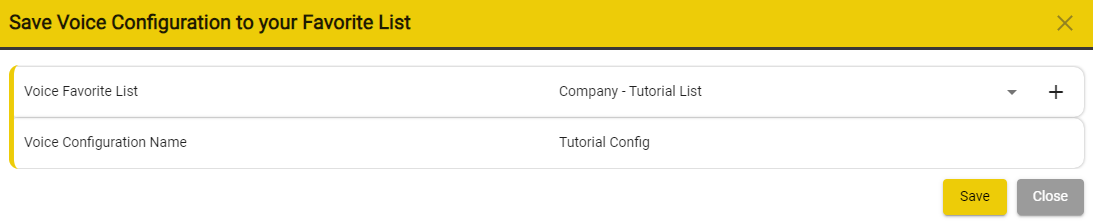
Name the Voice Configuration - then press Save.
You will see all the details of the selected Voice Configuration in the entry bellow.

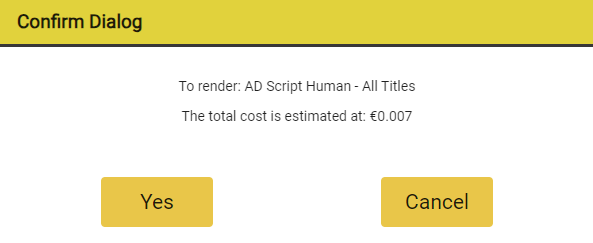
Rendering
After pressing the Render button, you will be prompted by a Confirmation Dialogue which will provide information about what fill will be rendered and how much the render will cost. You can chose to continue or abort the process.
While the files are rendering you will be prompted to wait. You can abort the process by pressing the Abort button.
Please do not close the window or close Stellar while the voices are processing.
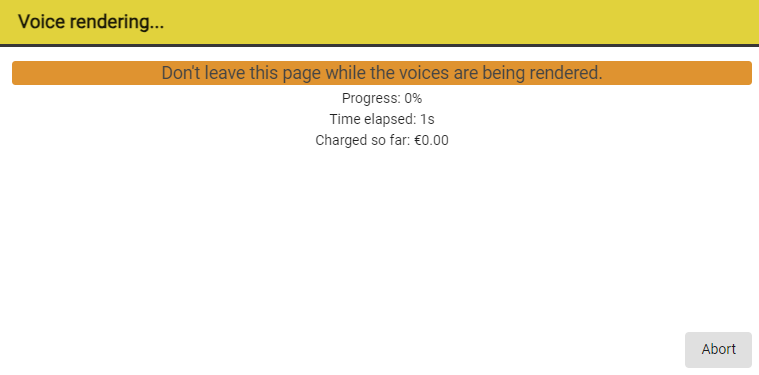
When the process has finished, the Voice Rendering window will disappear.